Once every while, everybody has an idea that requires some development on a computer system. While the more basic ideas can be put into scripts (and scripts can be very complex!), the more elaborate ideas usually end up with a higher programming language such as C or C++.
“Hello Raspberry!” on the Pi
The first program almost everywhere is “Hello World!” – a one-liner that usually display exactly this string… it was my first program on my very first ZX81, it will be the first one on the Raspberry… yet, it needs to be written which requires a text editor being available. For the Pi, this is nano… and guess what: the command is
nano
Nano is a most basic text editor, yet it holds everything we possibly ever need when working with text files… it is just not very… well, not the easiest thing to work with for a Windows Boy.
 The program itself is rather short – as you can see, I am using PuTTY again for the SSH connection (like explained in my previous post) and there really are just a few lines of coded.
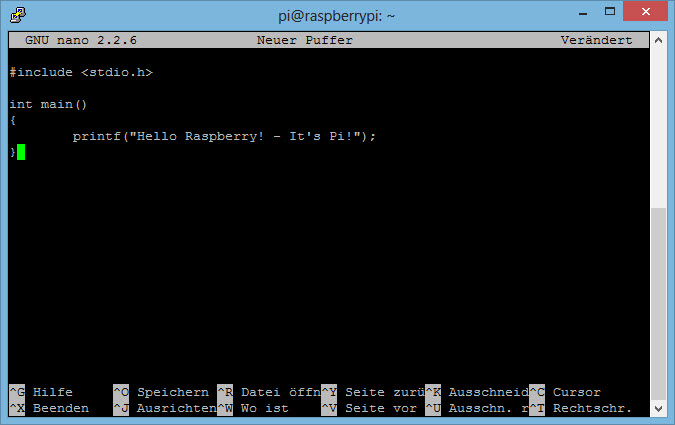 Ctrl-O will save the file and you will have to provide a file name – hello.c seems appropriate. Once saved, nano even provides syntax highlighting because it now knows the type of file – a C-File.
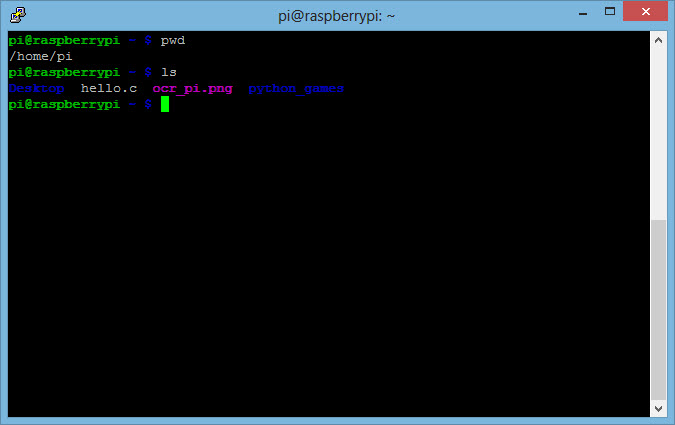
Now, the next question is: where did I save my file? So I leave nano using the Ctrl-X shortcut (which brings me back to the command line) and ask the system “Where am I?” – or, in command form – “Print Working Directory!” – the actual command is
pwd
and the response is /home/pi which is my personal home directory. And surely, my newly created file is listed there.
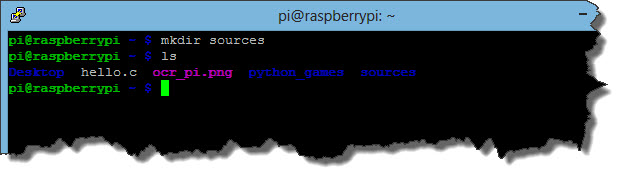
 Now the problem with that is: I don’t want every single one of my files to stack up directly in my home directory! So let’s create a sub-directory within /home/pi called sources. The command to create a directory is mkdir (short form for make directory) and it requires a name for the new directory.
mkdir sources
creates the directory, the ls command – ls for list – shows the result.
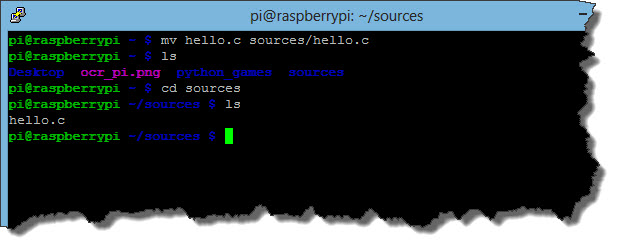
 Last thing to do is to move the hello.c file into the sources directory (or a subdirectory within, if you want further separation). The command is mv (for move) and it can also be used to just rename a file. The format is mv [options] oldname newname. In our case
mv hello.c sources/hello.c
because we want to keep the file name but place it in the sources directory. Once done, we can use the ls command to show the file is gone, then use the cd (for change directory) command to go into our sources directory and issue the ls command again.
 Compiling & Running the Program
Writing the source code is actually only the first step – C is a so called “higher programming language” and the source code needs to be translated into machine-readable code. This process is called compilation. The program that compiles the code is the Compiler.
Luckily, we don’t need to worry about a compiler being installed on the Raspberry – it is already there. The default C-Compiler is GNU C Compiler (GCC) so let’s just ask the compiler which version is installed.
gcc --version
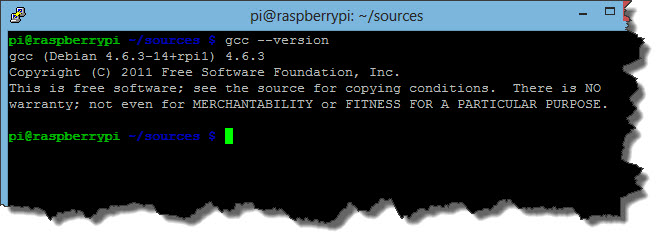 Cool – we got version 4.6.3. And at the same time, we also learn that the Raspberry Operating System is actually a Debian Linux. Next step is to compile hello.c and make it an executable program.
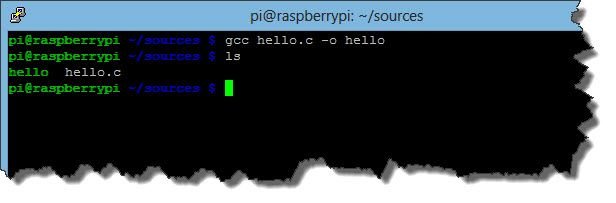
gcc hello.c -o hello
Which means “Dear Gnu C Compiler, please take the file hello.c and create an object file called hello from it!”. The result is less than spectacular… the output is… nothing. But a ls command shows the result.
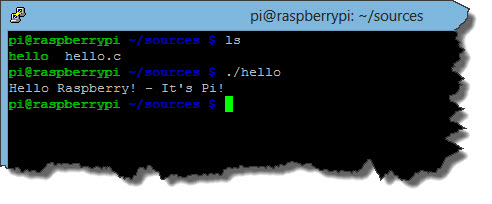
 You can now execute the new program – just call it from the command line:
./hello
and you will see the result.
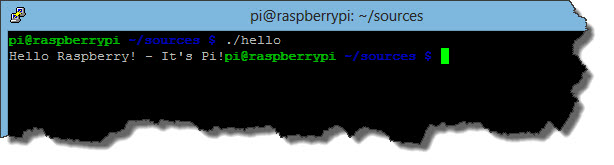 Every C-Programmer in the world should now complain I could have at least made sure it moves the cursor to a new line after the text but hey, this is the most simple interpretation 😉
Getting a more elaborate Development Environment
Let’s make a few changes to the Hello.c program but let’s make them in a more decent development environment – we want a so called IDE (stands for Integrated Development Environment) – many hard-core developers will now say that is nonsense but hey, I know you can cook your steak over fire but when you got a nice BBQ, you will use the BBQ…
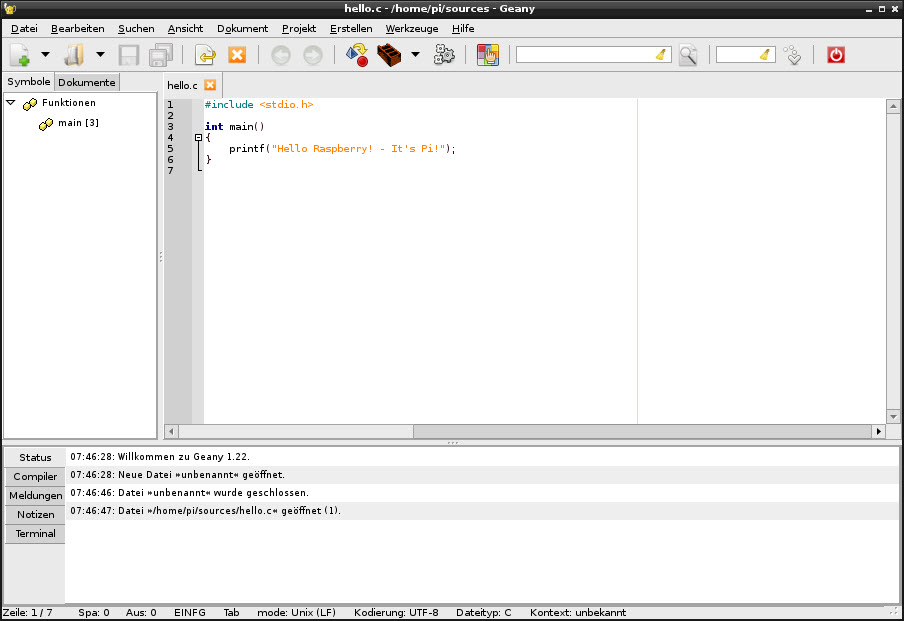
For our purpose, an IDE called Geany will do the trick – but it needs to be installed onto the Raspberry.
sudo apt-get install geany
and off you go. The installation will kick in but there will be a confirmation required. The installation will succeed but when you try to run the program from the command line, you will receive an error: the IDE is written for the XServer Desktop which in return requires us to switch from our commandline PuTTY to an RDP Connection. You will find Geany on the menu. I have already loaded our hello.c program…
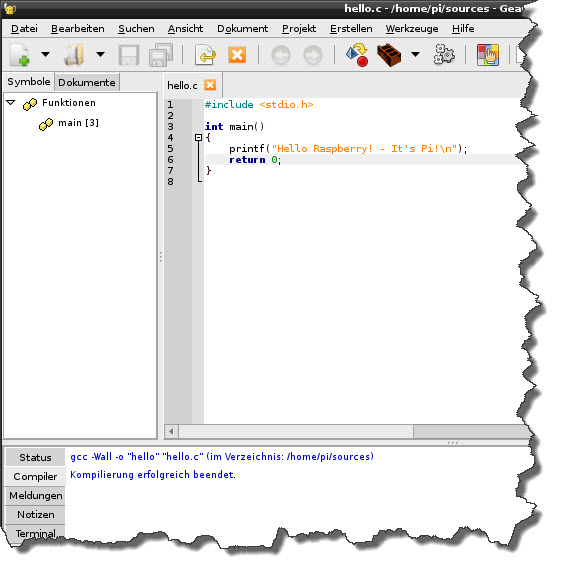
 First of all, we will make sure we get the cursor into a new line when the program is executed this time – this is simply achieved by adding a \n to the output, a control character which will add the new line. We also need the program to deliver a return code (otherwise the compiler will complain…) so another line is added: return 0;
You can now press the F9 key to start the compilation…
 We could now go back to our PuTTY session and review the sources directory using the ls command. Again, we will find the source code and the compiled file – executing it again will now make the output look different.