
Sometimes, you just need to start something new – in my case, I have been a developer for years and have then ventured into the more “project-related” activities, leaving the hardcore coding behind (except sometimes for personal projects). And one of these has now brought me back to coding and the insight that I probably should start looking into something new than the pure Microsoft Development Environments and C# – moving into the Eclipse 4/Java world.
Getting Eclipse 4
Unlike the Microsoft tools I am used to, Eclipse is much more dynamic in its development and the development of its plug-ins and tools.
First of all, I figured, getting Eclipse itself should be the first part. That seemed easy enough with an easy-to-access download location at download.eclipse.org. Which is where the fun starts: do I get the standard package (at the time I am writing this, Eclipse 4.4 is the most current version) or do I get any of the pre-packaged download (in my case the one for Eclipse RCP (Rich Client Platform) and RAP (Remote Application Platform, formerly Rich Ajax Platform).
The good thing is: we can try both and see where the differences are: Eclipse is not “installed” in the classical manner – it is simply executed on to of an existing JAVA Platform (which of course is also a pre-requisite to have).
What I did is creating a directory on my disk named Eclipse Environments under which I created two sub-directories RCP and Standard. I then downloaded both packages and placed them into their respective places.
Just to be on the save side (and this is probably not the way you want to do it) I have created a similar structure named Eclipse Workspaces to keep settings and project separeted.
When starting Eclipse 4.4 (the standard package), I am asked for the location of the Workspace (which I point to my standards workspace directory). Having done that, Eclipse will start.
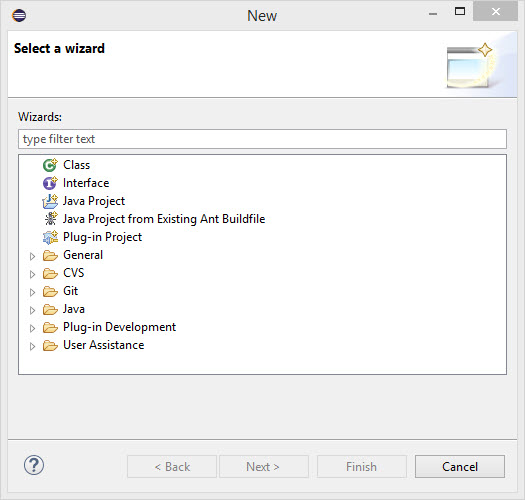
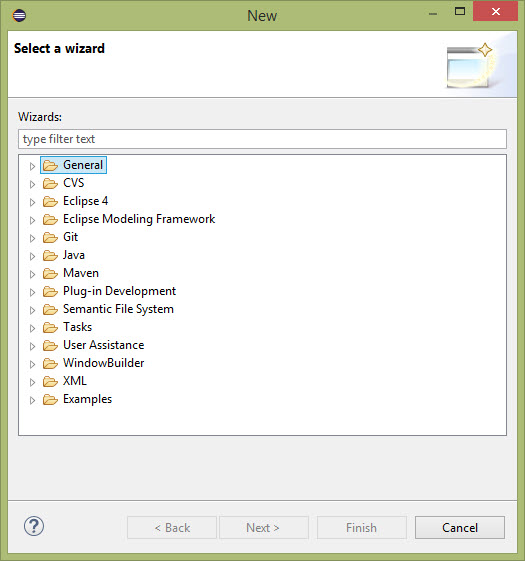
 Since this is the very first time I start Ecplise, I get the somewhat “maiden” Welcome screen which I can close and – as a first step – got to the menu File | New | Other to see what type of projects my standard installation supports.
 If I do the very same for the RCP/RAP Edition, I will see the following:
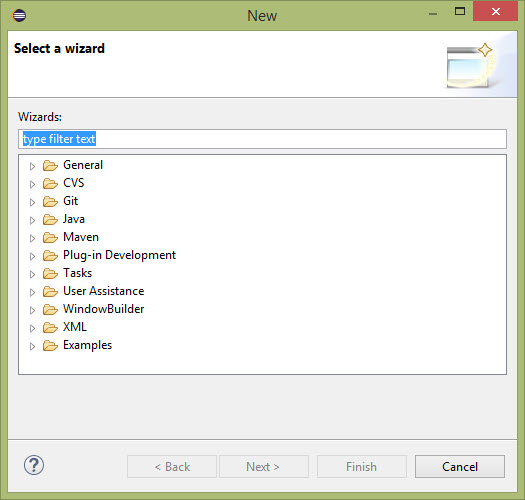 As you can see – the editions already differ in behaviour which is simply explained by the fact that the pre-packaged solutions already contain typical elements for a specific groups of users. Other pre-packaged solutions would yet provide other components.
Since I am targeting a Rich Client Interface, I will stick with the Eclipse 4.4 RCP/RAP edition for the time being.
The Eclipse E4 Project
To make a long story short: the E4 Project is an “in development” project that is aiming at simplifying and standardizing development with Eclipse – if you want the details, go to the Project Home Page.
What makes this project interesting – and from a learning perspective a bit difficult to handle – is the constant development. Almost any tutorial you encounter on Rich Client applications refers to the E4 Project as base component – however, the versions are changing quickly and so the current state of what you will get with the latest version is not what the person writing the tutorial got at the time it was written. And this will also be true for the words I am writing right now…
One thing that remains “constant” for the time being is the project home page – the version history and downloads can be found here.
Installing a particular version of the E4 Project is easy – it can be done through the Eclipse IDE:
- Start Eclipse, go to Help | Install new Software…
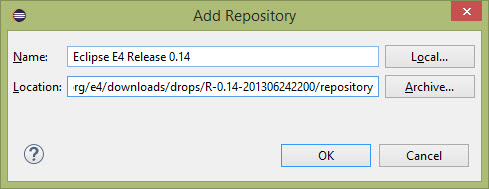
- Click the Add button next to the Work with: field
- In the input box, provide a meaningful name (e.g. Eclipse E4 Release 0.14)
- Now, go to the Download Page, click the version you want to install (in my case 0.14) and copy the URL behind the online p2 repo link text in the Comment field. (lower right corner).
- Paste the URL into the Location field back in the Eclipse IDE Input dialog.
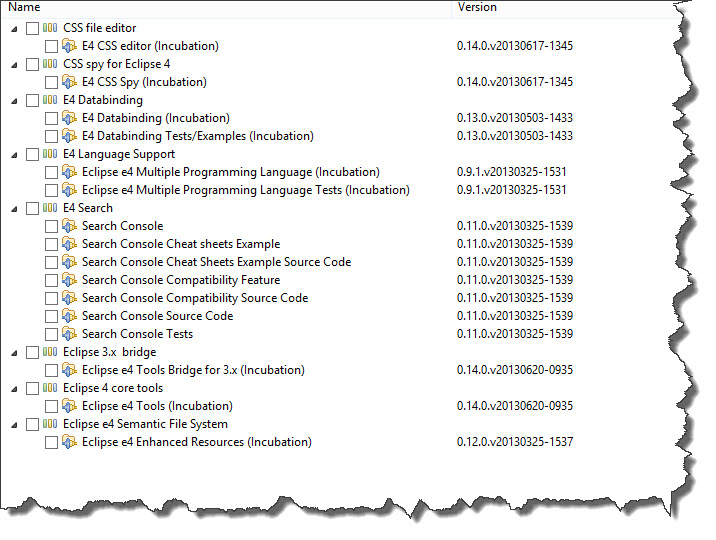
 When you click OK, the package should be downloaded and examined. This is where the fun starts – for Release 0.14, this is what I see when I expand all the sections:
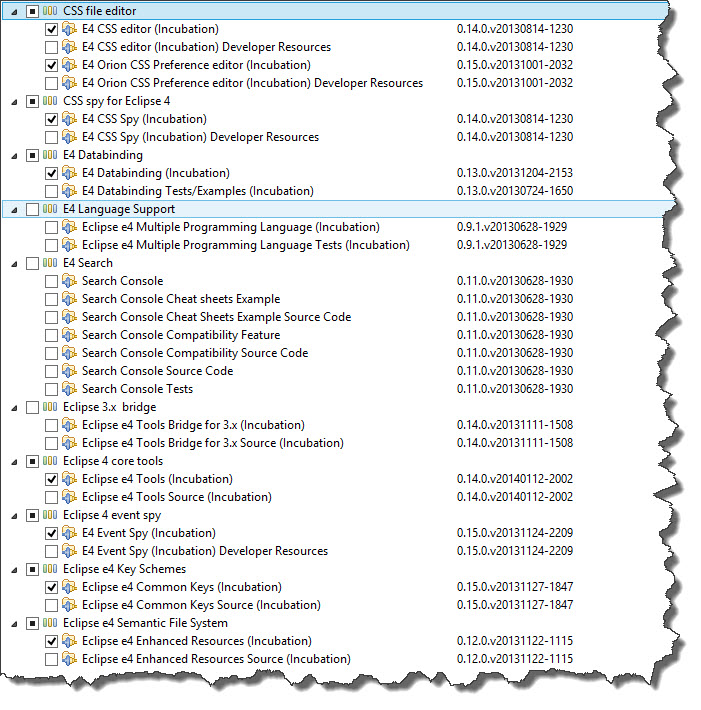
 Release 0.14 is from June 2013 – adding the most current integration release instead of version 0.14, I get this:
 As you can see – the list now does not even fit the screen. In other words: what you can install, what it is named and where it is located depends on the release you download – and many tutorials do not bother to mention the exact version…
For now, I am going to install Release 0.15 which is relatively recent (January 2014) but not an “in-development” build either. As for the individual components, I am guessing on everything that is marked Incubation but not Developer Resource.
 Completing the remaining pages of the wizard and accepting the license agreement, the installatin will start and – once finished – I will be asked to restart the Eclipse IDE which I confirm.
Going back to my previous excericise File | New | Other… provides an updated project list:
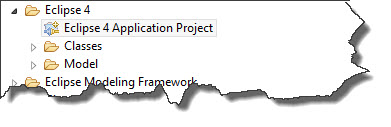
 What I am interested in is contained unter the Eclipse 4 container – a new Eclipse 4 Application Project.
 Selecting the project template and continuing brings up a New Plug-in Project wizard where I first add my very own project name.
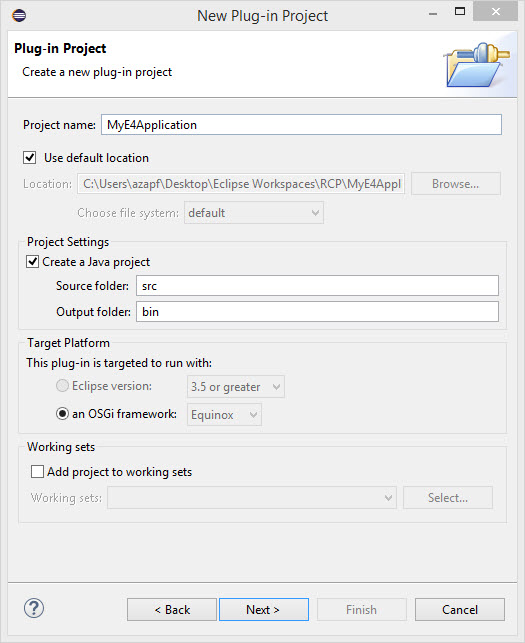 The remaining values on this page of the wizard remain unchanged – these are standard options defininf the location, associated JAVA Project paths and the target platform. Advancing to the next page of the wizard, I can maintain all pre-set values as well.
 Here, my project properties are defaulted based on my previous input and standard options are set. Without changing a value, I advance to the next page.
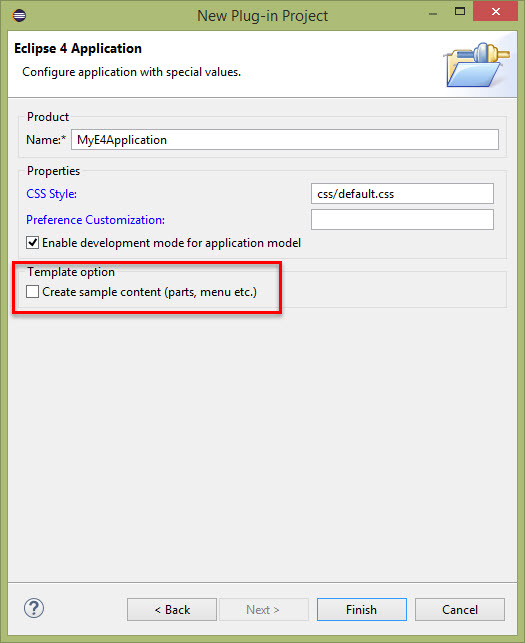 I am not going to change anything here either – but want to point out the last option which would pre-populate the to-be application with some sample content. I am not going to do that but if you are interested to see a bit more than an empty screen at the beginning…
Clicking the Finish button builds the application and opens it up in the package explorer.
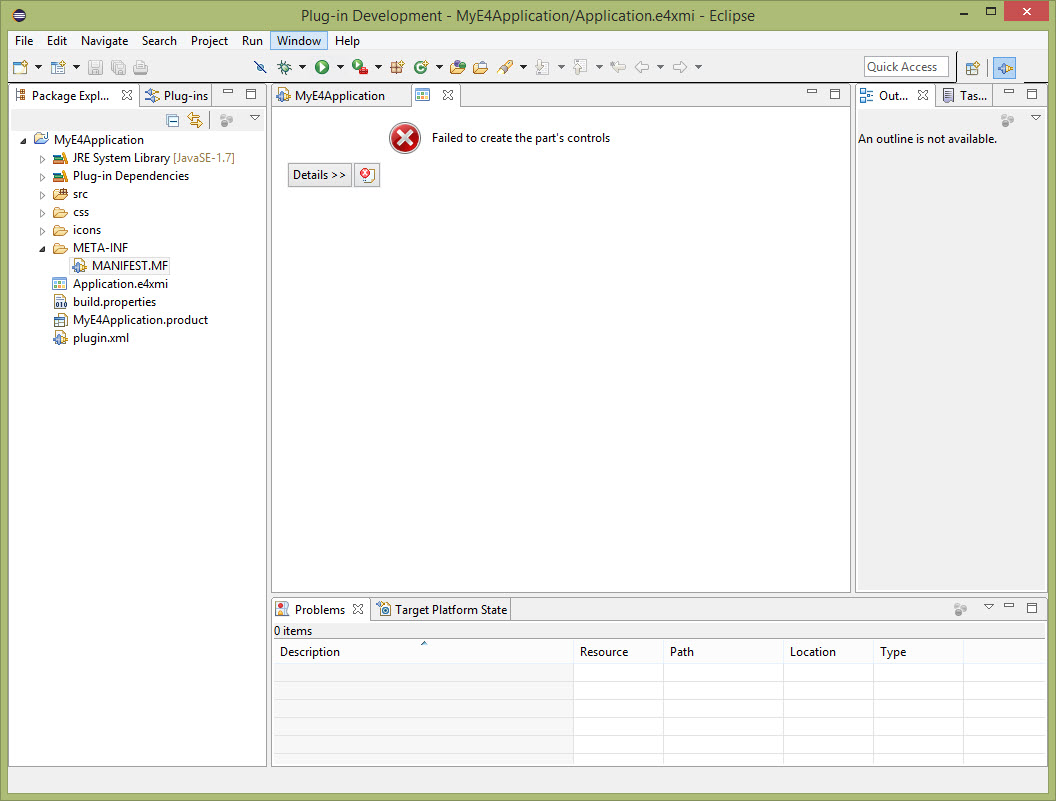 Notice the error in the center part? This is what really upsets me about these highly dynamic environments – I have not done much and I have not deviated from any defaults, yet I do get an error…
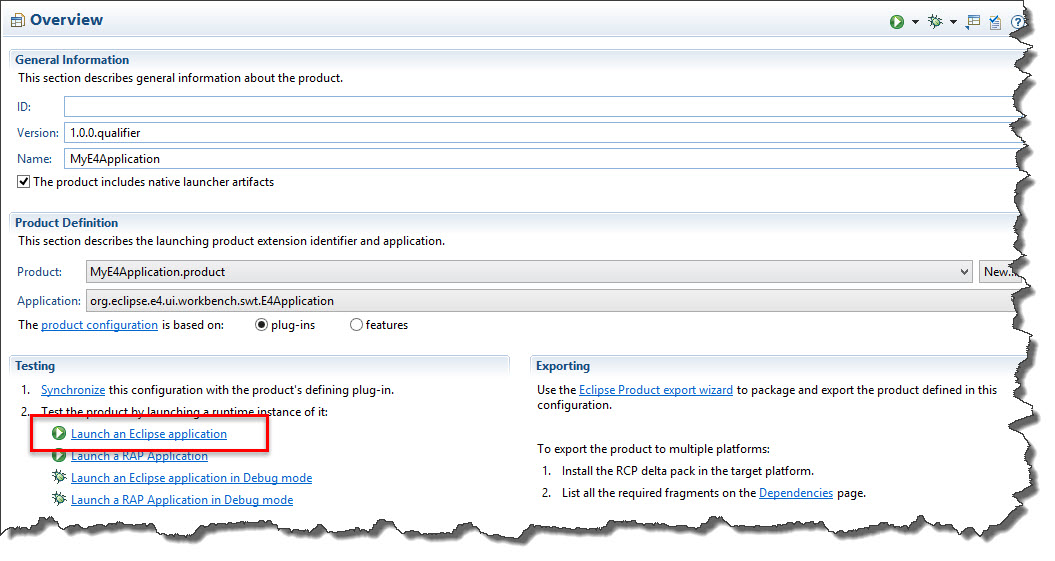
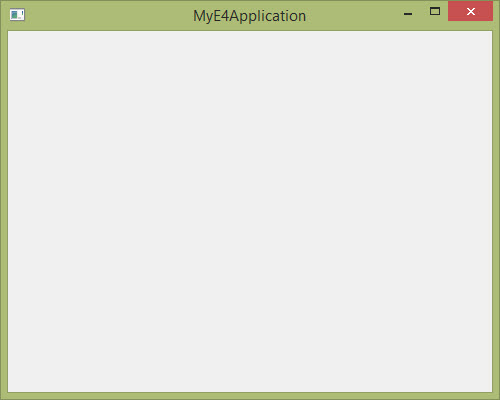
Now, not worrying about the error now, double-click the MyE4Application.product file in the Package Explorer. From the resulting Overview window, click Launch an Eclipse application.
 It may or it may not start – but if it starts, you will just see an empty application window (remember: we have not done anything yet and we have not populated the project with the sample menus and other items).
 Back to my error – as I said: I would expect this not to happen – now, instead of exploring how to add elements to my empty application, I have to find out what is wrong with my development environment. So maybe it is a bug… let’s see if there are any software updates available: menu Help | Check for updates… and sure enough, there are some fixes available:
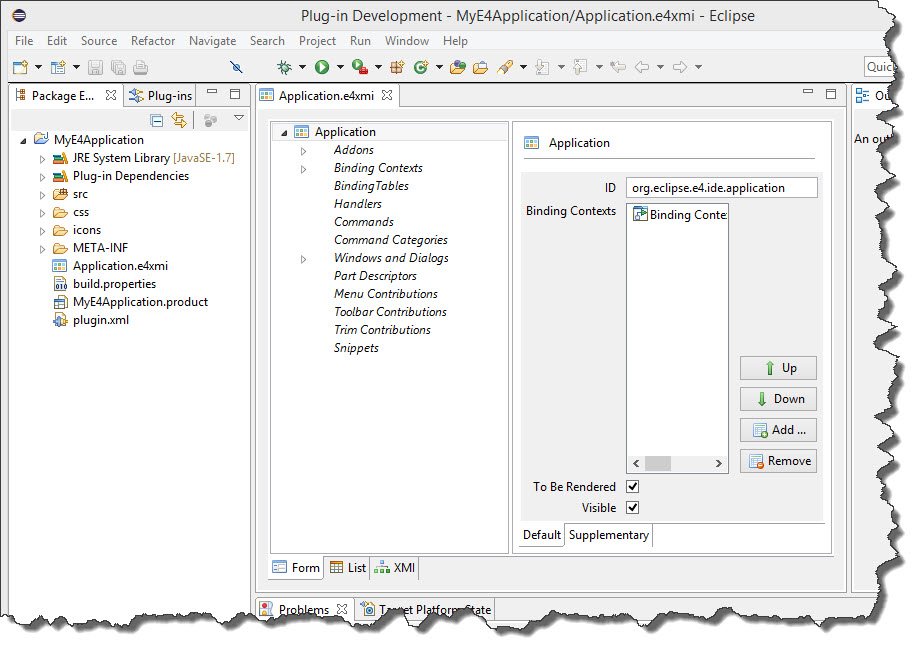
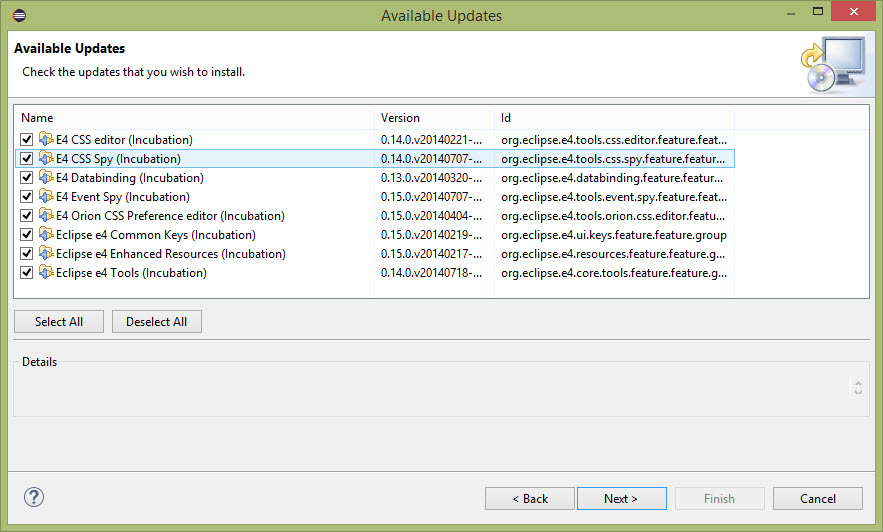 Executing these updates and restarting Eclipse afterwards solves my immediate issue – the Application Editor now opens.
 Now with the environment set up and ready to go… let’s see what I can make from it.