
OK, here is a “new” problem but I think it is one that I can overcome with my Raspberry Pi (still having the “old” version floating around, not the new model).
Here is what I am chewing on:
- I got large amounts of data (legal data, that is!) – literally terabytes which I want to share with friends but an FTP Server would block my upload capabilities almost immediately.
- I don’t want the data to be “too public” meaning that I have no issues with people getting it from me but only “an interested community”, not “the whole world” might find it useful.
- I want to make sure that I can provide my data without the need of a big computer being online constantly.
So I was thinking to myself: “What if I distribute the data using a torrent approach?”
- I would certainly need a private tracker (because I don’t want to to be dependent on a public one only) – but that is only Priority B (means: can come later).
- I would need a torrent client to seed my data continuously (at least for as long as not enough other seeders are established) and it needs to be able to support initial seeding (the the seeding that is done for an all new torrent where only one source is available).
- I would need a Raspberry Pi, connected to an external HDD as an ideal solution – I have both floating around unused somewhere on my shelf.
Choosing the right BitTorrent Client
Option A: Deluge
If you start browsing the internet on the topic a little bit, you pretty quickly come across a BitTorrent client named Deluge – its home page is here.
Deluge seems to be pretty cool and well suited because of one feature that make a huge distinction from a “regular” BitTorrent client – quoting it’s own About page:
“It has been designed using the client server model with a daemon process that handles all the bittorrent activity. The Deluge daemon is able to run on headless machines with the user-interfaces being able to connect remotely from any platform.”
What does that mean? Well – nothing less than that your Raspberry Pi (without a monitor and a keyboard attached and only connected to a storage media) will be able to run the back-end Deluge daemon process and you would be able to connect to it (and get a user interface) from your regular PC (Windows, Mac, Linux…).
Option B: qBittorrent
Another choice of BitTorrent client is qBittorrent which you can find here. Unlike Deluge, it does not offer a Client – Daemon architecture but it offers a Web User Interface which would also work.
Option C: any other BitTorrent Client and a Remote Desktop
Last but not least, you could install any other BitTorrent Client of your choice and use a Remote Desktop Connection into the Raspberry Pi to support your daily work with the Raspberry Pi.
Setting the Raspberry up (Basic Install)
But before you need to make that choice, you first of all have to grab the latest version of the Raspberry’s operating system, Raspbian (which you can get here). This is also the opportunity to test the torrent idea: the download is available as direct download (ZIP file) and as torrent. I used the torrent – at a speed of finally 12 MB/s whereas the direct download “just” gave me 1 MB/s.
Next, the image must be transferred onto an SD Card – best to use the USB Image Tool which can be found here. After the operating system has been “installed” onto the SD Card, you can now put the card into the Raspberry’s SD Card Slot, connect a network cable and plug the device in.
Configuring the Raspberry Pi without Monitor and Keyboard
You now got two choices: you either have connected a monitor (or TV) and a keyboard to the Raspberry or you use a remote session to configure the box:
- find the IP Address your Raspberry has been assigned (e.g. from your network router)
- get yourself a tool like PuTTY (which you can download here)
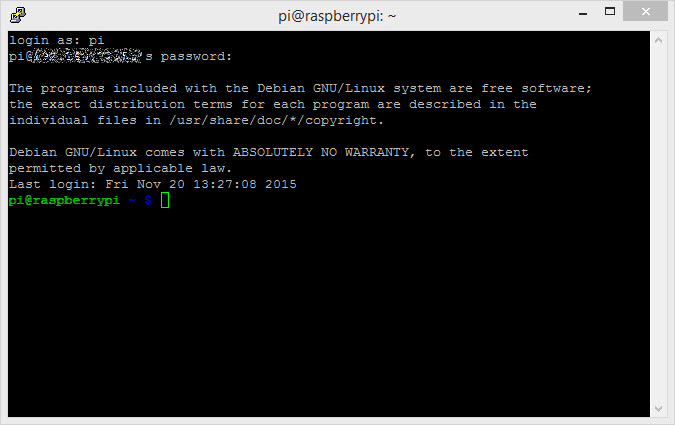
Give it a minute or two to boo up – then connect – via SSH – to the Raspberry Pi. The default login user is “pi”, the default password is “raspberry”.
Start the initial configuration of the Raspberry Pi using the following command:
sudo raspi-config

You might want to expand the file system to use the full SD Card and consider changing the password as well! Then click Finish (you can navigate with the Tab key and the Cursor keys) and reboot the device.
Making sure everything is up-to-date
Typically, as with any linux-based operating system, you want to make sure that your package information and your system is up-to-date:
sudo apt-get update
sudo apt-get upgrade
The two commands will first update your package library, then upgrade all installed software packages to the latest versions – which might take some time 🙂
Setting up a Remote Desktop Server
The Raspberry Pi comes with a Desktop Environment installed and ready to use – your only issue: you need to be able to log in from a remote computer. Because we do not need anything “fancy”, the simple implementation of the RDP Protocol should be sufficient.
sudo apt-get install xrdp
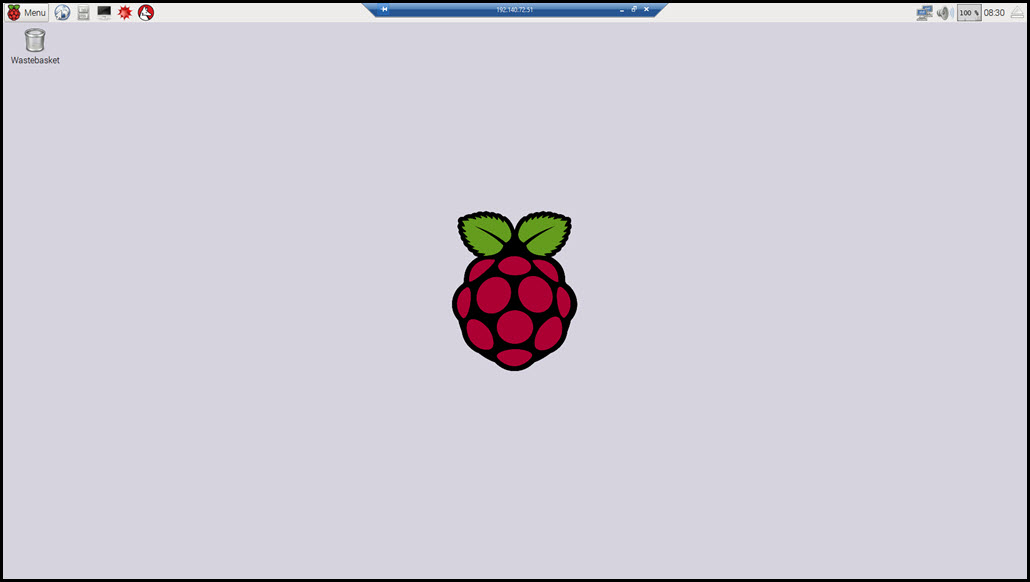
This will install the RDP Protocol Layer – you should now be able to connect using a Remote Desktop Tool, e.g. from any Windows PC. It will usually take a few moments during which your Remote Screen will just look gray – give it some time, this is what you should see:
A very important Choice
You now have a very important choice to make: the Raspberry Pi does not have any local storage media – which you will need to store your downloaded torrent data and to have the data available while seeding torrents. Which means: we need storage capacity – and probably not little!
You can either connect to any network storage location (e.g. a NAS you might have) which makes it easy to provide storage and to access the storage from other machines in your network – or – you can hook up an external HDD to the Raspberry, this separating the machine from your regular network as much as possible.
I have opted for a local HDD – primarily because my NAS is not supposed to hold redundant data just because my own library structure is different from my needs of a torrent box.
First of all, I need to verify that the Raspberry is ready to support NTFS-formatted harddisks – the following command will do that:
sudo apt-get install ntfs-3g
You might find that nothing is updated because the latest version of the support files are already installed – but better safe than sorry.
Now, plug in the external HDD (if not already done so) and examine what you got:
sudo fdisk -l
This should now – if everything has gone correctly – show you your internal storage (the SD Card) and the external one (the HDD).
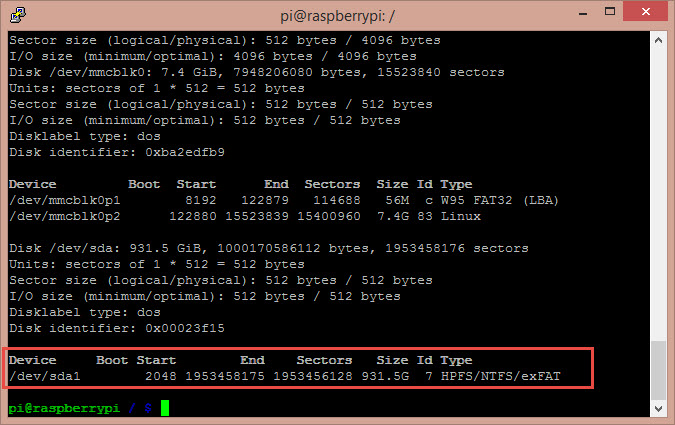
As you can see, I got roughly 1TB on my external disk available – and it is recognized as /dev/sda1.
To make the drives accessible easily, we need to mount them – for the Windows-guys: this is pretty much the same as assigning a drive letter in Windows. But sometimes, the Raspberry is faster – so let’s check if the device /dev/sda1 is already mounted:
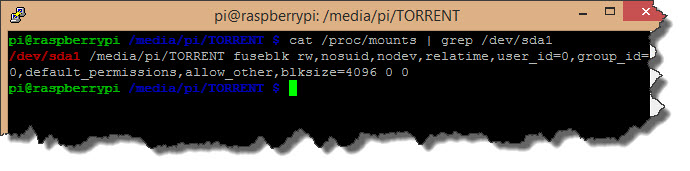
cat /proc/mounts | grep /dev/sda1
My external drive is already auto-mounted – so there is nothing else for me to do.
One thing to make sure is that this is true even if you restart your Raspberry – so you could issue the
sudo reboot now
command and repeat the step above. If so, you are all fine.
Note: I am not going to install and/or setup a samba share to remotely access the drive – the data I have to share is by far to huge to transfer it via the Raspberry’s network interface. Instead, I will power down the box occasionally to get the data of by directly attaching it to my NAS. I know this is not ideal but my workaround to save copy time.
Option A: Setting up Deluge
If you have chosen to work with Deluge, setting up the software is the next thing to do. Or more correctly: the Daemon process running on the Raspberry Pi. To install deluged (the Daemon) and deluge-console (a think console interface) type:
sudo apt-get install deluged
sudo apt-get install deluge-console
Confirm the installations, then start the Daemon process.
deluged
Switch to the ~/.config/deluge directory and wait for the auth file to be created by the process – then stop the deluge daemon process:
cd ~/.config/deluge
ls (<- repeat until auth file is present!)
sudo pkill deluged
Edit the auth file, e.g. using nano – then add a line indicating the authorization required. Format is user:password:level.
nano ~/.config/deluge/auth
To keep things simple, we use the default user (make sure to provide the correct password if you changed it) and an access level of 10 (full administrative access to the Daemon process!)

Now, start the daemon process again, then start the console application:
deluged
deluge-console
If everything works fine, you will see the console application window displayed:
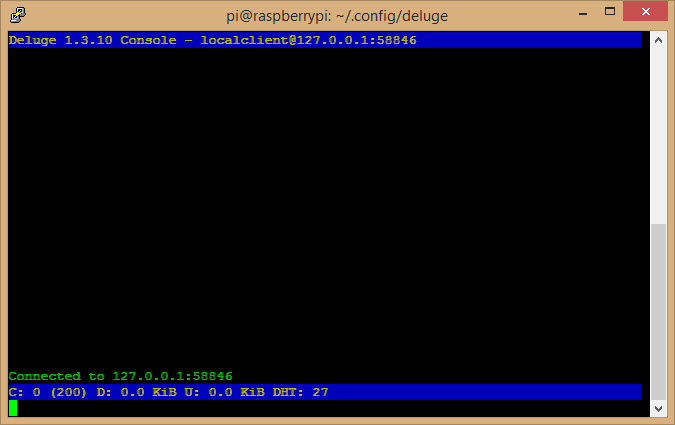
If that does not work properly, type exit in the console and re-trace your steps! Otherwise, you can now configure deluge for remote access. Enter the following console commands:
config -s allow_remote True
config allow_remote
exit
This configures the deluge for remote access and closes the console application and verifies the value:
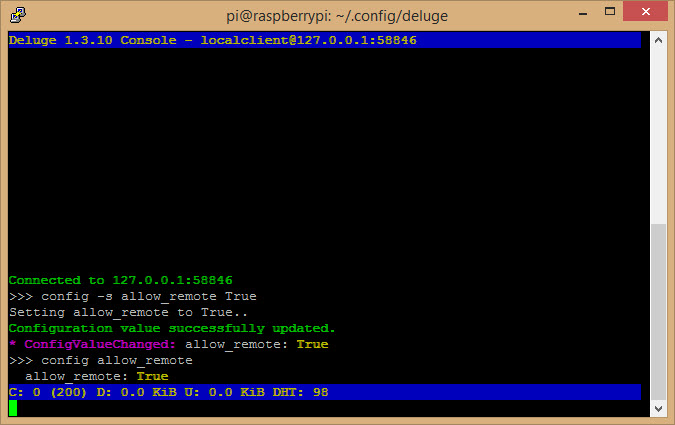
Now, you need to kill the daemon process and restart it again (there is no service restart command as much as I am aware for this one):
sudo pkill deluged
deluged
So much for that – now it is time to install the Deluge Client application (in my case the Windows version).
Installing the Deluge Client – Raspberry Pi
Although Deluge comes with a very nice Windows Desktop Client, you might want to install the Linux version of the Deluge Client on the Raspberry:
sudo apt-get install deluge
Why would you do this? Well – first of all, now you can run (and handle) Deluge with only an RDP Connection available. Secondly, some things (like creating new Torrents) may seem to be easier directly from the Box rather than a remote machine. It does not cost you anything – just to be on the safe side.
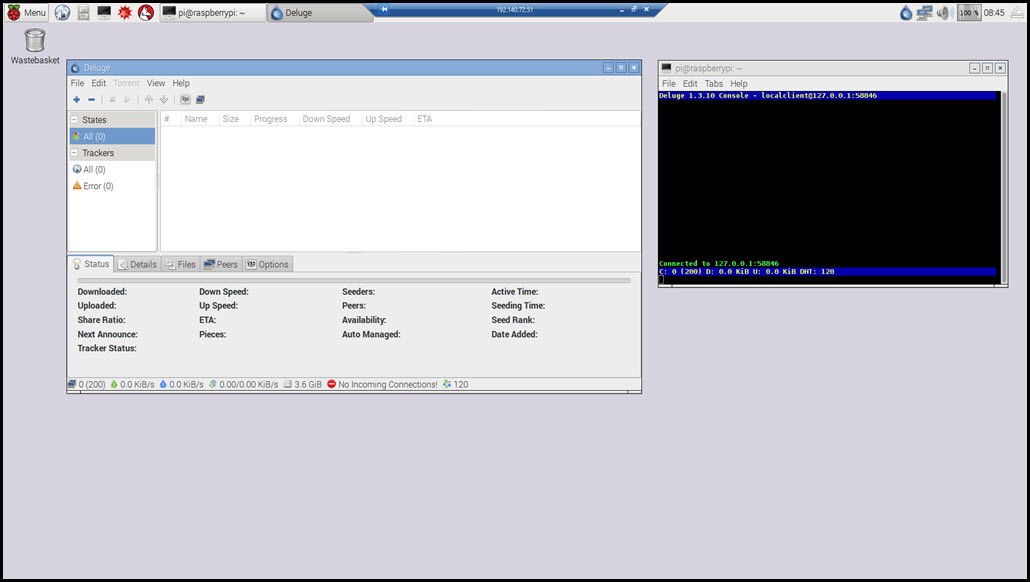
The image above shows both, Deluge Client (on the left) and the Deluge Console (on the right) running on the Raspberry, seen through the RDP Connection.
Installing the Deluge Client – Windows
With the Raspberry now running Deluge (and deluge configured for remote connections), it is time to setup the front-end, the Deluge Client. That one, you can download here (pick the correct one for your OS). Then simply install it and run it.
The first think you need to do is to set the User Interface to non-Classic mode – so go to Preferences -> Interface and tick off the box (it is checked by default):
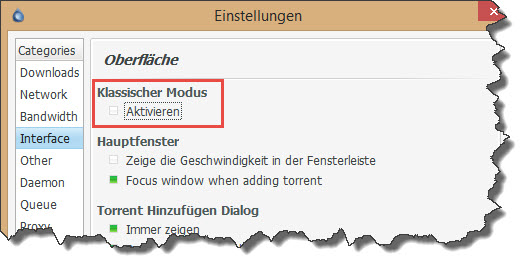
Note: Deluge is automatically recognizing the system language and adapts. Since I did not want to mess with my system, the screenshots are in German (but I will try and give you the English terms in addition)
Once you have changed the Interface Mode, you need to restart the Deluge Client. This time, you will be confronted with the Connection Manager where you will have to add a connection to your Raspberry Pi using the account you have specified when editing the auth file.

Back to the Connection Manager screen, you should now see a green light next to the new host indicating that the Raspberry PI Daemon process was successfully contacted. You can now connect to the remote host.
Before we can start adding Torrents, there are some more configurations to make. But the good news is: with the Deluge Client connected, you do not have to do these through the console on the Raspberry, you can directly configure the Daemon through the Deluge Client.
Configuring the File Locations
One thing you certainly want to make sure is that Deluge is using the external HDD on the Raspberry to store the downloaded files. Go to Edit -> Preferences -> Downloads and check the current settings:
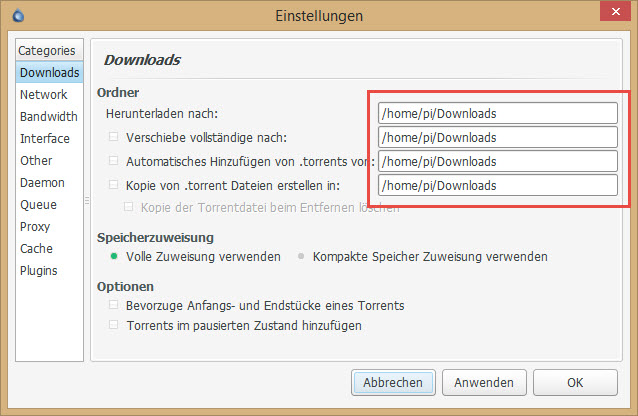
This is certainly not what you want – it would fill up the Raspberry’s SD Card in no time 😉
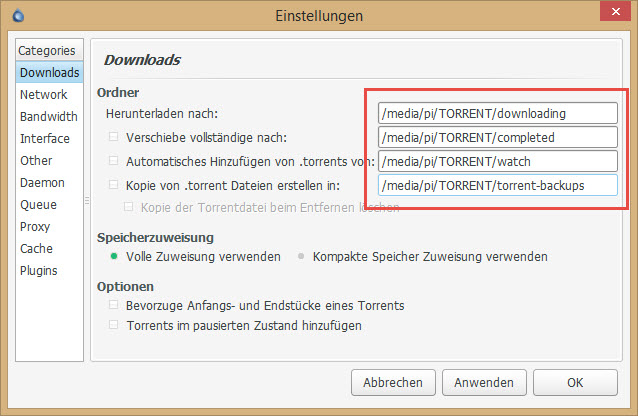
Instead, I have prepared a few directories on the external HDD:
- completed to host the completed downloads
- torrent-backups for the backups of the torrent files
- downloading for any active downloads
- watch for the torrent files to automatically add
Which means that my directory configuration should look like this:
IP Port Forwarding
Now, one last thing remains to be done – in the status bar, Deluge is currently reporting “No Incoming Connections!” which is caused by Deluge not being able to connect its required ports to the internet.
This is something you need to do on your network router which connects you to the Internet – it is usually called Port Forwarding.
In the Deluge Client, go to Edit -> Preferences -> Network. You will find the settings for Incoming Ports and Outgoing Ports – both currently set to “Use Random Ports”. But this only works if your network router supports (and has enabled!) dynamic configuration via UPnP (which for example I have switched off!
Bottom line: if you need to manually forward the ports, tick off the “Use Random Ports” check boxes and specify the desired ports. Then forward them from your Internet Router to your Raspberry. Finally click the Test Active Port button to verify all is working as intended.
Testing the Installation
Before we look into some further configuration, we want a success story to tell, right? Torrents live from contribution – the more seeders there are to a torrent, the better the community is served. Therefore, I have decided to contribute to the seeding of the Raspbian OS Image I downloaded yesterday.
I simply had to add the torrent information file I got off their website the day before today, the download started immediately and was visible in the Deluge Client.
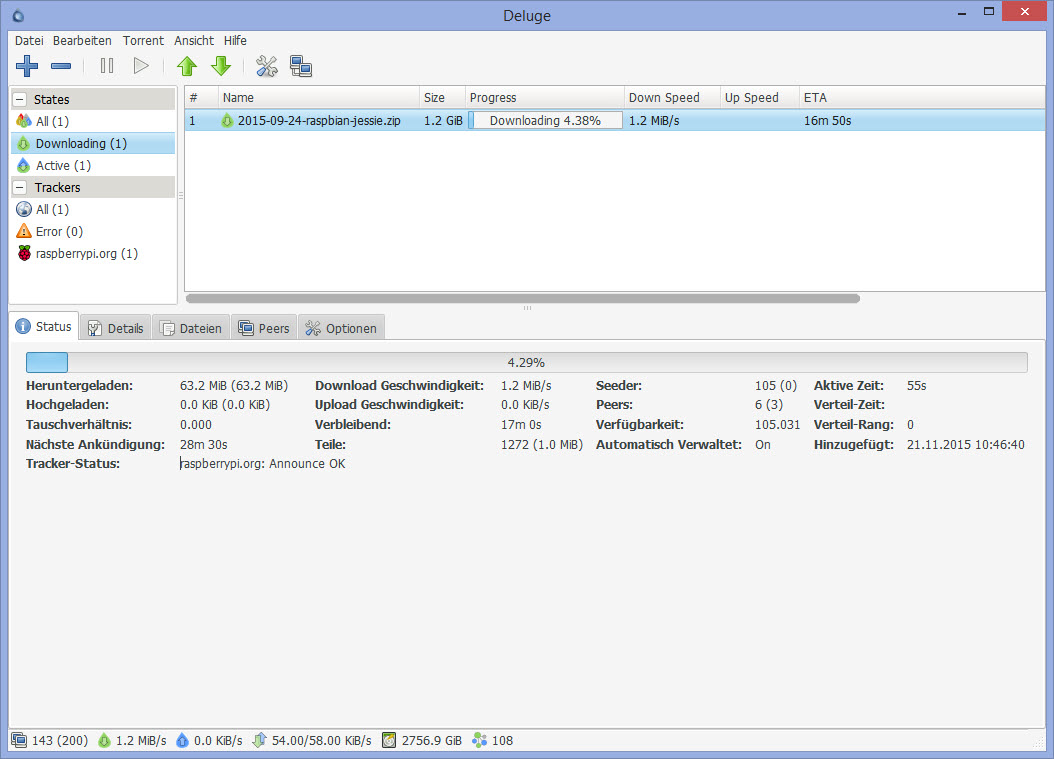
Notably, my download speed is severely below a comparison download using µTorrent from my regular PC – the Raspberry does not exceed about 1 MB/s, the PC soars up to 12 MB/s.
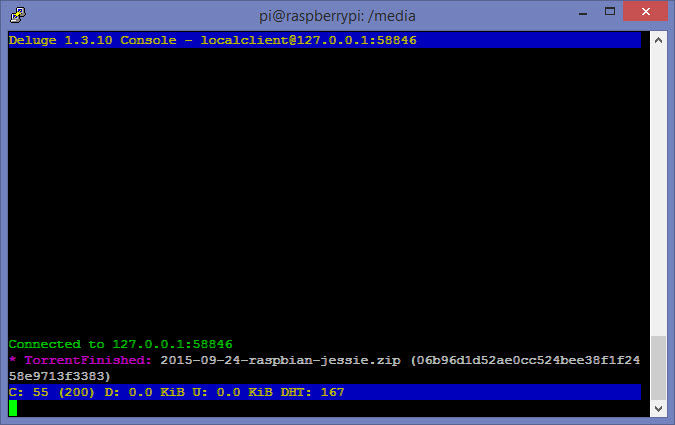
But the nice thing is: I can now close my Deluge Client on the PC – the Raspberry is still doing the download in the background via the Deluge Daemon process. And that one will also provide you with events and status updates as needed, e.g. for the end of my Raspbian Jessie download.
So much for this post – what have we done so far?
- We have installed the Raspberry Pi’s basic operating system, Raspbian.
- We have added the ability to connect to the Raspberry’s Graphical Desktop via RDP.
- We have installed the Deluge Daemon Process and configured it for remote access.
- We have installed the Deluge Console application.
- We have installed the Deluge Client, both on the Raspberry and a Windows PC, and
- we have started our first (public) Torrent, downloading the Raspbian image and then seeding it to the community.