Way back last year I wrote about having aquired a Sinclar ZX 81 home computer on eBay. Back then, I had problems hooking the old veteran up to my modern TV – and I still have. I have – again on eBay – gotten myself an old 5.5″ Black & White TV and hey, I am having a stable but grizzled image of my ZX 81 screen on that box. Too tiny to work with, too bad an image to even imagine how I could ever have spent hours and hours and hours in from it a very similar setup… but good enough to know it works and is in good shape… now, it is time to leap back in time and share a little bit about programming the old classical one with you.
…but using today’s Computer to do it
There is no way on earth that brings me back in front of the ZX 81 with it’s bad image, its notoriously lousy connectors (which usually provided for at least one “involuntary reset” every 30 minutes) and a cassette recorder to save the programs to. But if you want to experience those old days, there are actually a couple of ZX 81 emulators out on the Internet.
The one I am using is simply called 81 (or “EightyOne” if you put it in words) . You can download a copy here.
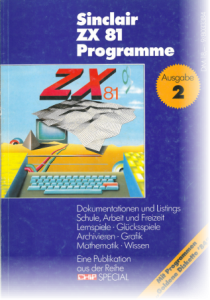 Secondly, I got my hands on an old CHIP Computer Magazine, published around 1985 or so.
Back then, computer magazines had been a popular source for new programs: because they focused around providing you with Listings of all types to feed your home computer.
I don’t think that anyone today can imagine to buy a magazine, spend hours to type the listings (BASIC or Assembler for the ZX 81) into the computer and then be happy with it. No, today, we are expecting to get all software for free from the Internet – downloading packages that exceed the available RAM on the ZX81 a million times – and much more.
The tiny program I am going to use as an example has been named Rocket-Pilot by it’s author – and I hope, this very author sees it as a tribute to him and all the other ones that wrote software in these days.
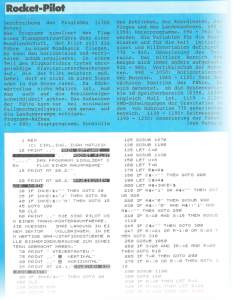 What you are seeing on the right side is the actual BASIC listing as published in the CHIP Special Magazine shown above.
You had no other choice but typing the code in – and once you had finished doing that, hoping it would save to what we referred to as the Datasette – an artificial word trying to describe that we had been using simple music cassette players to record our software.
The problem with the ZX 81 was that it did not really have a “keyboard” – at least none that we would recognize as one today. The ZX 81’s keyboard was a plain plastic sheet with contacts beneath the “keys” – so there have been no real physical keys on that system (makes it very hard to “type”).
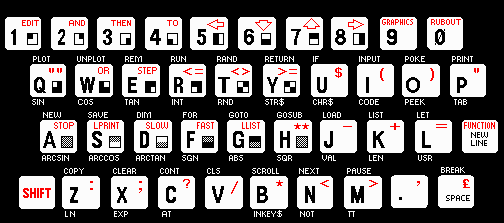 Making things even harder was the fact the BASIC commands could not simply be “typed” – each command was associated with a specific key and indicated on the keyboard above the key: for example, if you wanted the command PRINT, you had to press the P key (but only once because the computer would have interpreted this single keystroke as a command input.
The commands had actually been referred to as Keywords by the ZX 81’s manual – and the computer showed by the display of its cursor that it now expected a Keyword – it simply displayed a white K on black ground.
 This was – by the way – also the entire display when the computer was switched on – switched is actually the wrong word because there had not been a switch: you simply plugged in the power supply to make it go…
The other obstacle to overcome for a modern style programmer is the lack of any type of procedural or even object-oriented programming language! BASIC back then was flat – your program consisted of a set of line of codes which had been enumerated (usually in steps of 10) and your only means of making the computer execute different areas of the code had been GOTO and GOSUB commands. If you try writing that type of code today, being used to objects, properties, methods, delegates, etc. – you may end up wondering how the programmers of that time had been able to provide some of the great software packages of their time like Wordstar, dBase, etc.
Here is my first line of code:
 To get there, I had to press 1 to get the line number (1), then E to get the Keyword REM, then a number of spaces to move the text into the next line, then Shift-I for the opening bracket, C for the C and Shift-O for the closing bracket. The rest of the text is simple typing (you notice the cursor is not an inverted L (instead of the previous K) – the manual does not say anything about the meaning of the L – maybe it means Literal or something like this. Eventually, I should close that line with a New Line to move it up into my listing. I will “quickly” do the next line, then show you what the screen looks like.
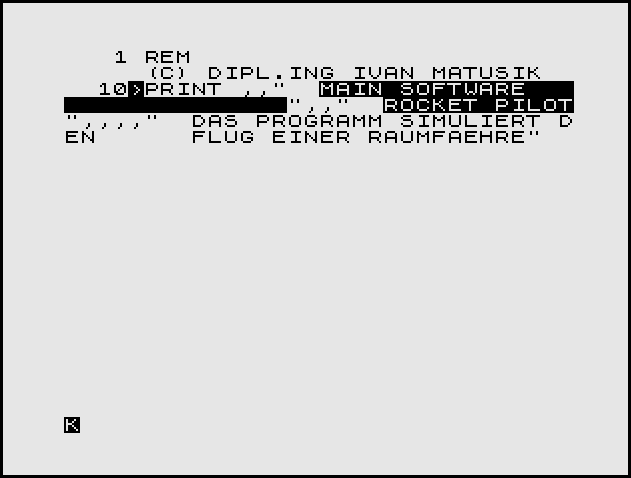 To illustrate the simplicity of the human-machine interaction, let’s look at the next line of code:
30 IF INKEY$="" THEN GOTO 30
This has taken me about 5 seconds to write in the blog – on the ZX 81 it goes like this:
- Type 30 for the line number.
- Press U for the keyword IF.
- Switch to the Function level (SHIFT – Cursor changes to inverted F), then press B for the function INKEY$.
- SHIFT-L, SHIFT-P, SHIFT-P for =””.
- SHIFT-3 for the keyword THEN which makes the machine recognize the next things needs to be a Keyword (Cursor switches to K).
- Press G for GOTO, then finish of with 30 and New Line.
Nice, hm? How much easier is the straight forward simple type-it-in approach of these days? We love the Auto-Complete function of Visual Studio 2010 but hey, the auto-complete had been there a quarter of a century ago – and it sucked!
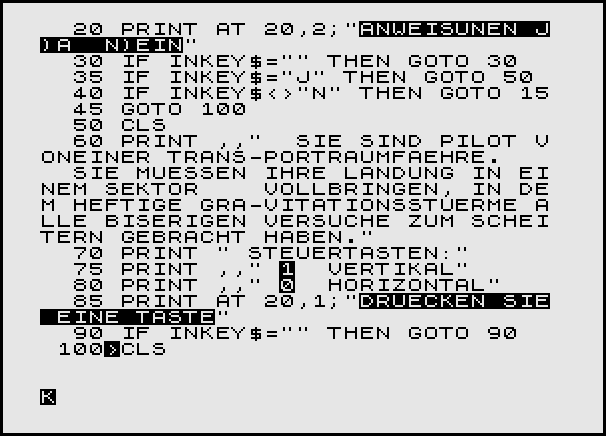 The first lines of code are now in the computer’s memory. A couple of things come to mind:
- It is absolutely tedious to cope with the approach of auto-complete of these days – typing the code takes soooo much longer…
- If you want to format the output of the PRINT commands, you need to manually count the characters and insert spaces to enforce line breaks.
- There are no lower-case letters – everything is always upper-case!
- Waiting for the user to press any key (and then evaluate it later) is a nice combination of checking INKEY$ to contain any value and GOTO the same line – see like 90.
- Lines that are committed are not freely editable like to day – there is no mouse to click somewhere into the code nor are there any cursor key to move around. If you want to edit a line, you need to enter the Keyword EDIT and the line number!
Now, that I have spent a good time writing the code, it would have been a great idea to save it – to tape! Just because the ZX 81 was knows for its involuntary resets because of the very simple power plug – no power, no code…
The Emulator makes the life a little bit easier – not much though. You need to go to the Tape Manager, then either select an existing “tape” or create a new one.
Then, on the ZX 81, you need the keyword SAVE – either SAVE “” or SAVE “<Program.bas>” will work. It is then that the recording to the cassette would start (and your program would hopefully save). Speaking of saving (and loading): here is a video of the load procedure for the few lines if code we have written so far: ZX81 loading code.
Code Maintenance
Today, we are telling the programmers to write clean code. Rules apply – like using speaking names for variables. No magic numbers! No more GOTO & GOSUB… wonder where that came from?
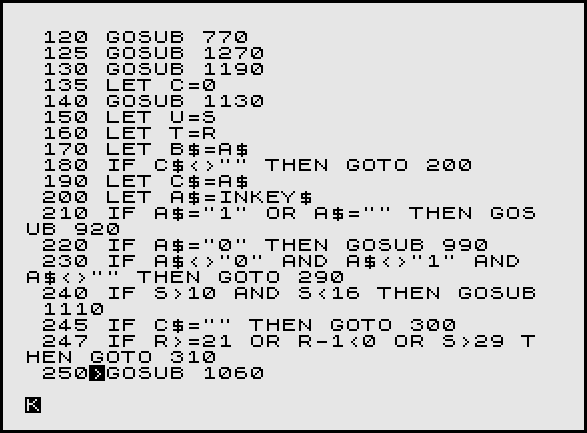 I have typed that but I would have to study it to understand what it does… however, it shows the classical dilemma of a programmer of these days: memory was sacred! And every byte we see on the screen costs one byte in the computers main memory. And the ZX81 originally only came with 1024 Bytes (1KB!) of RAM.
There simply was no room for speaking variable names, no room for in-line comments, basically: there was no room for nothing!
Cashing in…
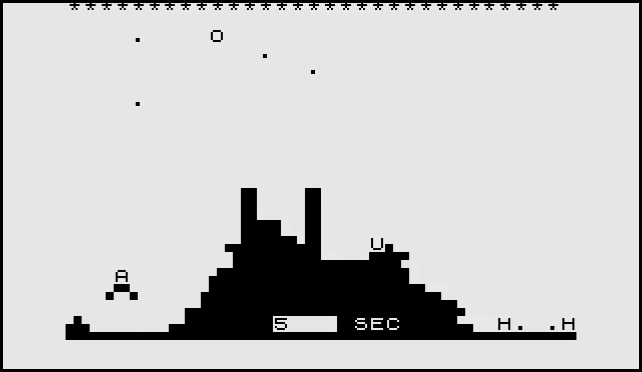
Eventually, it is time to cash in – the whole program is about 1700 Bytes (which means it only would run if you had bought the 16KB RAM Extension for the ZX 81). It is a very simple game – see for yourself. And click the Screenshot to play the video!

