Planetbase – a truly entertaining little Game

I wanted to do this post for a long, long time – computer games come and go, and I have played many since the mid 1980s. Planetbase is one of those that sticks out a bit. So let me tell you about it.

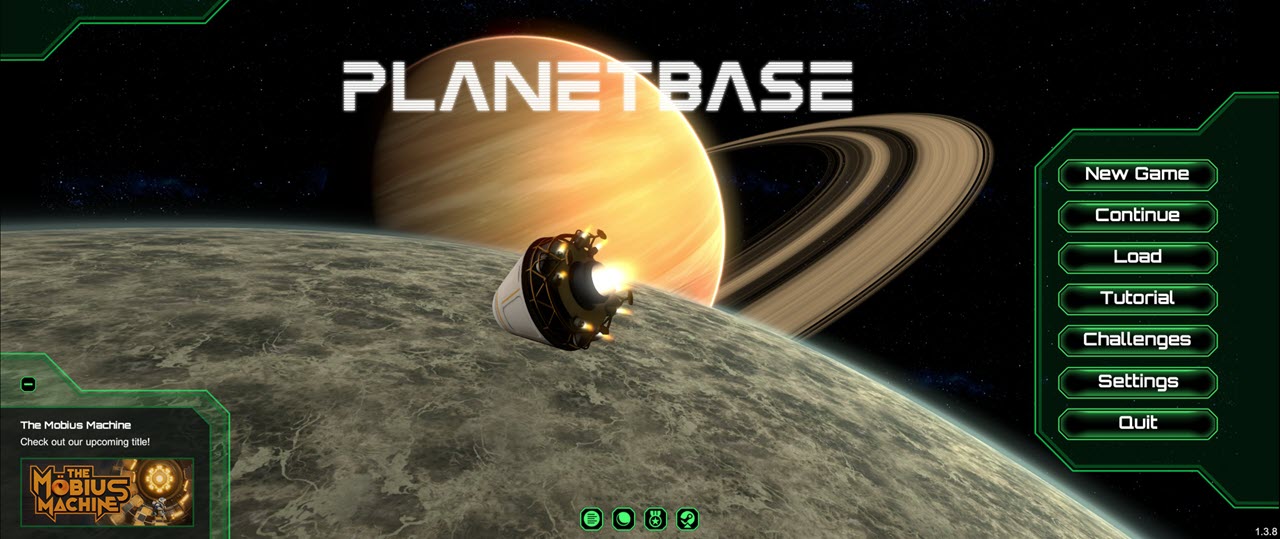
The game itself is quickly explained – your task is to build a station on a variety of planetary or lunar environments, each one with its own specialities in terms of dangers, skills needed, etc. Your task is not done with “building” the base, your team must survive and grow the base as well.

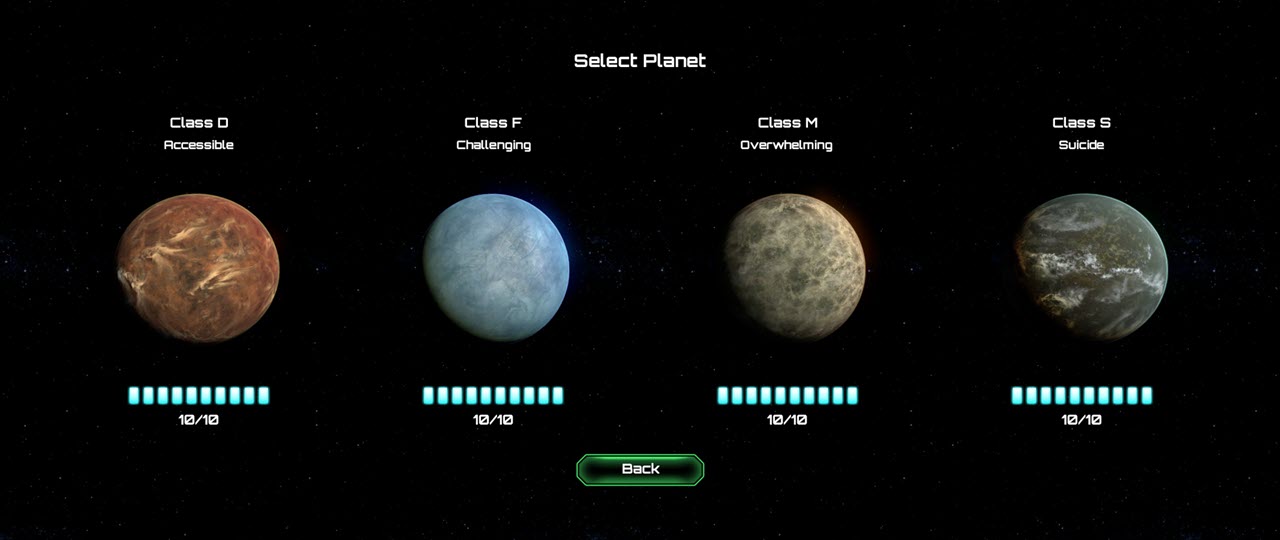
Your first selection is that of the planet (or moon) you want to build your station on. “Class D” is relatively harmless, a Martian environment with storms and asteroids but not really a big challenge. “Class F” is an ice-planet – strong winter storms, little sunlight and a dense atmosphere require a careful approach. “Class M” (which we are going to play here) is a lunar environment, bare of any atmosphere. Consequently, your only source of energy is solar power, but your problem will be asteroids and solar flares. Finally, “Class S” a moon-like environment with plenty of lakes from methane. The true difficulty here is the little sunlight for solar power, the thunderstorms with destructive lightning, and the lack of land to build on.

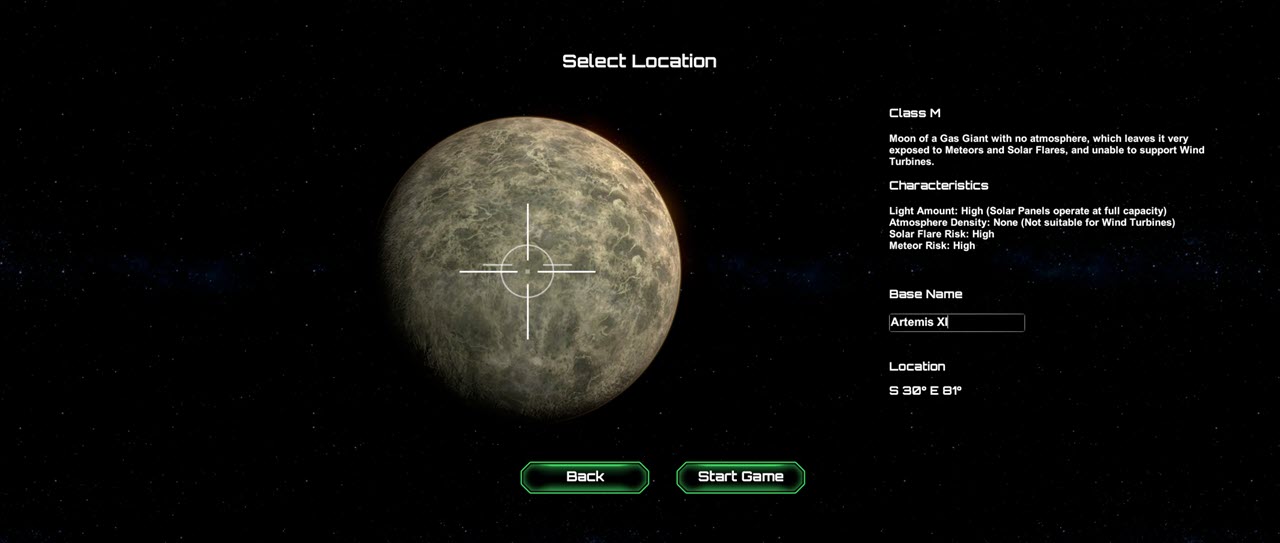
Once you have chosen your game world, it is “randomized” by selecting the North-South and East-West Coordinates. It will create a different landscape for each coordinate pair, but if you found a good space, you can dial in the parameters again for the next game. You can also give your station a name – mine is called “Artemis XI” in honour of the Artemis flights that should bring us back to moon.

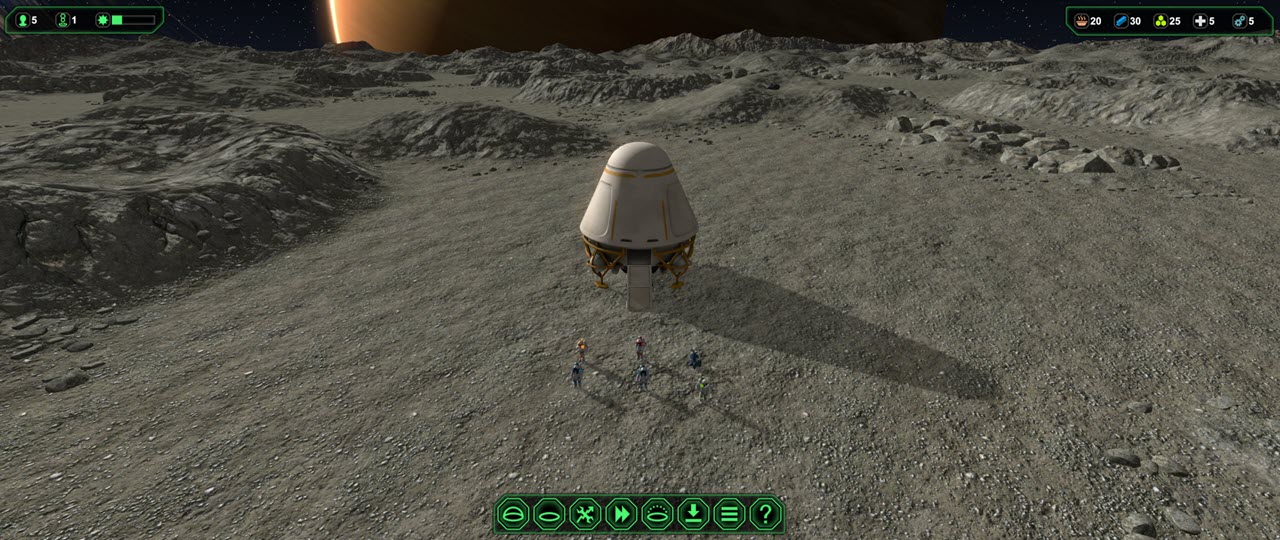
You can now watch your landing vehicle approach the surface – the door will open up, and the crew will disembark. Which, and how many crew members and robots you get, depends on the game world. The more difficult, the fewer resources.

Green shoulder patches represent biologists, blue one are the workers. Orange marks the engineering corps and red is the medical team. Later, black (gray) is the guards. Blue robots are transport only, orange ones are engineering robots. And now, your teams sits on the surface, and time is ticking.

The Initial Base

The initial elements you are building can be created from the reused parts of the spaceship. And there is a sequence to follow. First, we need power and water – so the very first element to build is the solar panel, followed by a power collector (which should actually go up first by using building priority!).

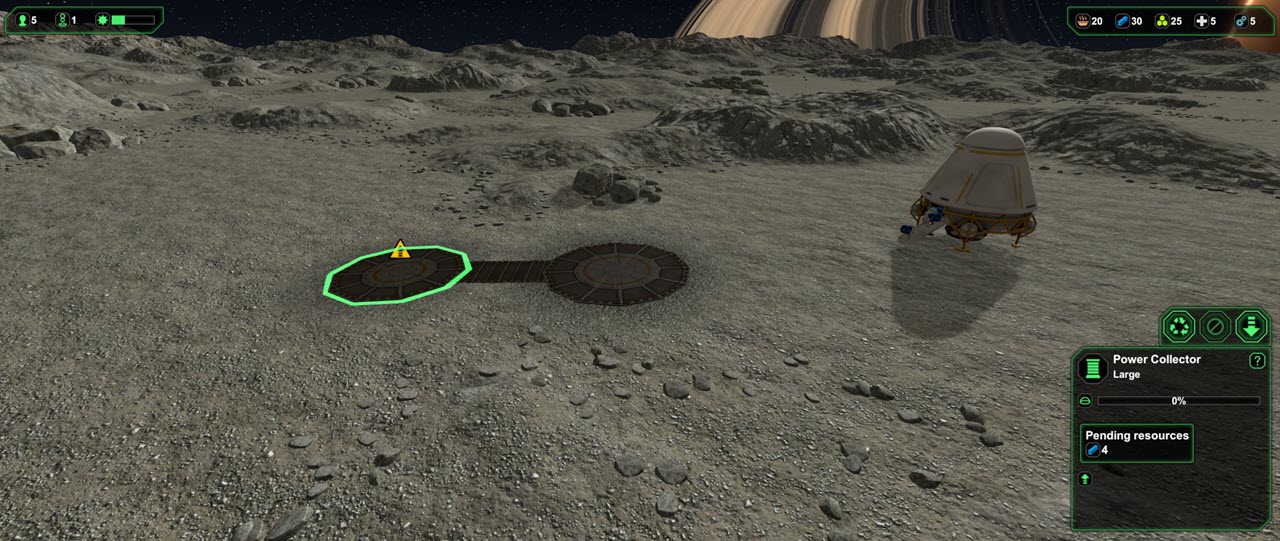
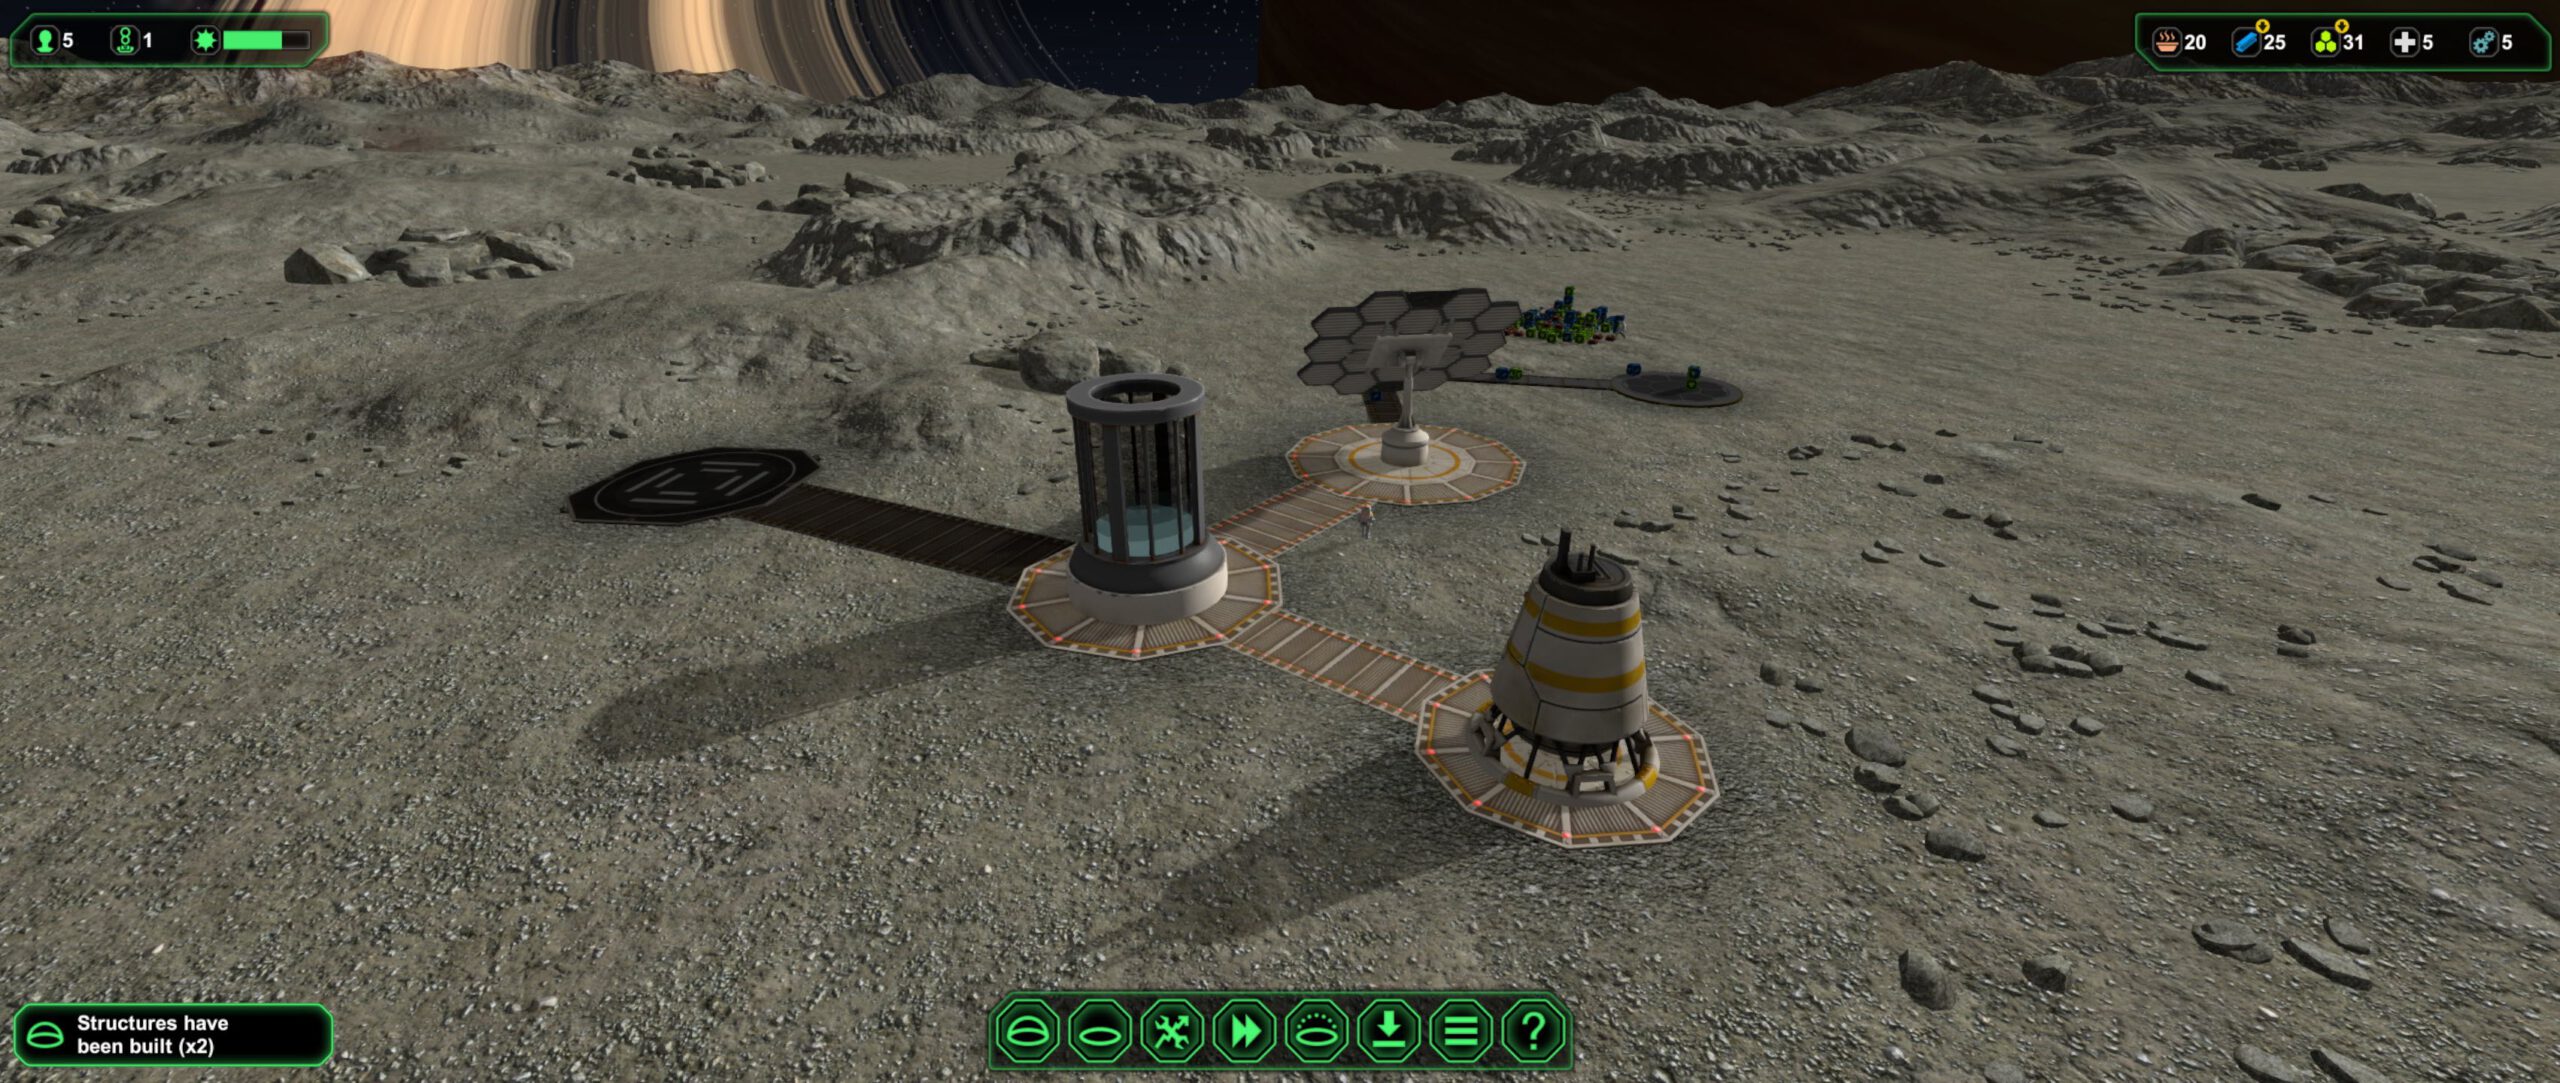
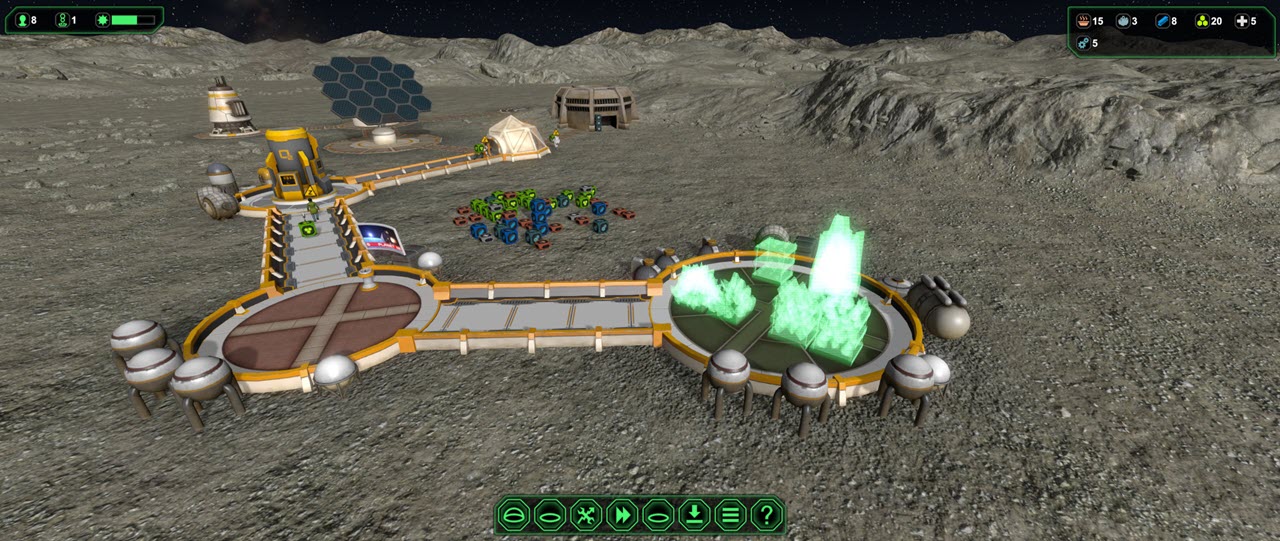
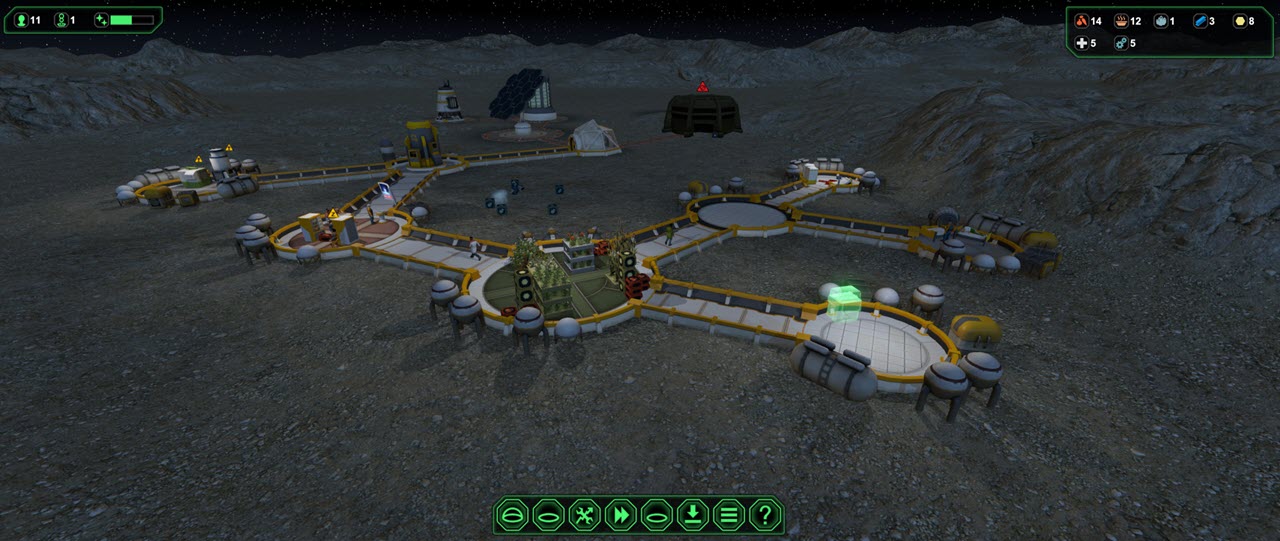
In the above layout, the plan is to build the base to the right of the solar panel (which is the right element on the ground). The important part is to keep your solar panel close to the air lock because later, you will have to do maintenance, and you don’t want your engineers to wander far and wide across the map. It takes time, and – more importantly – their way back to safety is long when a solar flare strikes.

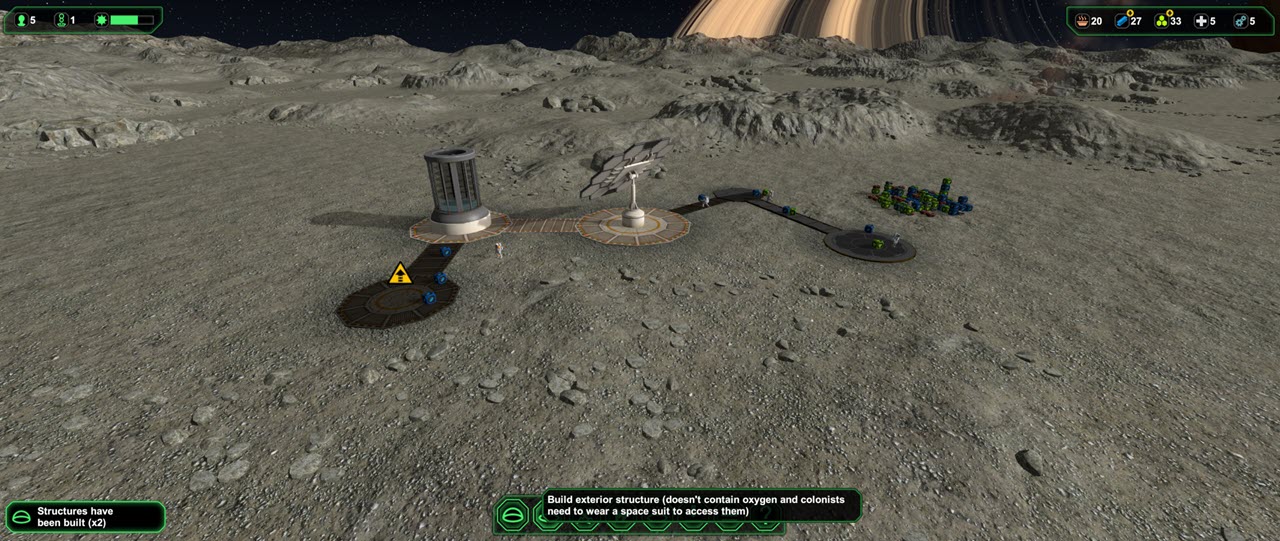
The image above shows the solar panel up, also the power collector. The water extractor has all its metal put down, and the engineer is just on the way to erect it. Meanwhile, the rest of the team puts the materials down for the air lock and the oxygen generator.

Timing is key now: the engineer will be lagging behind, doing the job he or she does. If we do nothing else, the rest of the team will just wait for the engineer to finish. Instead, we send the team to put together the material for a small landing pad – we want to extend the team quickly, before their attitude drops and no new team members will arrive.

Once the air lock and the oxygen generator are up, the team can go inside and refresh their O²-Supplies. The next pressing supply is water, followed by food. The team did bring some food, but it only lasts a short time. Water comes from water dispensers, which can be built in canteens and some other installations.

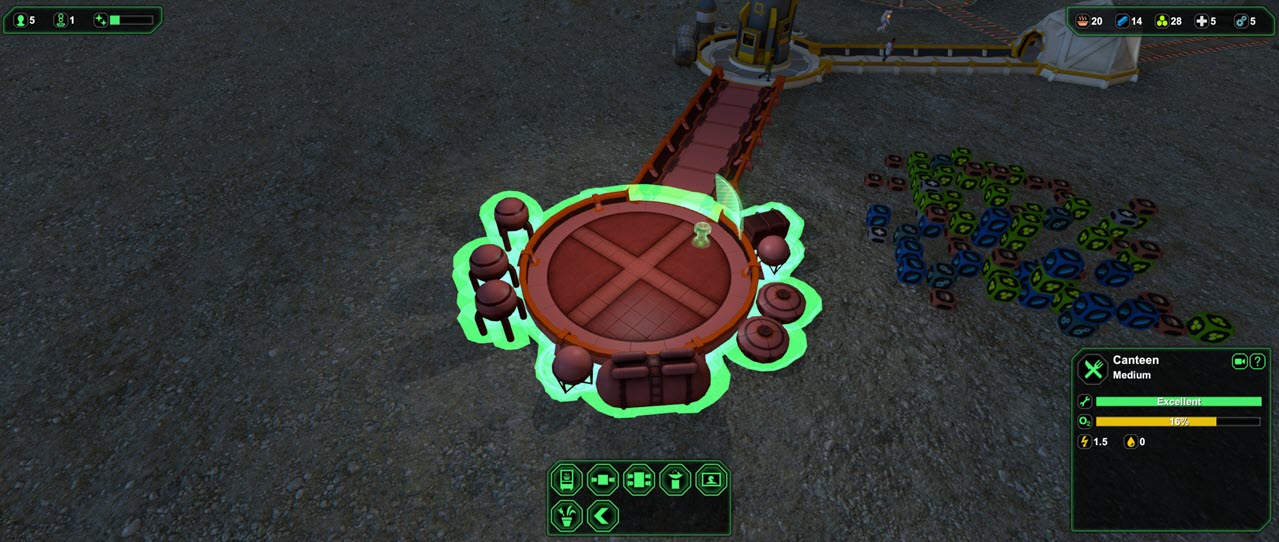
So, first things first: we build a small canteen – and it is important to only build this now. Once it is up, it gets a water dispenser and a TV screen. The reason why you should not start any other buildings in parallel: your team can not distinguish between priorities – so they might be focused on bringing building blocks to something while running out of water.

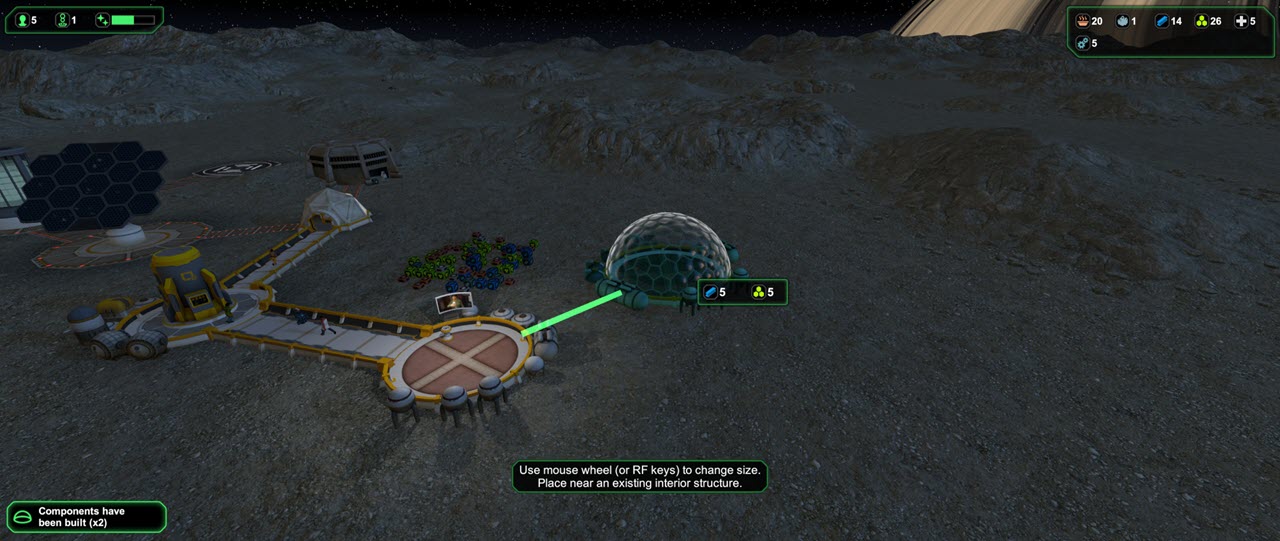
Once the canteen is up and the two elements are built, you can construct a large bio dome. This will cost you five starch and five metals and by now, it is time to keep an eye on your supplies.

By now, a few new team members should have arrived – and hopefully, you got some workers and some biologists.

The biologists are important now: each one of them can take care of two plants in the bio dome. So before starting to grow, find out how many plants your team can support.

My team has started with one biologist and two more arrived. Which allows me to plant six different plants: tomatoes, peas, mushrooms, radish, rice, and wheat work well, with three of them producing starch as resource.

With the plants kicked off, it is time to build the stuff in the canteen: one big table, two food dispensers.

So far, we have not seen a solar flare yet – the most efficient control of your team during dangerous situations is having a control room, and I got mine set up just behind the bio dome. You can power it off, it just needs to be there for you to have the alarms available.

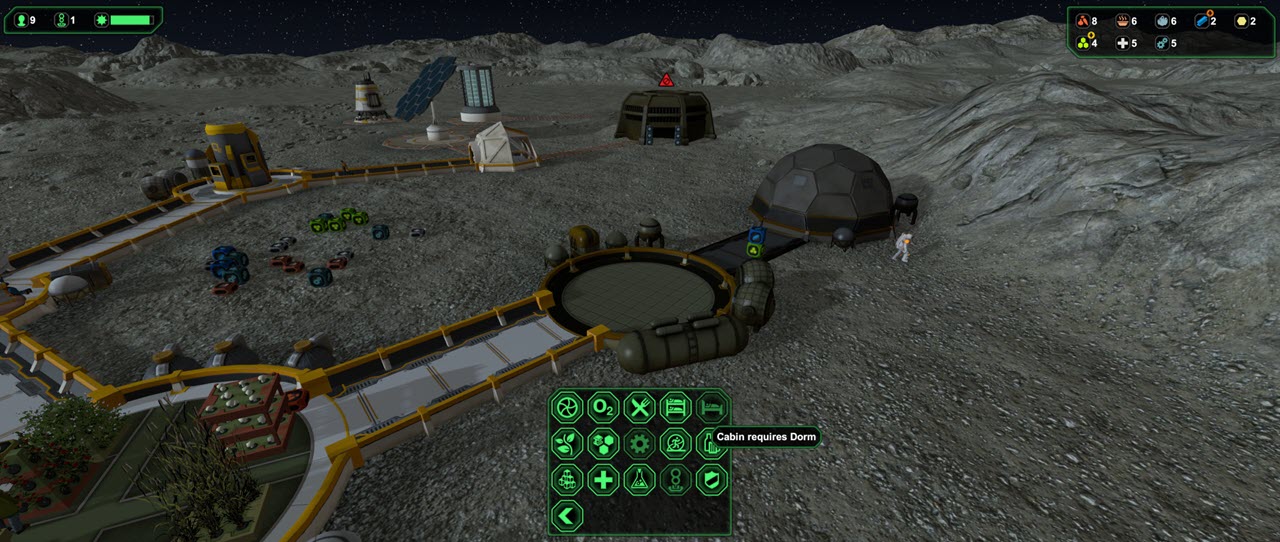
Next, we need some sleeping quarters for the team – they will sleep where they stand if they don’t have beds available, and that’s not good for morals. However, we want them to sleep in a Cabin rather than in a Dorm which is better for them regaining morale and shortening sleeping times. Downside: you can only build a Cabin if you have either another one or a Dorm. At this point, resources are sacred and building a Dorm, then a Cabin and then removing the Dorm would cost us the resources for the connection – one Metal and one Bioplastic. So, what to do?

The answer is surprisingly simple and just needs a bit of coordination: build a small Dorm, then wait for the engineer to put up the main structure.

While the engineer is walking over to build the connection, you can quickly build a Cabin and tear down the Dorm. Since the connection was not built yet, the building materials remain in your inventory.

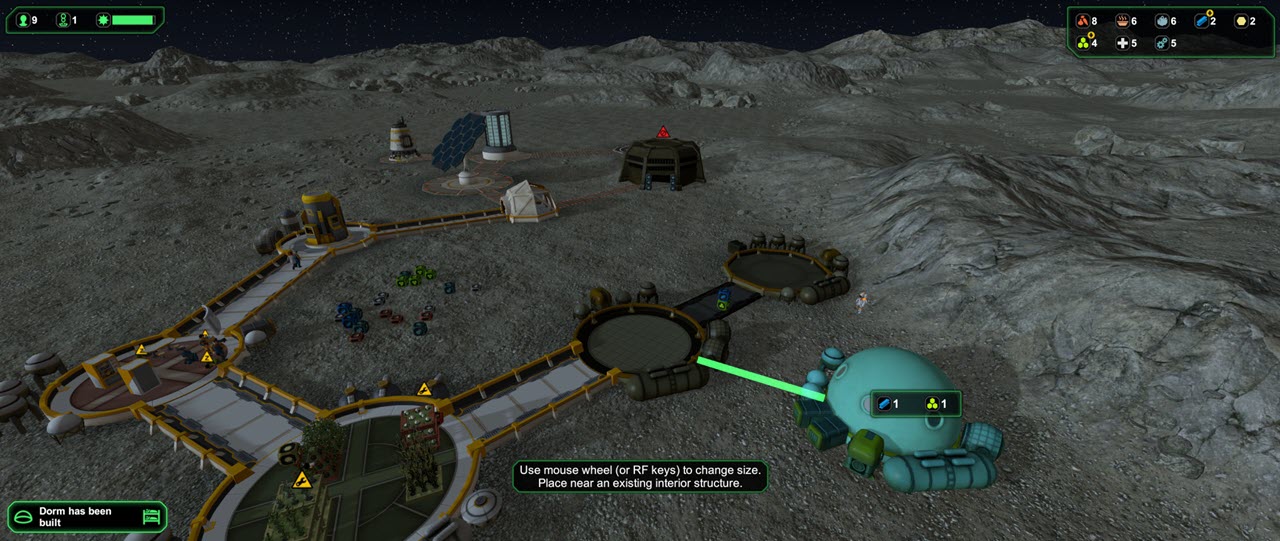
All it takes is a bit of coordination and running the game at the slowest possible rate. Once we got the Cabin up, place two or three beds in there, that’s enough for now.

Next, we need to gradually add a few more buildings, but you need to be careful: your resources are now low. First, we need a Processing Plant to convert raw materials such as Ore and Starch to usable products. Ore becomes Metal, Starch becomes Bioplastic. To get enough resources, I also took down the Landing Pad for now.

Next up is a small Sick Bay. We will need it because running the Mine with workers will cause them to get injured, and they require medical treatment. An injured worker will not perform any duties, so you need to be on the watch: with no Landing Pad and all workers injured, you cannot run the Processing Plant and consequently, you are in a stalemate situation. Which is why I stop the Mine once I got enough initial Ore produced!

Once the Sick Bay is up and running, my next concern is a small Lab. Here, you can produce Medical Supplies (if you are growing Medical Plants) and artificial Meat (if you are running a Tissue Synthesizer).

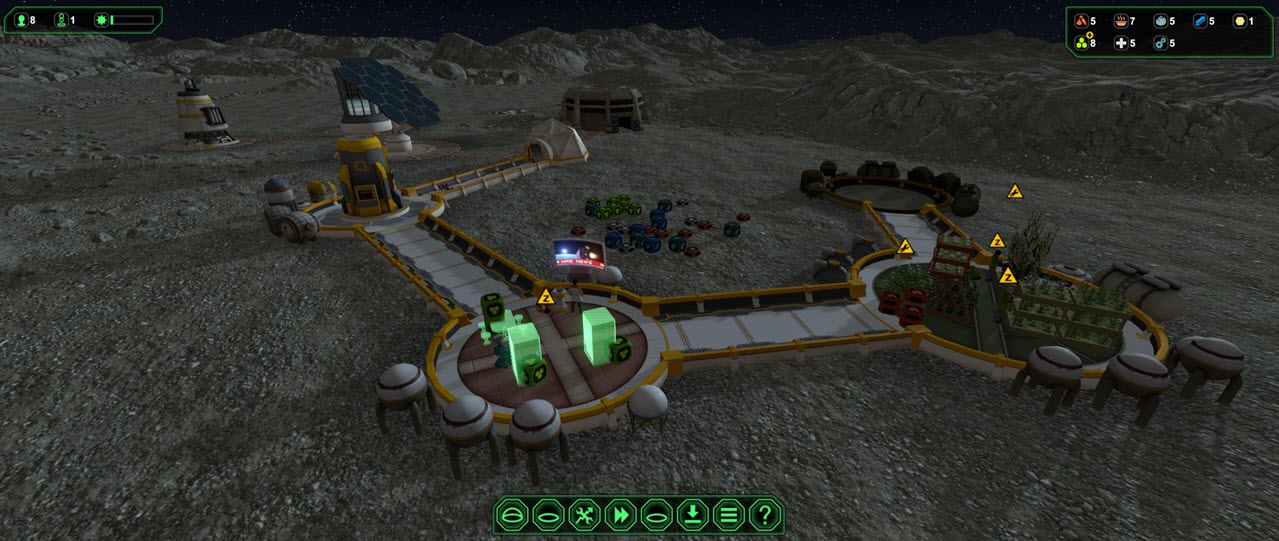
I was just setting up the building place for my next building, a small Factory, when the warning about an incoming Solar Flare appeared.

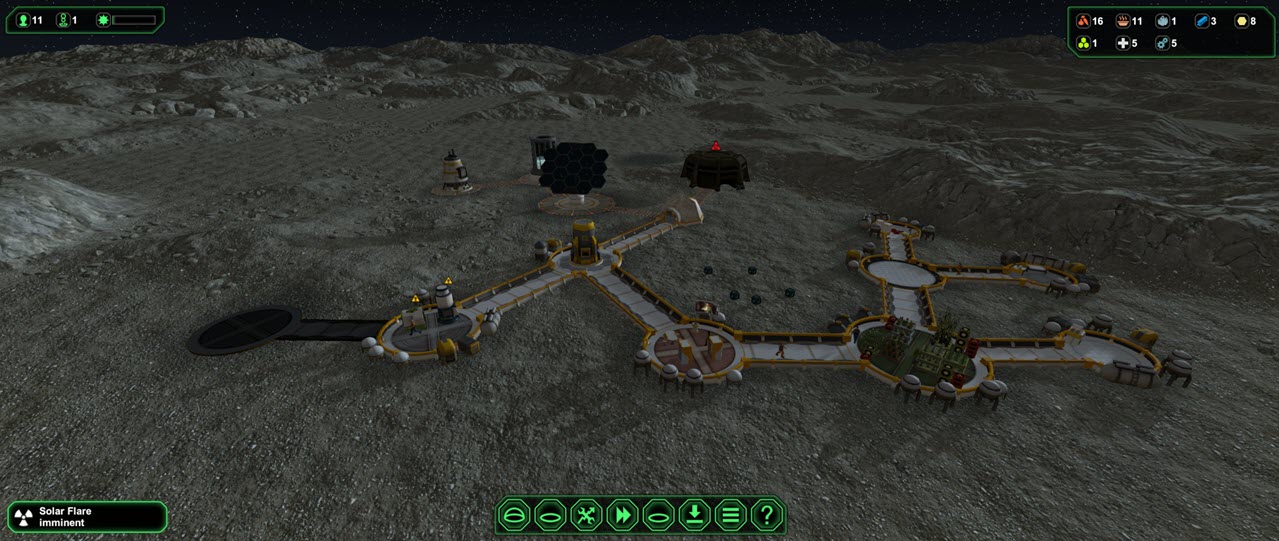
With this one, you should be quick: sound the yellow alarm to disallow your people leaving the base and quickly double-check the Mine: the workers have a tendency to not react immediately, risking them to exposure to radiation. Power down the Mine, that forces the worker to leave and he or she will run inside.

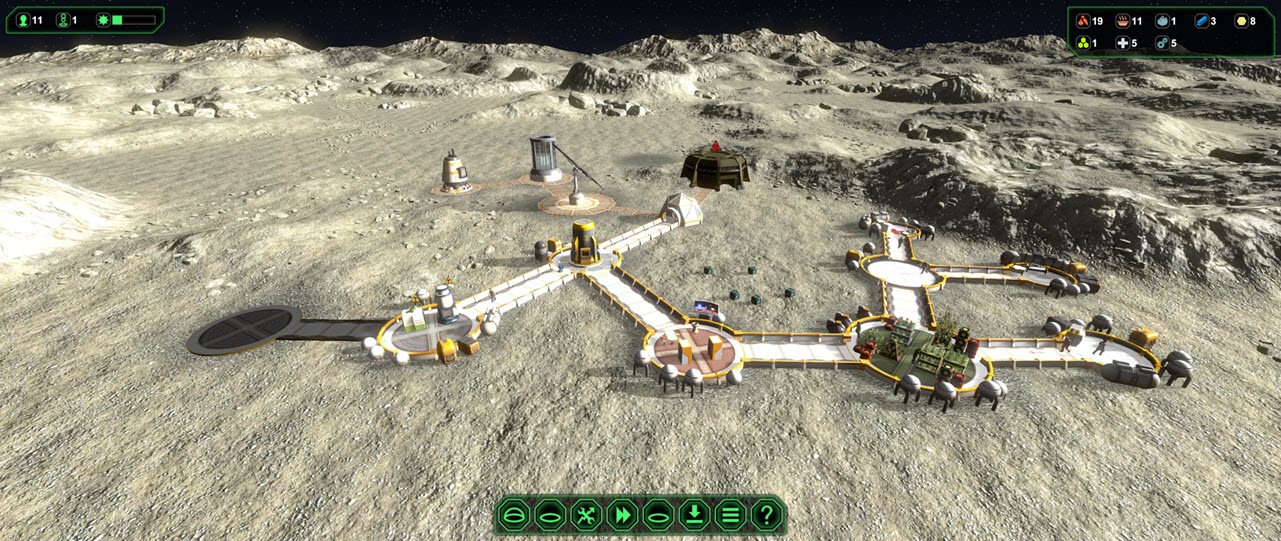
When the Solar Flare hits, the colour intensity of the game changes – you may also hear a crackling noise in the game’s sound, but to be honest, I only noticed it, when I was playing with a headset. So mind the colours – and only stop the alarm when everything is back to normal… your team is not made up of the brightest lights on the cake… they will run outside when the alarm is off, no matter if the flare is still on or not.

Once the Factory is up and running, you want to build a Spares Workshop to ensure you always got enough Spares for the Solar Panels. If you cannot repair them, you will lose your energy source – and no energy, no life.

You also want to make sure that Manufacturing Limits are set: these allow you to automatically control, which goods are produced from raw materials. No new production is started, if the number of items in your inventory exceeds the Manufacturing Limit.

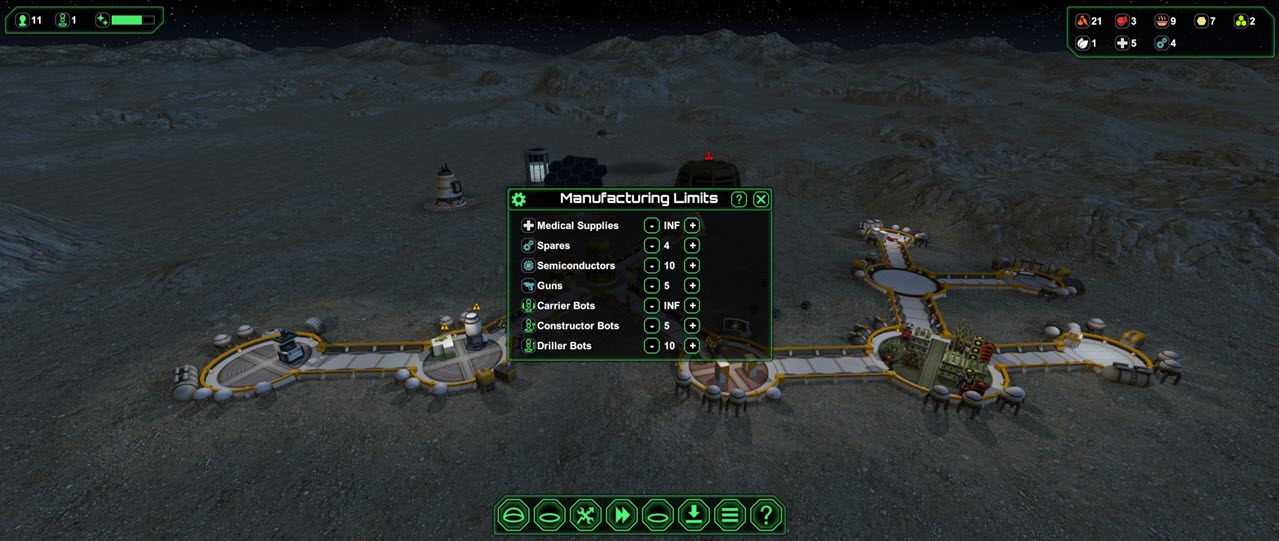
One final building is needed, then our initial setup is complete: a Storage. Items that have been produced, either are used or stay in the machine you used to produce them (Spares, Guns, Semiconductors, also Medical Supplies and Meat) or the building they are produced in (Plants). Some of them will deteriorate over time. Having a Storage frees up the machines and regenerates elements of poor condiction over time.

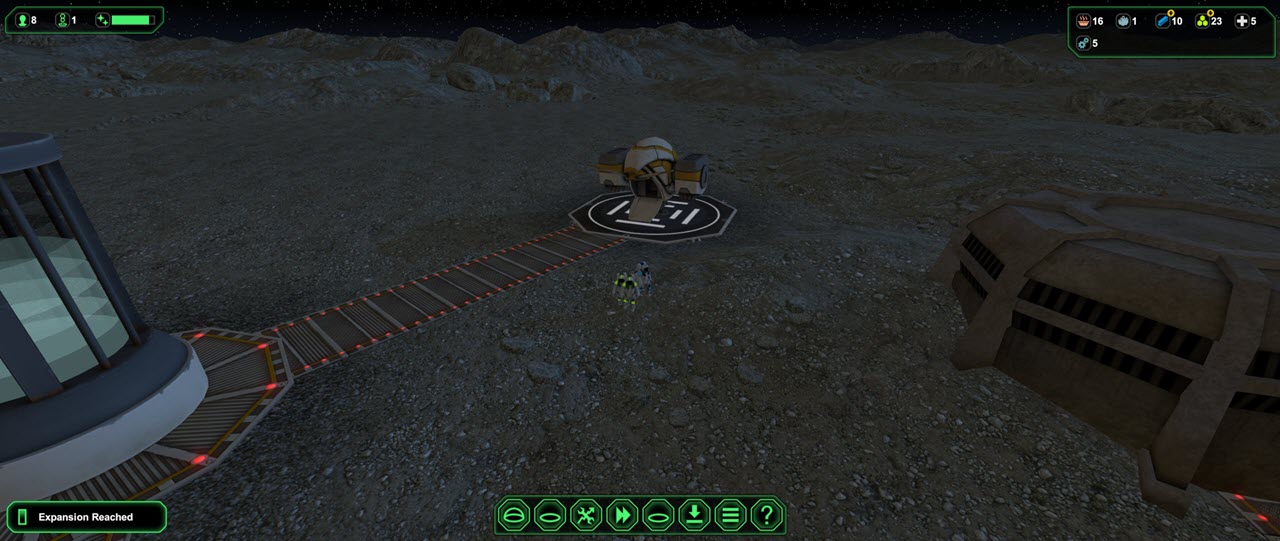
Finally, we need to bring the Landing Pad back and have a small but functioning base established. From now on, it is about “Keeping the Balance”.

Conclusion

Establishing the base is not rocket science if you have found out how the game mechanics work. It actually is fun, and I like the founding of a new base more than I like playing a big base. Yes, certain events can kill your base prematurely but such is space exploration: it does not come without dangers.

If you want to give it a try: Planetbase is available via Steam and I would say that if you are into base building games and space, you might want to risk a look or two. At the time of the writing of this post, the game sells for 12,50€, that is not a bad price. And considering, I have spent some 1500 hours on it, it is also not the worst investment I ever made into a computer game…

Posted in Allgemein | Leave a comment

Astrophotography in 2022 – Review Part I

January 2022

The year started out pretty bad – a single night of observations on January 13, 2022. I put the ASKAR 135mm f/4.5 APo to work, paired with a ZWO ASI 533 MC. A couple of targets for the night, M35, M44, M51, M87, M95, and NGC4565.

Messier 35 (annotated)

Messier 35 is an open cluster in Gemini with approx. 400 stars contained in a sphere of 11 light-years diameter. The image is made up from 30 individual photos with 70s exposure time each – a total of just 35 Minutes. The conditions were less than optimal with a Moon only five days from its 100%. The cluster itself is located at the upper edge of the image to allow for other objects to appear in the overview, namely IC443 and the NGC2174/NGC2175 complexes.

Next target up was Messier 44, also known as “Praesepe” or “Beehieve Cluster”, an open cluster located in the heart of the Cancer. It is a relatively easy target, given some acceptable dark skies and preferably some binoculars. This target requires a wide field of view although we will later see that a “close-up” is also gorgeous.

Messier 44 (annotated)

Speaking of “gorgeous” – the annotated version, of course, has its value but this one comes out a bit nicer when adding some star spikes and color.

Messier 44 with Star Spikes and some pushed colors.

Next up was Messier 51 – the famous “Whirlpool Galaxy” in Canes Venatici. The galaxy is some 23 light-years from Earth and I decided to take the photo covering the area between M51 in the upper-right corner and NGC5297, a spiral galaxy in 110 million light-years distance, in the lower-left corner.

Messier 51 and NGC5297, with the original 1:1 images copied into the lower-right corner. The little ASKAR 135 has its strength!

A bit to the south of Canes Venatici are the three constellations Coma Berenices, Virgo, and Leo. They are holding large numbers of galaxies. The first wide-field is targeting Messier 95, a barred spiral galaxy some 33 million light-years away in Leo. It forms a group of two together with Messier 96 and a bit off is Messier 105 with NGC3384 and NGC3389.

Messier 95 & Messier 96 (annotated)

Finally, the last image of that night went to NGC4565 in Coma Berenices, the well-known “Needle Galaxy”. The beautiful spiral galaxy that we are looking at “edge-on” is approx. 57 million light-years away. Again, it will be revisited later with the larger telescope.

NGC4565 & Coma Galaxy Cluster (annotated)

That last photo concluded the January observation night – it was supposed to remain the only night that month and only at the end of February, it would clear up again.

Posted in Astro2022 | Leave a comment

Switching to a dedicated Astro Camera – ZWO ASI 533 MC Pro

Right after finishing up “my” shooting of M31 – the “Andromeda Galaxy” – with my Skywatcher 72ED and my Nikon D7500, I switched to a dedicated astro camera, a ZWO ASI 533 MC Pro. It has two big advantages over the standard DSLR:

  • It can be actively cooled so I can always take my images with the same chip temperature (and re-use my darkframes)
  • It does not have IR Cut Filters and therefore accepts light in wavelengths the unmodified Nikon D7500 cannot
The first result produced with the ZWO ASI 533 MC Pro – 80 x 70s, 21 x 180s

The initial integration of the images (80 x 70s, 21 x 180s for a total of 2:36h) shows a nice result. And zooming in shows the superiority of a camera sensor cooled down to -10°C (plus I used darkframes this time): almost zero background noise!

Note the very low background noise in this 3:1 zoom of the image.

The rest is the same basic processing workflow that I have done with the Nikon images: Color Calibration, Stretching, some Curve Transformation…done.

M31 as developed in PixInsight

A direct comparison of both images – the one from the Nikon on the left, the one from the ZWO ASI 533 on the right – shows: they both work well, the Nikon’s image is an accumulated 12+ hours, the ZWO ASI 533 is an accumulated 2+ hours of exposure time.

A direct comparison at 1:1 zoom – Nikon on the left, ZWO ASI on the right.

The overall image also shows: the sensor of the ZWO ASI 533 is smaller but the items appear larger when compared to the Nikon. Photographing all of Andromeda probably requires a Mosaic of 2×1 or 2×2 frames, depending on what should be achieved.

Just out of curiosity (and stepping ahead a few month) I am also showing a comparison with a monochrome camera, a ZWO ASI 1600 MM with a Luminance filter:

And adding a ZWO ASI 1600 MM Luminance Frame to the equation…

Mono Cameras are a whole different thing – and I will talk about them later. But for now, let’s conclude: taking Deepsky Images with a DSLR is (for broadband targets such as galaxies) completely fine! The advantage of a dedicated color astro camera is mostly the ability to cool the sensor (and reduce the background noise reliably and reproducible) and the lack of the IR (Infrared-cut) filter on the One-Shot Color Camera (OSC).

Much more important are a good and steady mount that allows for pinpointed stars when guiding for say anywhere from 70s to 180s and a good telescope (preferable with a motor focus but more on that also later).

Suggestion from my side: put your money in the mount first! Then upgrade the optics and finally the camera. Pick your targets wisely and match them to your equipment. And don’t save money on the processing side! Like in many other cases: buy wisely! Those that buy “cheap” will either give up or buy twice…

Posted in Astronomy | Tagged , , | Leave a comment

A final DSLR Masterpiece – M31, the “Andromeda Galaxy”

By September 2020, and after the initial positive results with astrophotography from my backyard, I had invested into some “upgrades”. Initially, I was out just with the tripod and the Nikon D90 and several of my Nikon lenses.

Next thing that happened: the Nikon D90 got replaced by a Nikon D7500 and shortly afterwards, the tripod was equipped with an Omegon LX2 mechanical star tracker. Which did not last long (I mean, it did its job but had limitations) – it was replaced with a Skywatcher HEQ5 Pro Mount and the Nikon lenses made room for a Skywatcher 72ED telescope, together with a Skywatcher 50ED Guide Scope and a ZWO ASI 120 MM Guiding Camera. Also, a switch was made from a simple intervalometer, controlling the Nikon exposures to using dedicated astrophotography software. The Nikon D7500 remained in place for some last set of photos of M31, the “Andromeda Galaxy”.

Images were taken during several sessions between September 2020 and November 2020 – a total of 12:28 hours of exposure time.

PixInsight’s Weighted Batch Preprocessing Script with the Image Information

This time, some darkframes “survived” the times so I decided to apply them globally, although they did not match the temperatures of each image session – remember, the Nikon D7500 is a regular DSLR so darkframes should match the temperature the light were taken at.

Pre-processing a large number of images, including the creation of three master darkframes, takes a little while – my computer was busy for some 26 minutes. Like before, the next step is to debayer the images and then do the star alignment – this time, I had sorted out the “bad images” so I spare you that step.

PixInsight’s DynamicBackgroundExtraction Process in action

With an Deepsky Object (DSO) that large, the background extraction needs to be performed more selectively using the DynamicBackgroundExtraction process which allows the user to select what is “background” and what not.

M31 after the DynamicBackgroundExtraction process is done

Next are then the BackgroundNeutralization and the PhotometricColorCalibration processes – once done, the colors have been adjusted more to their natural look.

The “grand spiral galaxy” after the color correction processes

The large number of source images has already made sure that the background noise is very low but running a bit of noise reduction makes it even better. Now, we are ready to stretch the image finally.

“Stretching” the image helps with the full dynamic range – now, we have a “true” image that would show like this even outside PixInsight.

What comes now – again – is a matter of “taste”. But one thing I want to show you is how to work with the “galaxy” and preserve the stars around it in their current state (or handle them individually).

There is a PixInsight (and also PhotoShop) process written by Russel Crowman (see his Website) which allows PixInsight to “separate” the stars from the background. If you tell the process to also generate a Star Image, you can work both on the background and on the stars separately.

The result of running StarXTerminator against the M31 image.

This now provides almost endless possibilities – the sample below shows in the upper left corner an image of the background that was HDR-tunes in Photoshop, the regular image center bottom and the star-mask (intensified in Photoshop).

PixInsight with a variation of the M31 background and intensified star mask

Whatever we do to the individual images – we can use PixelMath to combine them afterwards:

Using PixelMath to combine two or more images

So for the moment, this is the result in PixInsight that comes from the long hours of photographing M31 in 2020

M31 as developed in PixInsight

This was the last image that I produced using the Nikon D7500 DSLR – afterwards, I switched over to a dedicated AstroCamera, a ZWO ASI 533 MC – but that is a different story…

Posted in Astronomy | Tagged | Leave a comment

Another Go at M81 and M82

With the success of the “Leo Triplet” and with the Nikon D90 replaced with a Nikon D7500, I decided to take another “go” at the big galaxies in Ursa Major, M81 and M82.

This was also my first “multi-session” attempt, with the images being shot over several nights (and with slightly different focal lengths).

  • May 25, 2020: 37 images of 45s each with the lens settled at 250 mm, f/5.6
  • May 28, 2020: 42 images of 45s each with the lens settled at 300 mm, f/5.6
  • May 28, 2020: 12 images of 60s each with the lens settled at 300 mm, f/5.6

That gives a total of 91 images with a total of 71 minutes. One of the first questions people often ask is: “Can you combine images from multiple nights?” and the second one, a bit more complex, is “Can you combine images from different telescopes?”

Both is possible and the StarAlign process in PixInsight will take care of that. The key is the Reference Image: all other images will be aligned (and resized!) to match the stars in the Reference Image. So you should make sure that an image with the shortest focal length (in my case one of those from the first night) acts as the reference – that will shrink the other images (whereas doing it the other way round would “enlarge” the images from the first night, creating unwanted artifacts.

In my case, the StarAlign process took exactly 6 Minutes but only 64 images aligned. Why?

One of the images that failed to align

In this special case, the reason for the failure to align was a failure to sort out the obviously unusable images first – this one failed on tracking, producing “star trails” which then failed the alignment process. Actually, this is a good thing because it sorts out “bad data”.

But there is a better way of doing that: the PixInsight process for the initial visual inspection is named Blink. It simply loads all the images and then “flips” through them, either automatically or manually.

Blinking the Images – pay attention to the star trails!

As you can see from the video: there are good images, bad images and “not quite too bad” images in there. Usually, I would have done this before I aligned the images (saves processing time!) but now, we can also use Blink to examine the effects of the StarAlign process:

Blinking the aligned images – take a note of the frames that show a “distortion”

Did you notice the “distortions” some of the frames showed? And how the field of view shifted suddenly to an area of the image, showing a 45° turned image? That is what StarAlign does for you: it aligns the images, rotates them where required and resizes them as needed. After a bit of clean-up (removing the distorted frames) this is what we are left with:

Staraligned and cleaned up, these are the images to stack

At the end of the day, our “good enough to stack” images turn out to be some 58 frames out of 91. Did you notice the satellite trails on some of the frames? I mentioned that ImageIntegration is taking care of these later but let’s first stack the images without and rejection algorithm:

ImageIntegration with no rejection algorithm set

Not horrible, but also not what we want – let’s do ImageIntegration again with what is called the “Sigma Clipping” rejection algorithm.

Now, ImageIntegration is producing three results – let’s look at the rejection map first (high-clipping):

The “High-clipping” Rejection Map

The High-clipping Rejection Map shows all information that was not integrated into the final image based on the algorithm – you can clearly see the satellite trails here but also some of the “fuzziness” around the stars.

The second rejection map – the “Low-clipping” – can be used to crop the image later. It very clearly shows which areas of the image are covered by all stacked frames and which ones are not.

The “Low-clipping” Rejection Map with two possible cropping scenarios (placed by myself for illustration)

Last but not least the integrated image:

The integrated and auto-stretched image

Before we continue with any other activitiy, I am goind to crop the image to the area of interest just around the four galaxies visible in here:

PixInsight’s DynamicCrop in action

Why cropping now and not later? Because all other operations will a) be faster on a smaller image and b) when it comes to working with averages across the image, the algorithms will just include data that also remains in the final field of view.

Now that we got the stacked and cropped image, the first thing that should be done is to PlateSolve it. The ImageSolver in PixInsight needs to know some RA and Dec Coordinate that is within the image but in this case, it is easy: M81 provides the required information.

The ImageSolver set up to plate solve the M81 & M82 image.

It always pays off to have a look at PixInsight’s Process Console window:

The result of the ImageSolver Process

Here, we are getting some valuable information about the image:

  • The Resolution (3.397 arcseconds per pixel)
  • The Rotation (91.371°),
  • The Observation Time (taken from the first and last stacked image)
  • The calculated Focal Length (228.28 mm)
  • The Field of View, and
  • The Image Center coordinates as well as the corner coordinates

If you can platesolve the image, you can annotate the image:

The annotated Image with M81, M82, NGC3077 and NGC2976.

The rest is “cleaning & adjusting” – in the following order:

  • Background Extraction
  • Background Neutralization
  • Photometric Color Calibration
  • Noise Reduction
  • Stretching

And if one wants, PhotoShop and some additional filters can also be applied, all a matter of “taste”.

The final image, showing M81 & M82 – taken with a Nikon D7500 and a regular Telezoom Lens @ 225 mm

So, last thing to do is some information just for reference – first, the finding chart so you know where in space you need to look at:

The Finding Chart for M81 & M82

Then, some information on the four galaxies contained in this image:

  • Messier 81 (also known as “Bode’s Galaxy”) is a grand spiral galaxy some 12 million light-years from us. It measures roughly 90.000 light-years across.
  • Messier 82 (also know as “Cigar Galaxy”) is a starburst galaxy of approx. 37.000 light-years diameter.
  • NGC2976 is also a spiral galaxy, approx. the same distance than M81 and M82
  • NGC3077 is a small irregular galaxy, also approx. 12 million light-years from us.

All four galaxies are members of the M81 group which contains total of 34 galaxies in the constellations Ursa Major and Camelopardalis.

Posted in Astronomy | Tagged , , | Leave a comment