
With the success of the “Leo Triplet” and with the Nikon D90 replaced with a Nikon D7500, I decided to take another “go” at the big galaxies in Ursa Major, M81 and M82.
This was also my first “multi-session” attempt, with the images being shot over several nights (and with slightly different focal lengths).
- May 25, 2020: 37 images of 45s each with the lens settled at 250 mm, f/5.6
- May 28, 2020: 42 images of 45s each with the lens settled at 300 mm, f/5.6
- May 28, 2020: 12 images of 60s each with the lens settled at 300 mm, f/5.6
That gives a total of 91 images with a total of 71 minutes. One of the first questions people often ask is: “Can you combine images from multiple nights?” and the second one, a bit more complex, is “Can you combine images from different telescopes?”
Both is possible and the StarAlign process in PixInsight will take care of that. The key is the Reference Image: all other images will be aligned (and resized!) to match the stars in the Reference Image. So you should make sure that an image with the shortest focal length (in my case one of those from the first night) acts as the reference – that will shrink the other images (whereas doing it the other way round would “enlarge” the images from the first night, creating unwanted artifacts.
In my case, the StarAlign process took exactly 6 Minutes but only 64 images aligned. Why?

In this special case, the reason for the failure to align was a failure to sort out the obviously unusable images first – this one failed on tracking, producing “star trails” which then failed the alignment process. Actually, this is a good thing because it sorts out “bad data”.
But there is a better way of doing that: the PixInsight process for the initial visual inspection is named Blink. It simply loads all the images and then “flips” through them, either automatically or manually.
As you can see from the video: there are good images, bad images and “not quite too bad” images in there. Usually, I would have done this before I aligned the images (saves processing time!) but now, we can also use Blink to examine the effects of the StarAlign process:
Did you notice the “distortions” some of the frames showed? And how the field of view shifted suddenly to an area of the image, showing a 45° turned image? That is what StarAlign does for you: it aligns the images, rotates them where required and resizes them as needed. After a bit of clean-up (removing the distorted frames) this is what we are left with:
At the end of the day, our “good enough to stack” images turn out to be some 58 frames out of 91. Did you notice the satellite trails on some of the frames? I mentioned that ImageIntegration is taking care of these later but let’s first stack the images without and rejection algorithm:

Not horrible, but also not what we want – let’s do ImageIntegration again with what is called the “Sigma Clipping” rejection algorithm.
Now, ImageIntegration is producing three results – let’s look at the rejection map first (high-clipping):
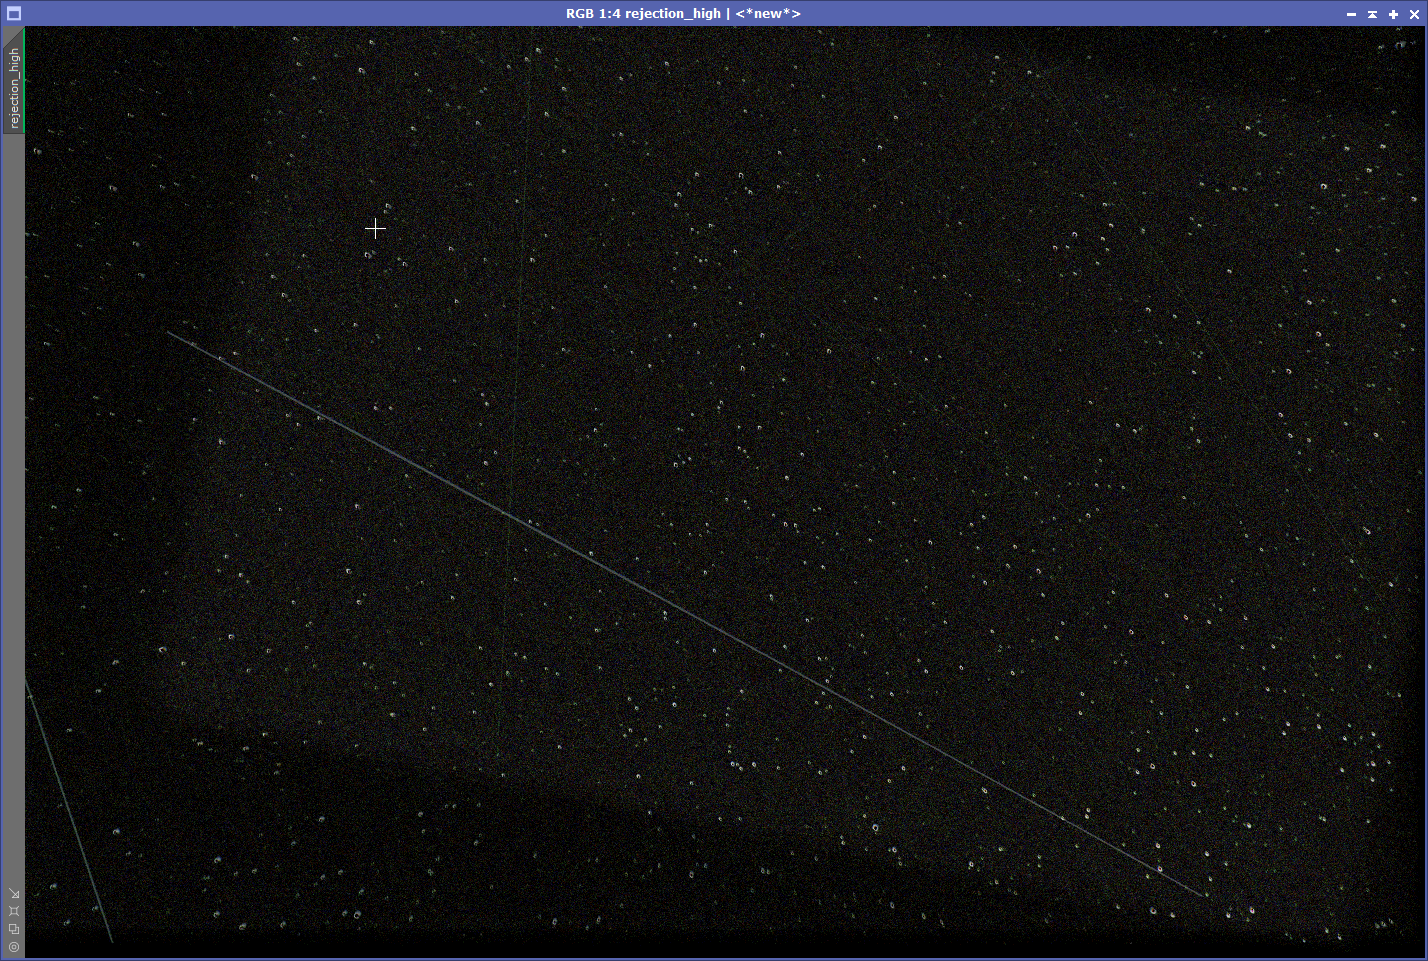
The High-clipping Rejection Map shows all information that was not integrated into the final image based on the algorithm – you can clearly see the satellite trails here but also some of the “fuzziness” around the stars.
The second rejection map – the “Low-clipping” – can be used to crop the image later. It very clearly shows which areas of the image are covered by all stacked frames and which ones are not.

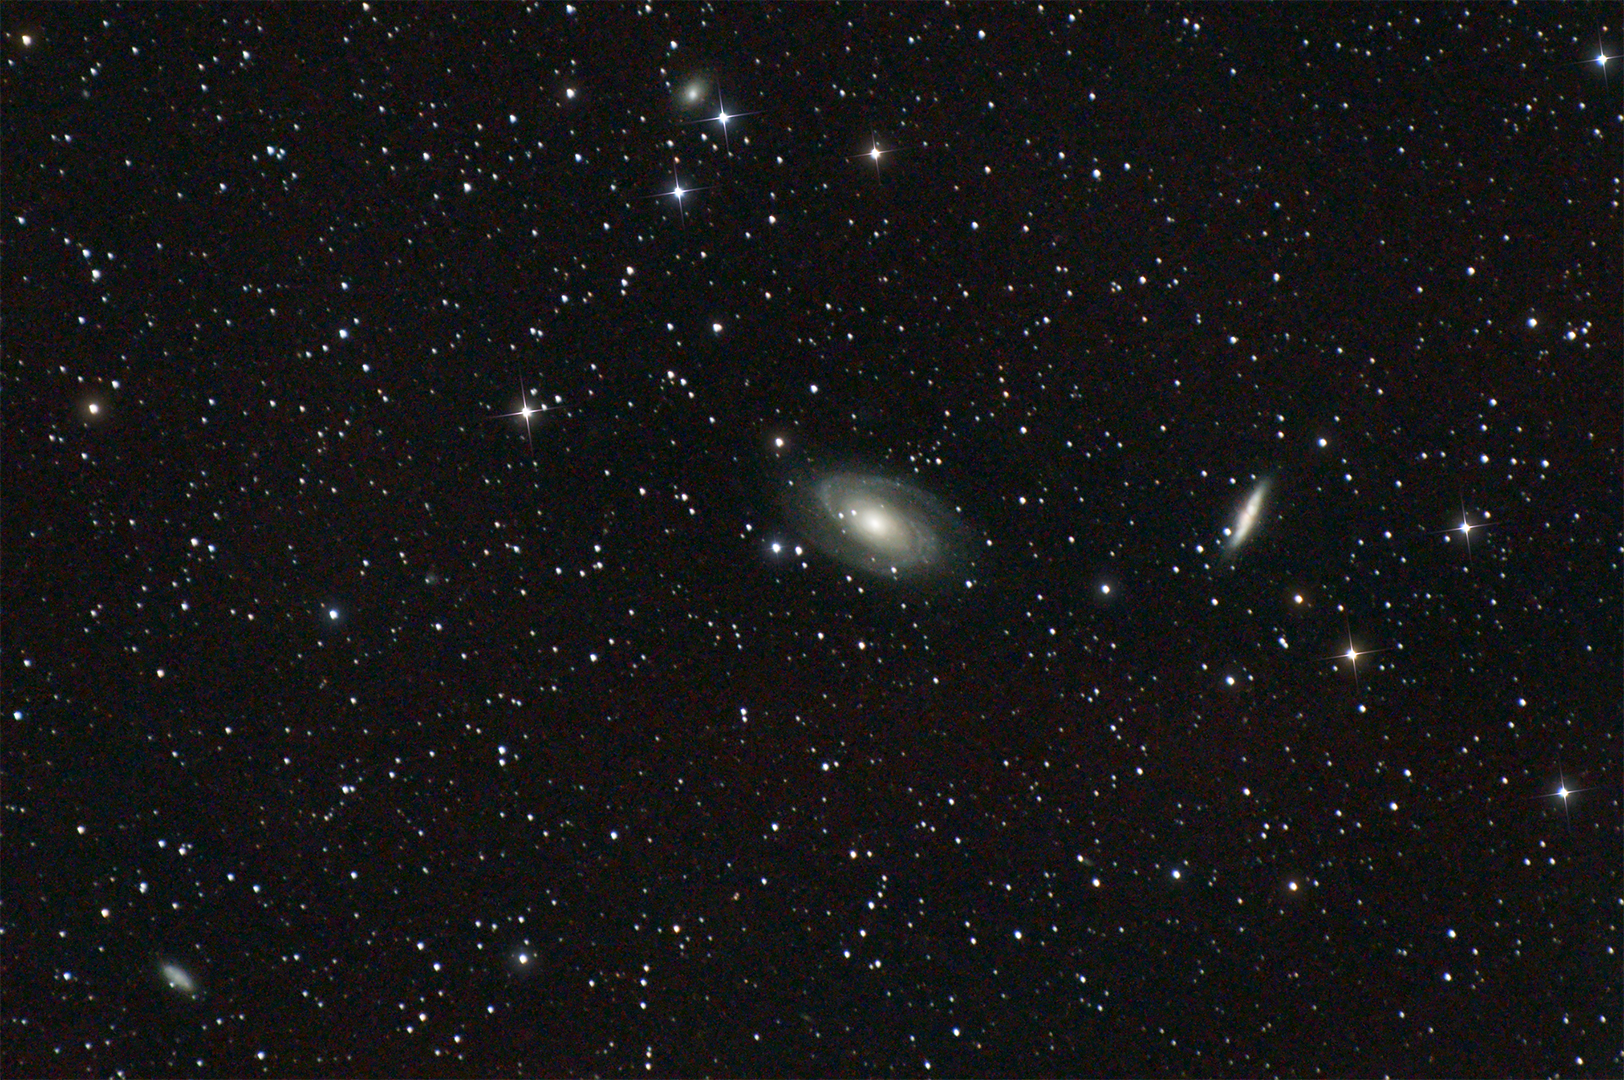
Last but not least the integrated image:
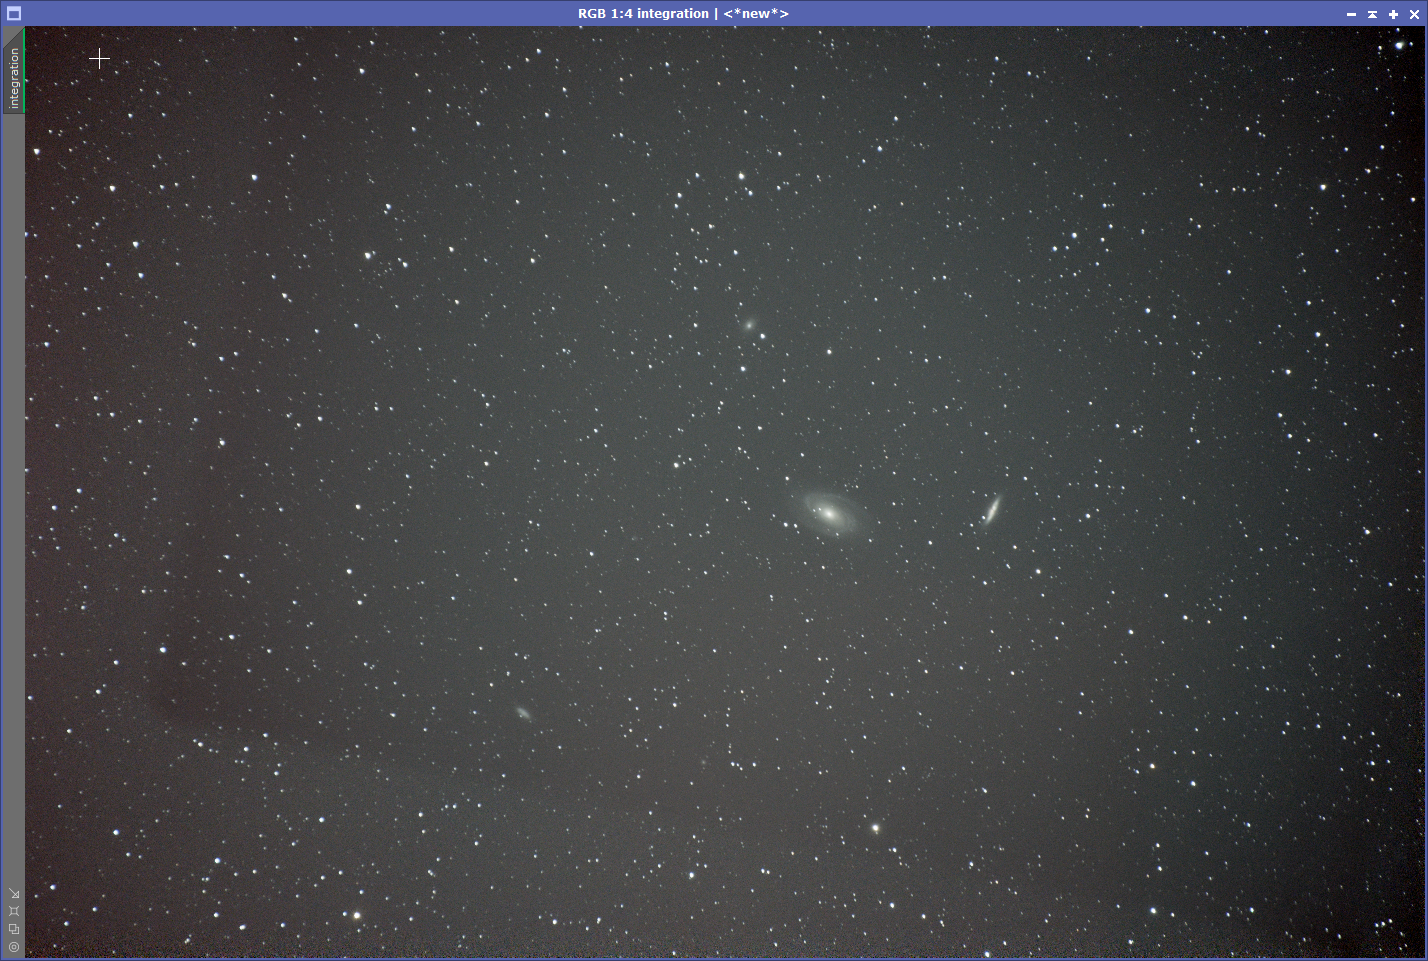
Before we continue with any other activitiy, I am goind to crop the image to the area of interest just around the four galaxies visible in here:
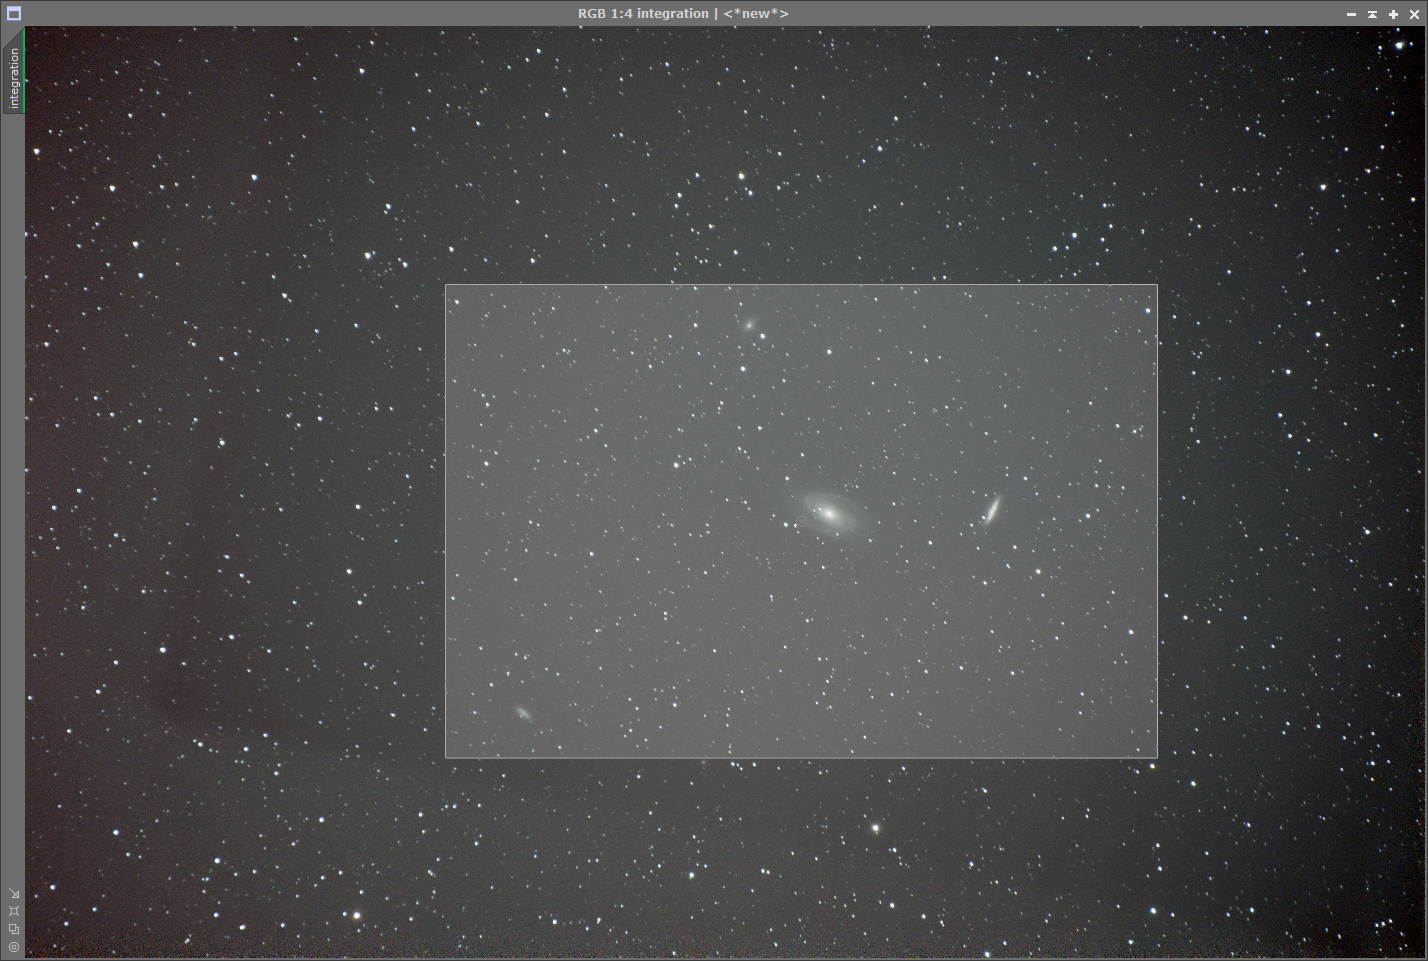
Why cropping now and not later? Because all other operations will a) be faster on a smaller image and b) when it comes to working with averages across the image, the algorithms will just include data that also remains in the final field of view.
Now that we got the stacked and cropped image, the first thing that should be done is to PlateSolve it. The ImageSolver in PixInsight needs to know some RA and Dec Coordinate that is within the image but in this case, it is easy: M81 provides the required information.
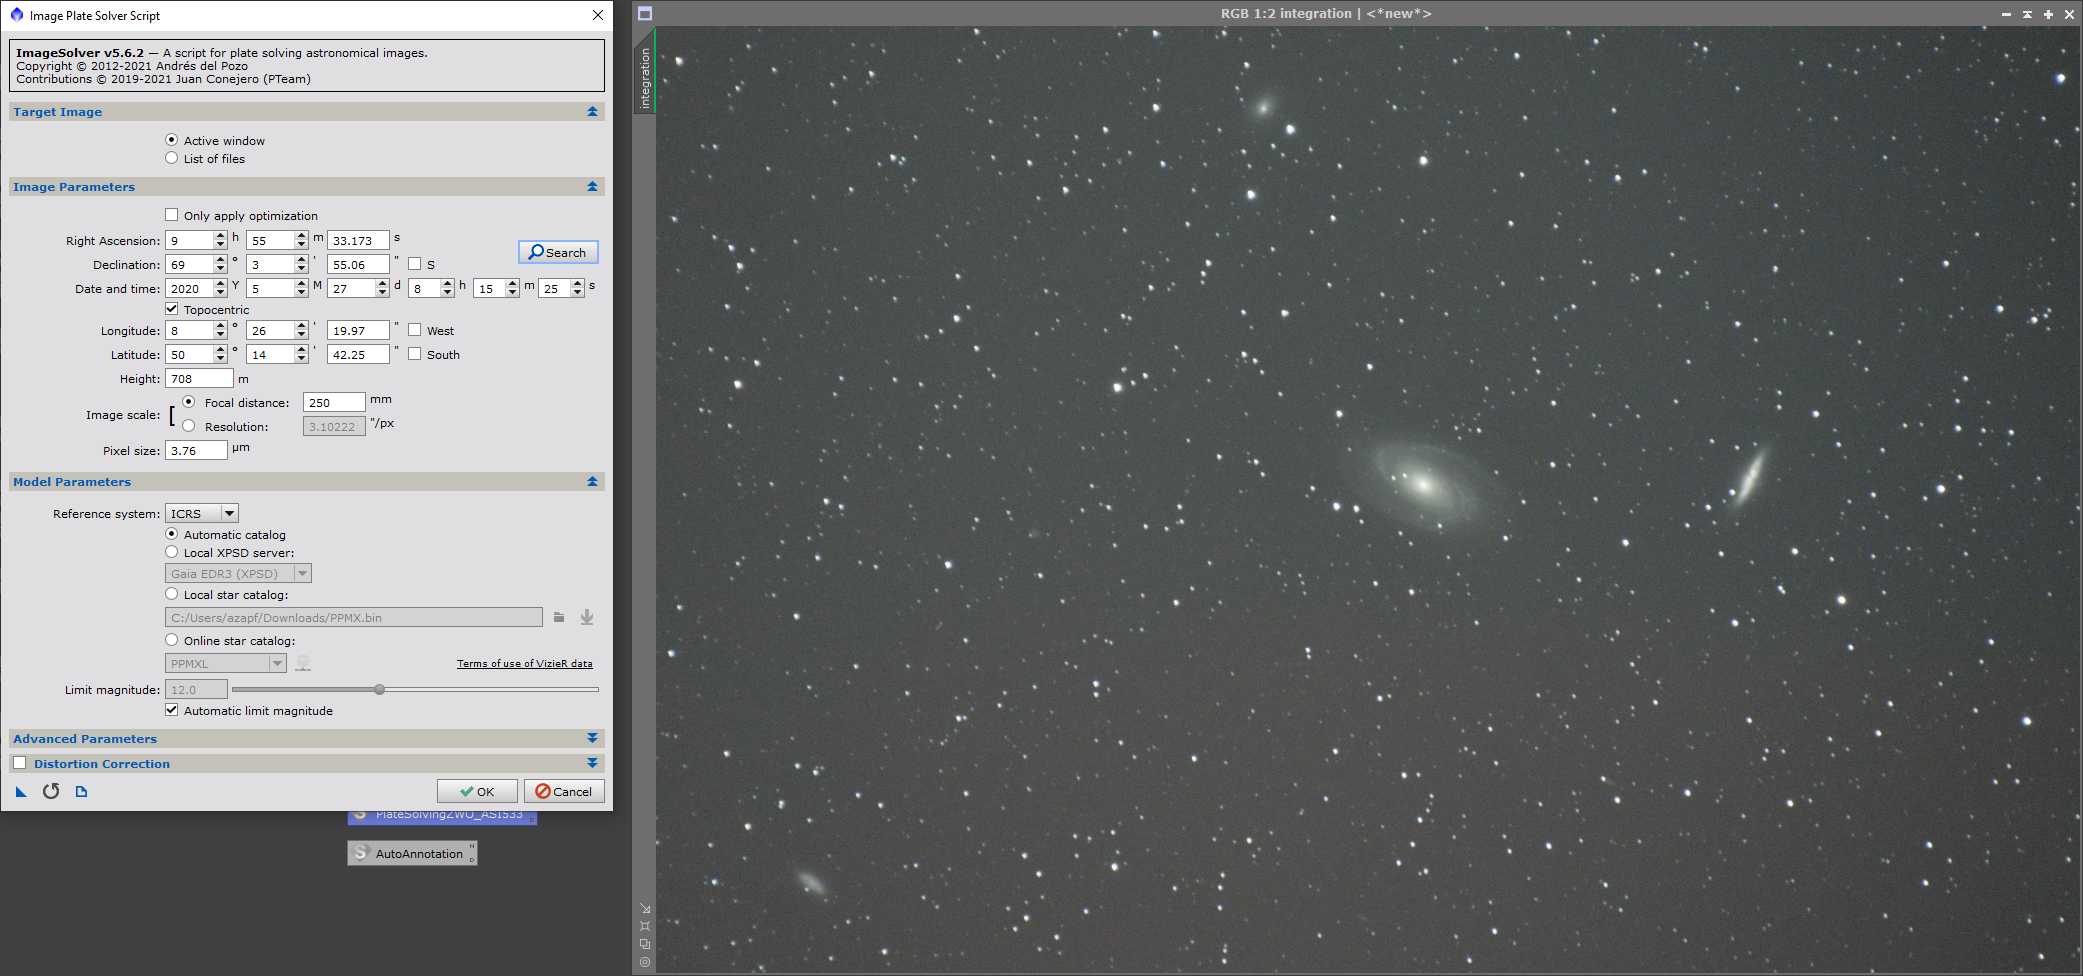
It always pays off to have a look at PixInsight’s Process Console window:
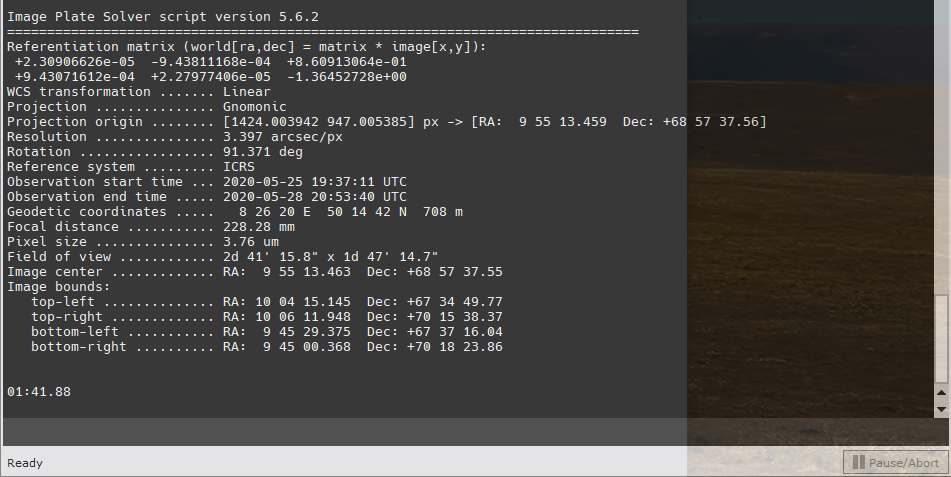
Here, we are getting some valuable information about the image:
- The Resolution (3.397 arcseconds per pixel)
- The Rotation (91.371°),
- The Observation Time (taken from the first and last stacked image)
- The calculated Focal Length (228.28 mm)
- The Field of View, and
- The Image Center coordinates as well as the corner coordinates
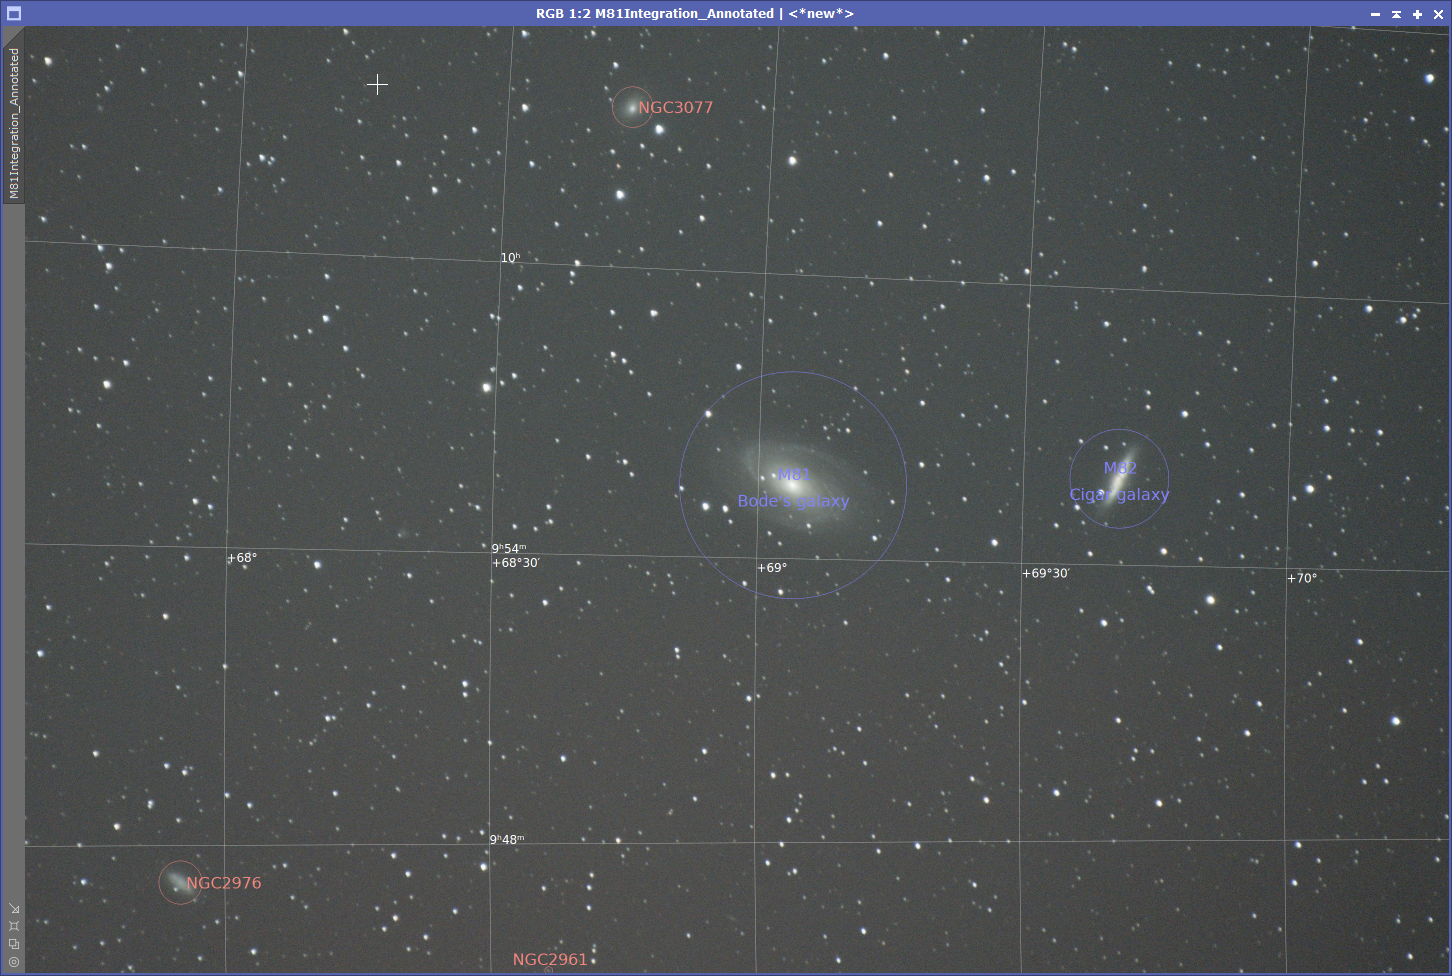
If you can platesolve the image, you can annotate the image:
The rest is “cleaning & adjusting” – in the following order:
- Background Extraction
- Background Neutralization
- Photometric Color Calibration
- Noise Reduction
- Stretching
And if one wants, PhotoShop and some additional filters can also be applied, all a matter of “taste”.
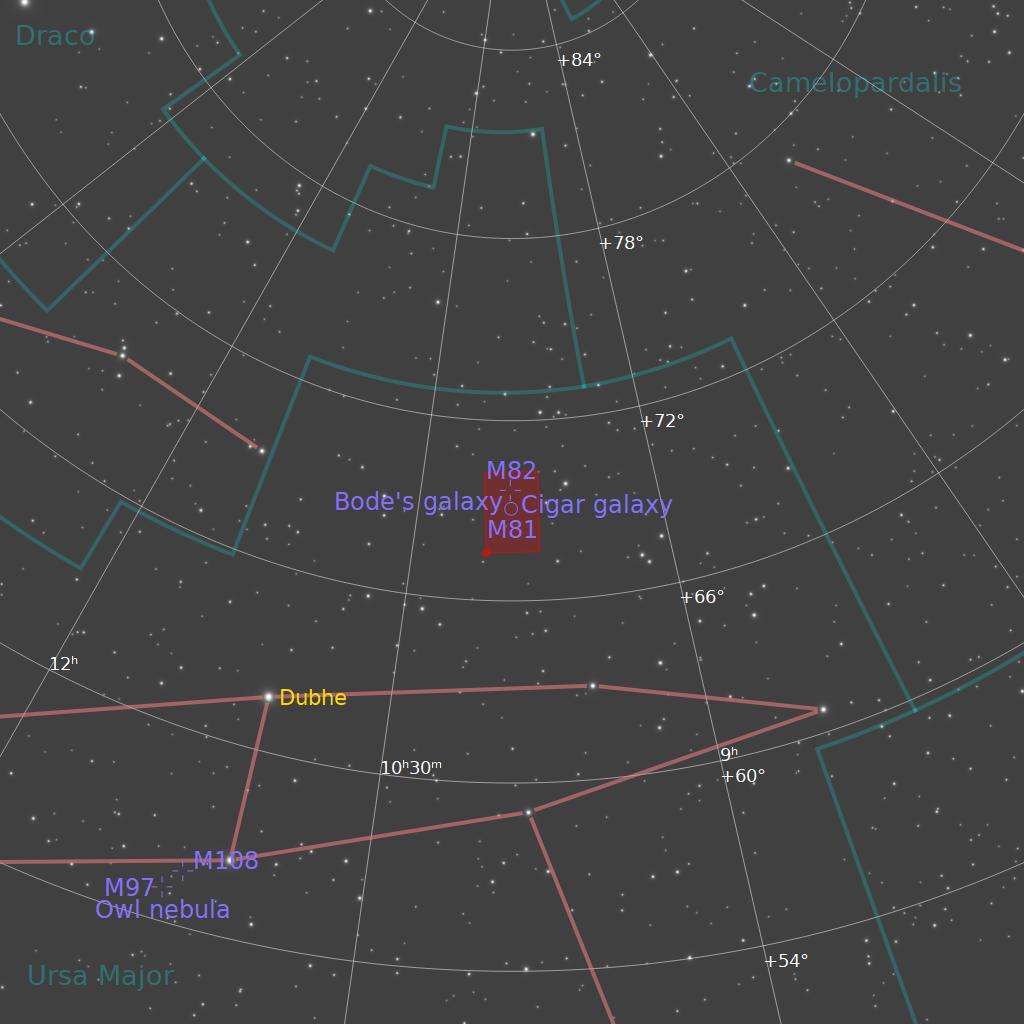
So, last thing to do is some information just for reference – first, the finding chart so you know where in space you need to look at:
Then, some information on the four galaxies contained in this image:
- Messier 81 (also known as “Bode’s Galaxy”) is a grand spiral galaxy some 12 million light-years from us. It measures roughly 90.000 light-years across.
- Messier 82 (also know as “Cigar Galaxy”) is a starburst galaxy of approx. 37.000 light-years diameter.
- NGC2976 is also a spiral galaxy, approx. the same distance than M81 and M82
- NGC3077 is a small irregular galaxy, also approx. 12 million light-years from us.
All four galaxies are members of the M81 group which contains total of 34 galaxies in the constellations Ursa Major and Camelopardalis.