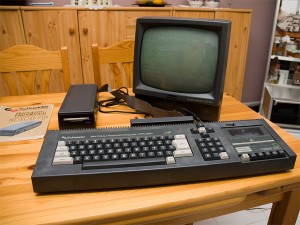
With the CPC 464 cleaned up and still working, I took the external Floppy Drive off the shelf (yes, ebay as well! – 43,60€, it seems to be pretty rare…) and connected it to the CPC. All switches on, all lights green…
…but the typical Disk-Drive Extensions to the instruction set are not present. Hm… my first guess: either the contacts on the mother board are more eroded than they look or the connector in the connector pack is a bit weak. After a couple of disconnects / reconnects, the drive is now recognized but it is still an area to look into later.
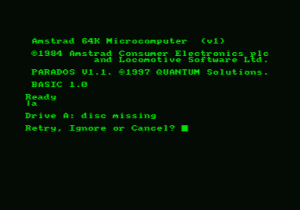
 So, time to load a disk (also eBay, two disks for 0.99 Brisith Pounds) and switching to the drive (I remember the syntax: |a) and yes, there it is… but trying to read anything from the disk only results an error: Disc missing… more “hm’s”…
So I peeked and poked the Internet a little bit, and it turns out that the DDI-1 Floppy Drive has a weakness – at least these days, some 25+ years after production: the drive belt that is transferring the power from the motor to the spinwheel turing the disc tends to wear out and often requires replacement.
 A friend in the office had old drive belts for cassette players at hand so I opened up the DDI-1 Floppy today and replaced the belt.
Caution: you are working on an electrical device that is connected to 220V Power – unplug the device first and do not touch the transfomer area in the back – not even after you unplugged the device!
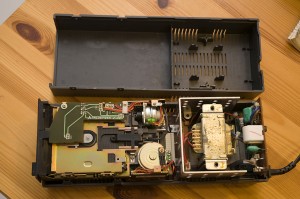
Now, turn the DDI-1 upside-down, then unscrew the two large screws on the bottom as well as the four screws on the left and right side of the drive. Turn it back into an upright position and carefully lift the top cover.
Next, detach the cables connecting the actual drive with the lower board in the case – there are two connectors that can be simply released and one grounding wire that needs to be unscrewed. Lift the drive unit out of the case and turn it on its side.
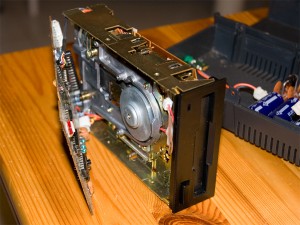
 Then remove the four screws holding the lower board in place. Keep the drive on the side to avoid and pieces falling from it! You may want to detach the connector going to the front of that board to gain better access to the area of interest.
You can now see the drive belt. Remove it and replace it with a matching one. If you cannot find an exact match, try one that is slightly smaller.
When done, re-assemble the device and put everything back in place. You may now plug the drive back into the power outlet. Switch on the drive and ensure that the lights are on. Then switch on the CPC464, put in a disk and try again – my drive is now working just fine (so I can continue bidding on eBay on additionan disks – they are rare 3″ Discs not produced anymore so eBay is the only chance to get them (as far as I know))

