As mentioned in my previous post, that CPC 464 I bought on eBay has long seen its best days – though still working, the entire PC more resembled a dustbin than a classical home computer, the connection to the monitor is all but shaky and the only positive thing about it is the fact it only cost me 20€.
Why? Because at 20€, it is not a big loss if it will no longer work after the procedure it is going to go through: a total disassembly and cleansing. My hope is though, that the CPC – when built in the mid-80s – was nowhere close to the filigran design of todays computers. I expected it to be of rather strong (some would say “crude”) design, more likely built to last and I kept my fingers crossed it might survive the procedure.
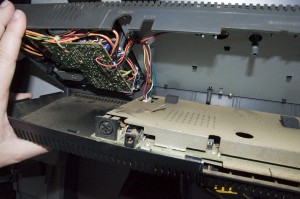
 To take the CPC apart, one needs to turn the CPU/Keyboard Unit upside down and remove six screws. You can then open the case but you need to be careful because of the three connectors running from the upper half to the lower half – so don’t overstrech it!
The three connectors can easily be detached – the one close to the tape deck is a solid plastic block, easily removed. But you wanna be careful with the two coming from the keyboard, they are plastic strips with contacts only – not solid connectors.
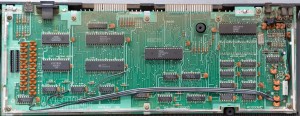
 Once you have the two halfs separated, you need to decide which one to work with first. I picked the lower half because it is holding the mainboard. Unfortunately, the CPU section is covered with a thin metal cap which is poorly sealed with a set of soldering points. Most of the points on my CPC had been broken by time – the two remaining ones I cracked carefully with a screwdriver (if they would have been any more solid, I would have carefully cleaned them and then used the soldering iron.
 Mine seems to be an older board but I could not find the exact details (yet) – it carries a 1984 Copyright with the Part Number Z70200 (MC0008C). I will have to find out about that one a bit more later.
The whole mainboard has a solid, greasy film of dust on it, resisting to any “soft” cleaning approaches such as pressurized air. The only way of getting rid of it was 100% pure alcohol – I used Isopropyl alcohol and cotton wool.
Eventually, that did the job and the fact that Isopropyl alcohol is evaporating quickly without leaving any traces behind made me hope the board will survive the rather drastic method of simply bathing (well, OK, not bathing but applying large quantities) it to get rid of the dirt.
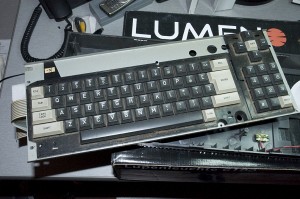
 That done, my attention was drawn to the keyboard next. The shape the keyboard was in when getting the computer was nowhere near “I want to touch that” – I had the feeling that the last (and possibly only) cleaning it ever received was also the very first one in the factory.
One good thing about the CPC464’s original design is that it had been built to last: each key can easily be detached from the keyboard, cleand and reassembled later – try this with a modern day keyboard any you may not succeed – the CPC’s keyboard, however, was disassembled, each key cleaned with nail polish remover (take one that does not have acetone!) and put back into place. The result was astonishing – the key are shining like on their first day.
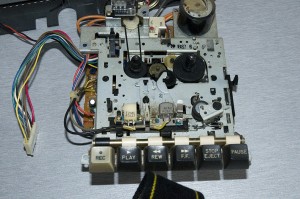
 Next candidate to worry about was the data recorder – an oldfashioned, music-cassette device to save and load programs.
Same thing here – if one looks at the original images, you can see the dust and the grease locking up the device – keys could be pressed but not released, the dirty of all the years finally taking over.
With a couple of screws removed, you can take the entire device out and clean it up. You don’t even have to worry too much, like many old tape decks, this one is more than capable of handling a decent cleaning procedure.
Last thing to clean is the actual non-electronic parts such as upper and lower plastic cover and the metal lid that is enclosing the CPU section – warm water, soap and a bit of rubbing does the job. Help with a good amount of Isopropyl Alcohol later – but do not use nailpolish remover! They keys can handle it, the case not… I might have to give mine a new spray of gray color if I am ever in the mood to do it…
After everything has been cleaned to a reasonable level, the procedure of assembling the pieces back is even faster than taking it apart – now you know where the screws go and if you have been clever, you had taken a good set of pictures breaking it up – they can now help putting it back together.
With all pieces back in plance (and the one screw left that I cannot remember where I had taken it from), I connected the monitor back to the CPU and fired it up…
