
In the old days of physical films, the ISO Value indicated the film’s sensitivity. And ISO 100 film was the standard for daylight photos, ISO 400 was considered superior in terms of sensitivity and 1600 ISO was about as much as one could get (and pay).
The world changed with the DSLRs – the ISO value survived but got a different meaning. While a higher ISO value on a physical film means that the film itself differs, your camera’s sensor will always stay the same, regardless of the ISO Level you set the camera to.
The ISO Value is nowadays defined by a standard, maintained by the International Organization for Standardization. Guess what, they are abbreviated ISO. The standard in question is ISO 12232:2019, indicating the standard’s number and the year it was last revised.
Taking a photo – in the analog world as in the digital world – is all about signal collection. The signal – the “light” – is what we want as much as we can get. Unfortunately, there is a second player called “noise”. This is what we want as little as possible. Non-mathematically spoken: comparing the level of “signal” to the level of “noise” gives the Signal-to-Noise-Ratio (SNR). The higher, the better – the more light per noise, the better the image. Theoretically.
A little example on ISO Settings
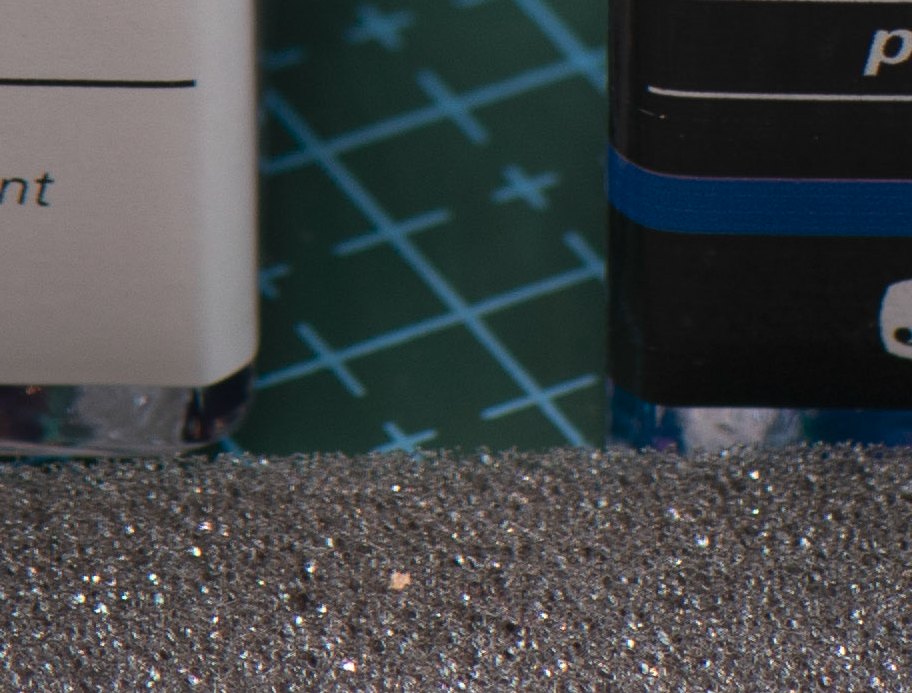
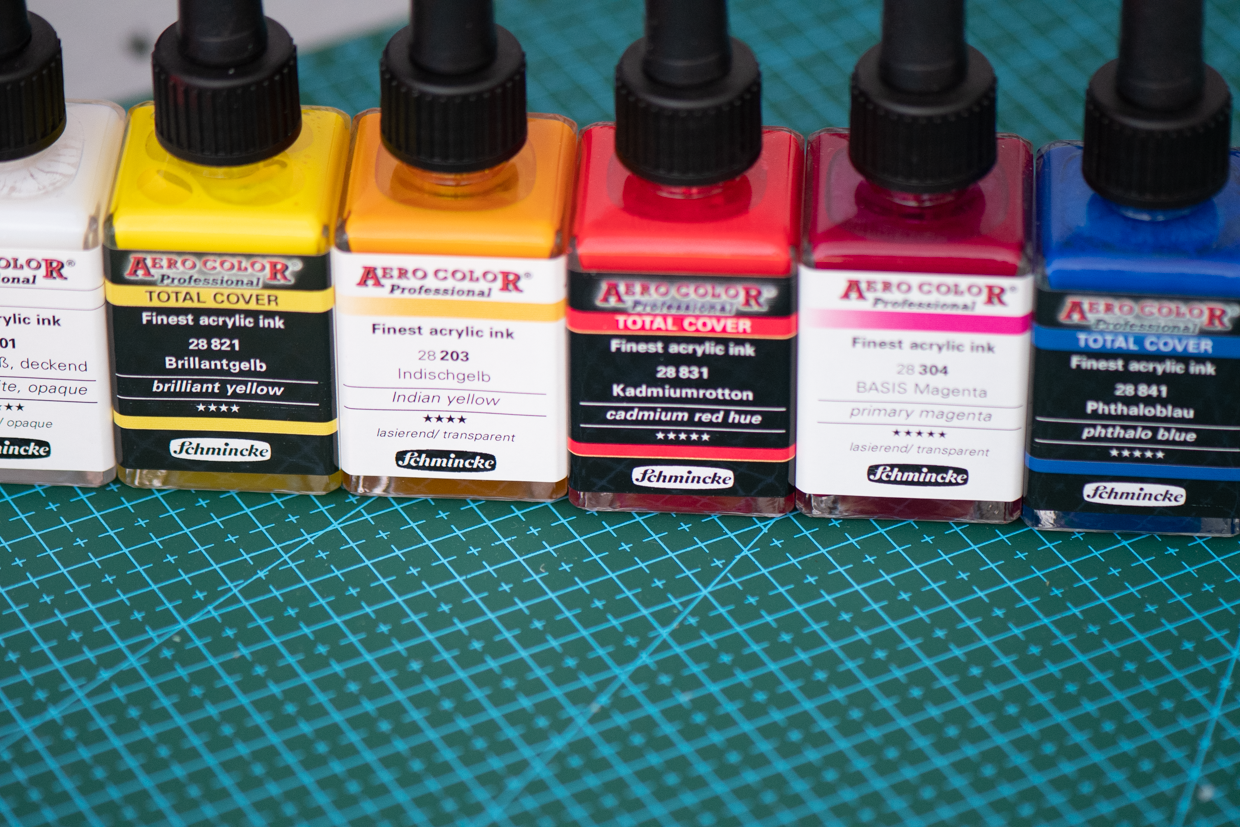
The image above is taken with my Nikon D7500 at ISO 100. All in all, it is a decent shot, the colors are OK, the details on the foreground are acceptable – not much to say about an undeveloped image.

What you are seeing in the image is “noise” – it would be a quick assumption to say “the higher the ISO, the more noise”. That is because the ISO value was not the only parameter that was changed in the image: the camera calculated different exposure times to create evenly balanced images.
“Flattening the Field” – ISO Value as the only variable
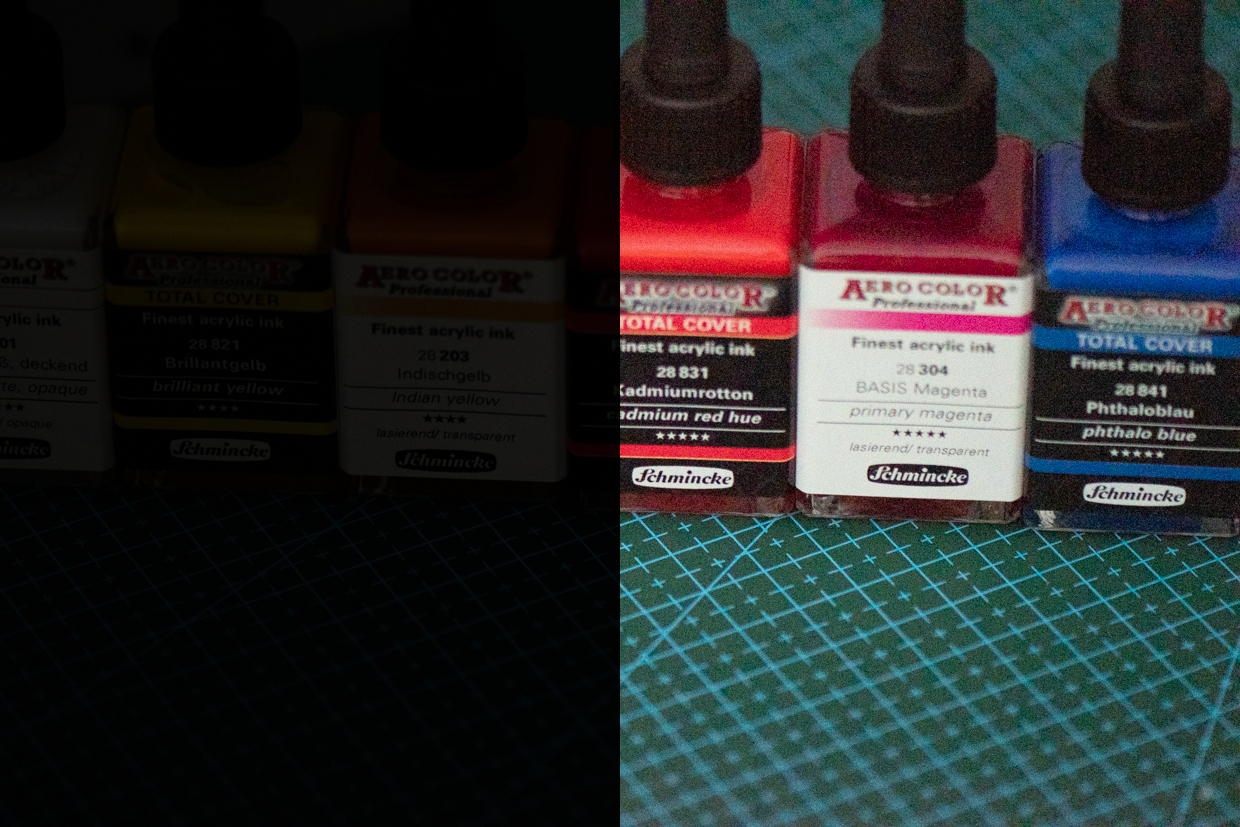
To flatten the field for the ISO Value, I have set the camera to manual mode. The aperture was set to f/3.0, the exposure time was 1/40s. All three photos have been adjusted in Adobe Lightroom to show an equal exposure (otherwise, the first one is too dark, the second one is OK, and the last one is slightly overexposed).
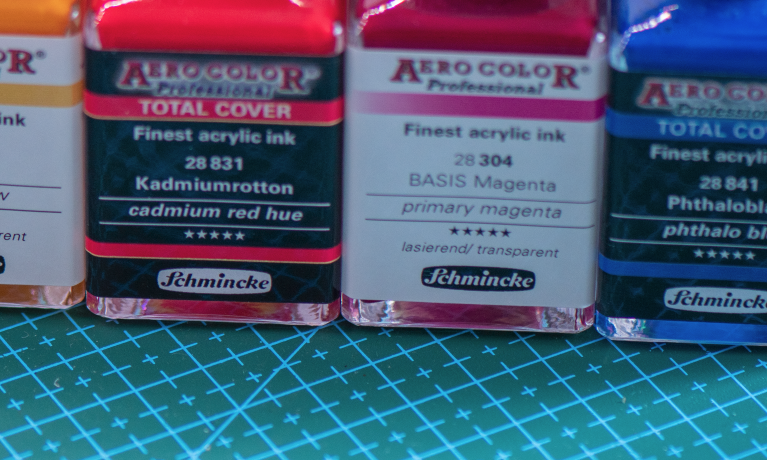
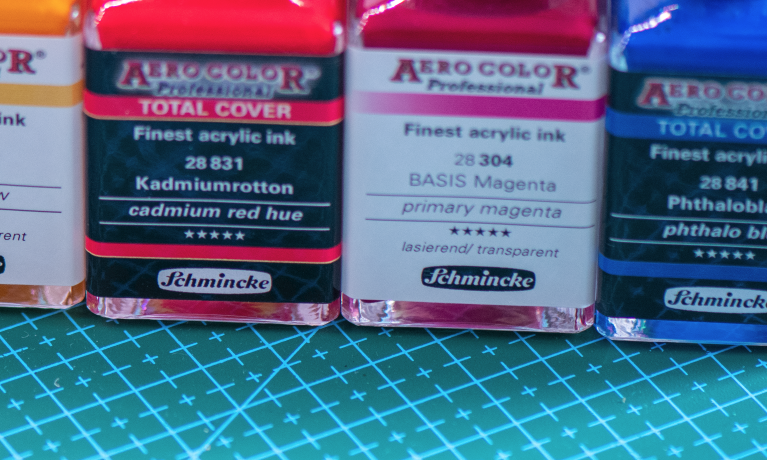
Eh… they do look alike, more or less? Well, even a photo taken at ISO 12800 does not make much of a difference although the noise in the fine details is more visible.
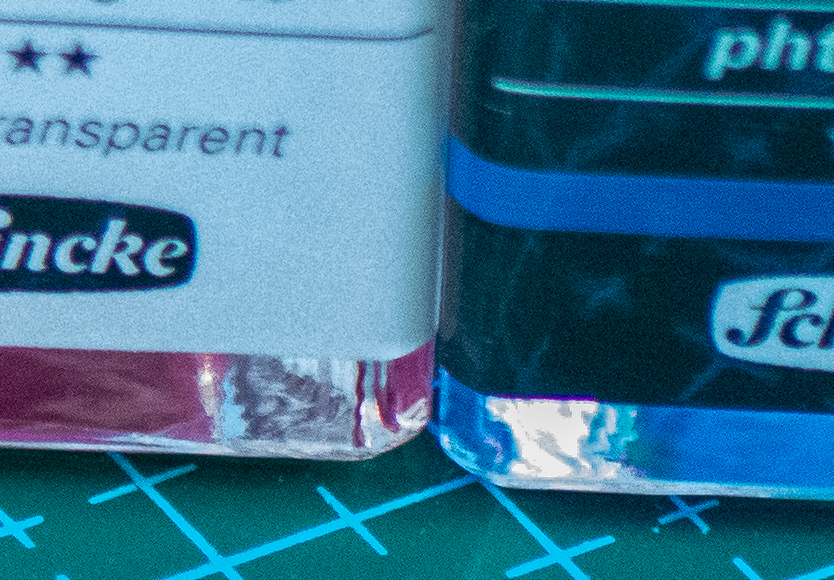
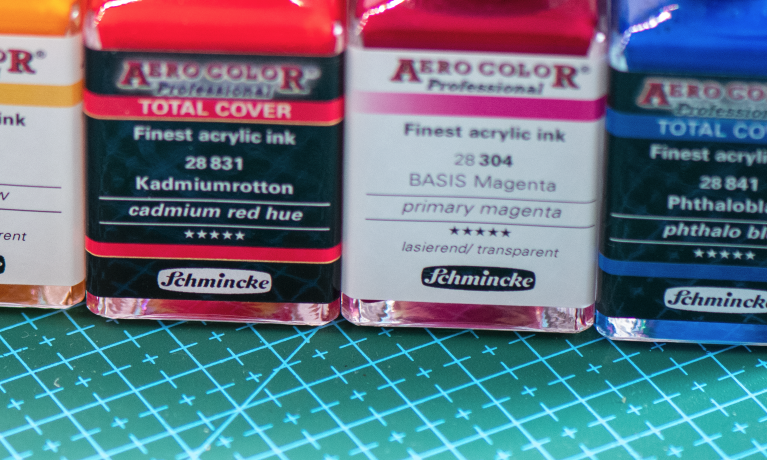
One thing that did suffer from the high ISO Value, combined with the relatively long exposure time is the dynamic color range of the image – the histogram shows more or less similar curves for the first three exposures, the (rather overexposed) fourth short has lost information – we simply overloaded the sensor…

Conclusion from ISO Hopping
Apparently – at least with the Nikon D7500 – changing the ISO Value does not make a difference, at least not when you are staying in a reasonable range between ISO 100 and ISO 3200. Neither is the camera adding significant amount of noise nor is the dynamic range dropping too much. At the very high ISO Settings like ISO 12800, the sensor is “overloaded” for very bright areas and the color details are just blown out and appear all white.
So if changing the ISO Values does not really make a difference – what does?
Same ISO, different Exposure Time
The aperture of the lens will not make a difference – and in astrophotography, we are almost always are using the best f-values. So let’s find out about exposure times – I did set the camera to f/3.0, ISO 1600 and an initial exposure time of 1/60 second. I added further shots at 1/40s, 1/20s, 1/10s, 1s, 2s, 4s, 8s, 20s, and 30s. Some of them are underexposed, others are overexposed. But one thing is sure: they have recorded the “signal” (the light in a difficult low-light situation) in different quantities.

Easy to see that this first shot has captured more than there is initially assumed but when blowing up the exposure, we can see a lot of noise – and little signal. To the SNR is pretty poor. The next sample is the image taken at 1/10s – same ISO, same f/3.0.
This image is much better – there is still noise but there is much more signal – the SNR is not too bad. The last sample is the well-exposed picture – no adjustment in Lightroom.
Unfortunately, the last one is a good example for “this world” but a poor comparison to the images we are taking in astrophotography. So my next question is: how can we better manage with the unbalanced images.
Can stacking two images beat one image exposed twice the time?
The only possible way to add more signal to our image is by capturing multiple images and then “adding” the values. The process is called “stacking”. And it is not just “adding” up but I am simplifying it here.
My assumption is: my exposure time needs to be long enough to make the sensor react to the signal (and for the signal to not get lost in the background noise) – but because I cannot endlessly expose (guiding, noise, etc.) I will simply stack images. For a sample, I will take 10 shots taken at 1/10s and I will compare them to a photo taken at 1s.
So the above image does not look bad – not at all. One effect of stacking multiple photos into one is that by the math performed during stacking, noise is leveled and becomes less obvious. And here is the comparison shot of 1s, single shot.
The images are not of equal quality – the stacked one has slightly lost detail in the dark areas because that information was never really recorded by the short exposure. But other than that, both images are producing an equally fine image. The histogram of the single exposure shows the better dynamics in the image but the overall result is fine, considering the overall light situation.
Conclusions from my side
The experimental session has shown:
- Setting a higher ISO does not allow for reducing exposure times – that only results in a poor Signal-to-Noise-Ratio!
- Setting a higher ISO does also not mean that the “noise” is increased – higher ISO might produce better results for the same exposure time, you need to test with your camera.
- Stacking a number of exposures of a given exposure time comes close to a single image taken at the total exposure time but the single-shot approach has slightly more details and vibrancy.
- When taking shorter exposures, they need to be long enough to allow the faintest details to be registered by the sensor (and not being lost in the background noise). The light may have reached the sensor but the electronics have lost the signal and nothing can return it!
Personally, I will put up the following for my next astrophotography session:
- I was fine with ISO 1600 but I will try ISO 3200 in my next session. If that goes well, I will try ISO 6400 but I am ready to fall back to what looks best. At some point, it will either be the degrading SNR or I will blow out the brightest points (aka “Stars”)
- I will try to extend my exposure time – I am currently working (with the lens I am using and the mechanical guidance) at 45s exposures which I think might be a bit on the short side…but that is owing to my mechanical guide, an Omegon LX2 Startracker
- And finally: more images (or subs) are needed to get a better result at stacking.