
In my previous post, I was showing you the installation of my Ubuntu 12.04.3 Server and I said I wanted it primarily to host a PostgreSQL Database.
Deciding on the Version of PostgreSQL
If you install PostgreSQL during the installation of Ubuntu, you will end up with a bundled PostgreSQL 9.1 installation. The current version at the time this article is written is PostgreSQL 9.3.1. You can always check the current state at the PostgreSQL Website.
So how do we get the latest version of PostgreSQL installed? Being a Windows user, I am used to download an installer and run it on my system – the LINUX world is different though, the installation in many cases is performed via the package manager… so let’s hope this also works for my installation… but before we do this, we make sure our Ubuntu Server is no longer using DHCP but a static IP Address…
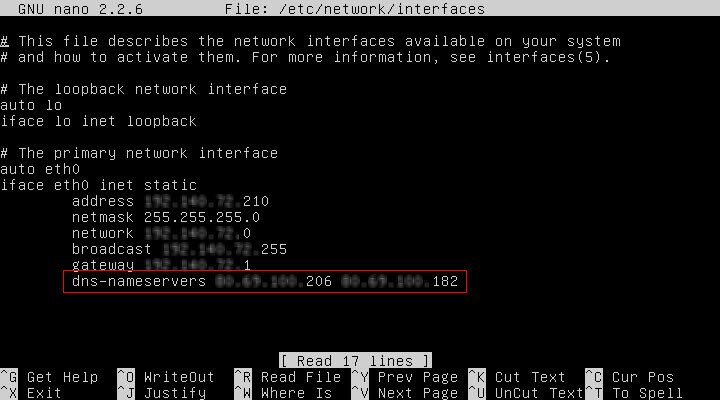
Giving the Ubuntu Server a Static IP Address
Luckily, I have done this before – for my Raspberry Pi. But Linux is Linux and the way of assigning the static IP for the Ubuntu Server is the same… except for one thing: with the Raspberry installation, I got away without having to specify the DNS Name Servers – my Ubuntu needed that:
Once done, make sure the IP Address Configuration and routing works by pinging a well-known URL:
ping www.google.com
You should receive a return…
Installing PostgreSQL
The PostgreSQL web site says installing PostgreSQL is as easy as issuing the following command:
apt-get install postgresql-9.3
But reality is a bit different – it is not that easy. As I mentioned earlier: the version of PostgreSQL bundled with this version of Ubuntu is Version 9.1 – and we need to tell the package manager, where to get the latest version from.
For my release of Ubuntu (12.04), this requires me to create the file /etc/apt/sources.list.d/pgdg.list with the following content:
deb http://apt.postgresql.org/pub/repos/apt/ precise-pgdg main
Afterwards, the repository signing key needs to be installed.
wget -O - https://www.postgresql.org/media/keys/ACCC4CF8.asc | sudo apt-key add -
So you either know what you are doing – or you are just brave… or both.
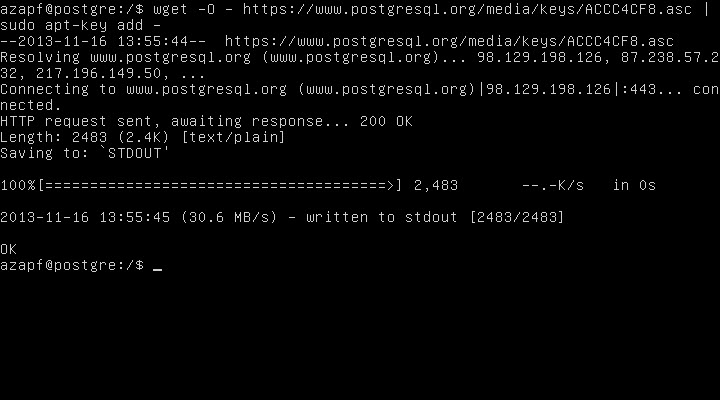 But I think, an explanation is serving everybody: this is actually executing one command (wget) and piping the result into a second command (apt-key) which is executed under root privileges (sudo) and supposed to add a new repository key (-add).
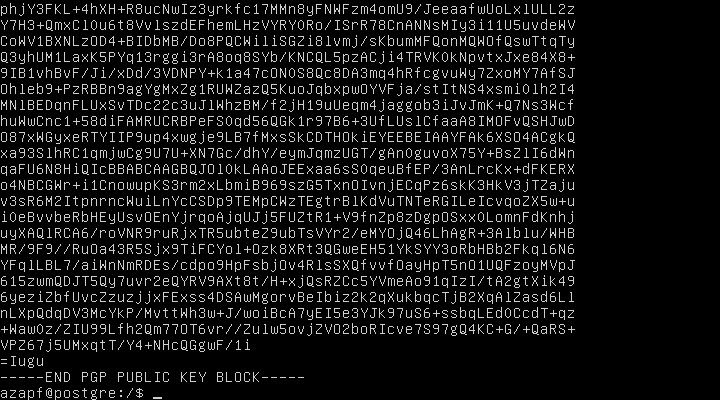
If you would just execute the first command (wget), you would actually see the PGP Public Key Block displayed on screen (which is in the chain of commands then passed on).
 With the Repository Key added, the last thing we need to do is making sure that the package manager information files are up to date.
sudo apt-get update
will update the package manager database. And with that, the following command will finally produce a result:
apt-get install postgresql-9.3
The new package is found and the package manager will request permission to install it.
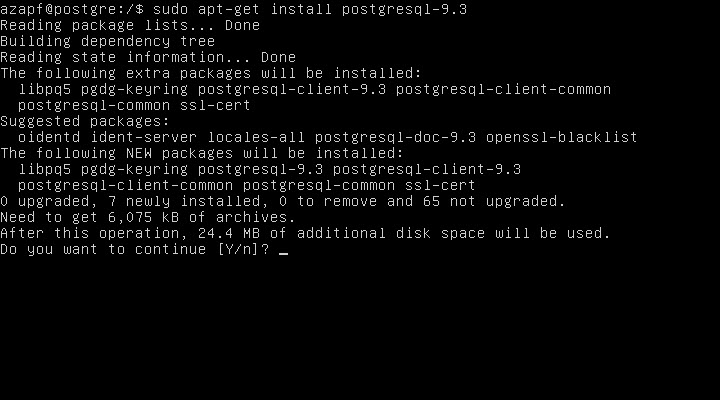 So let’s allow the installation and see what will happen…
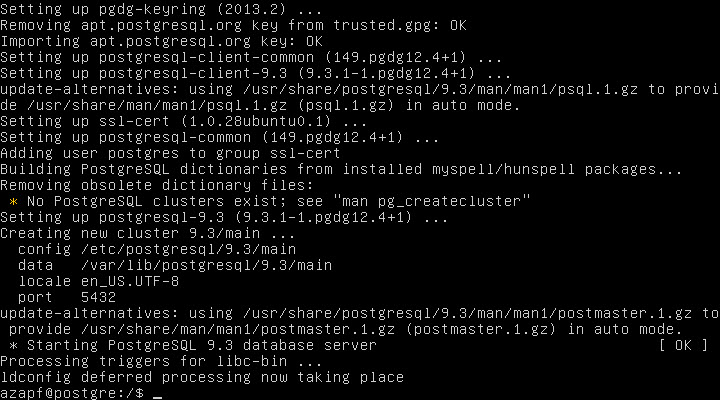 After a few minutes only, the software is installed and you can see the line
* Starting PostgreSQL 9.3 database server [ OK ]
towards the very end of the output.
Allowing Access to the Server
The PostgreSQL Server is actually installed and even running – but that does not really help a lot because we cannot do anything with it (yet).
Facing the truth, from an end user perspective, I am still a Windows boy – so I would like to access my data from my Windows Desktop and also do the database administration from there. The tool of choice if pgAdmin which I have already installed. But before we can use it to connect to the database server, some more work has to be done.
Setting the PostgreSQL Server’s Admin-Password
By default, the standard admin user for the database server – postgres – does not have a password set. Thus, nobody can use this user for a remote connection.
In order to set a password, we need to start PSQL, the SQL Commandline Interface.
sudo -u postgres psql
This will create a new session and will take us into the PSQL environment:
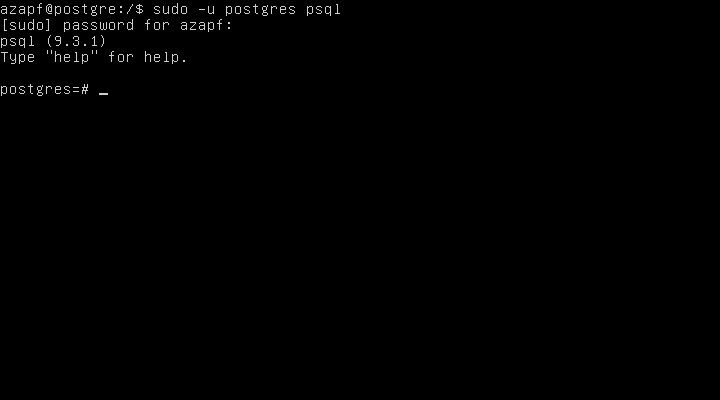 Noticed the new prompt? postgres=#? Issue the following PSQL Command to set the password:
\password postgres
Then, type the new password twice. You can leave the PSQL environment by issuing the \q or \quit command. Now, the postgres user has a password but we are still unable to connect remotely – and that is owed to the fact that, again by default, the database does not accept external connections.
Opening up for Network Access
This is handled via a configuration file – /etc/postgresql/[Version]/main/postgresql.conf is the file in question. Please note the exact path depends on the version of PostgreSQL installed!
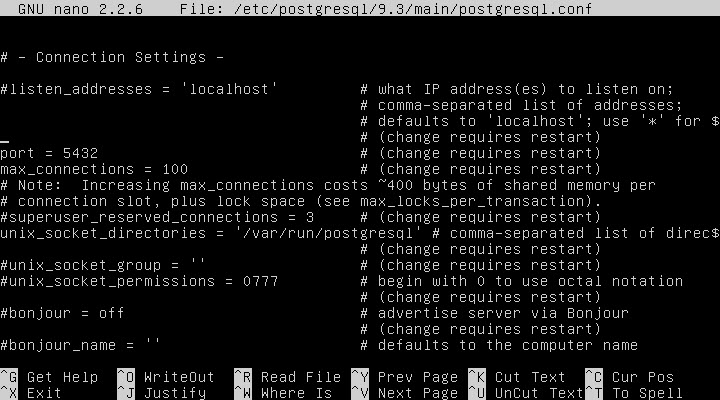 The configuration file actually contains a ton of interesting settings but the one we are currently lookingafter is the listen_addresses entry. As you can see, it is currently set to “localhost”, meaning that the database will only accept local connections. Let’s change this to “*” to allow listening on all network cards… and don’t forget to uncomment the line! Save the file after applying the change. But we still got work to do – we still cannot connect to the database 😉
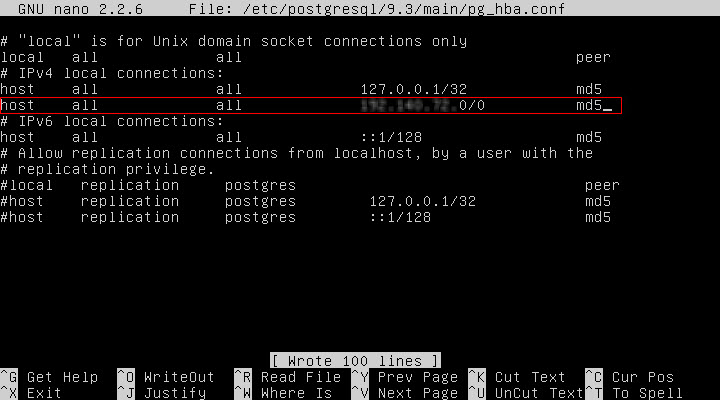
Authentification
With the above change, we will be able to connect to the database but we would not be able to authenticate. This is handled with yet another configuration file: /etc/postgresql/[Version]/main/pg_hba.conf.
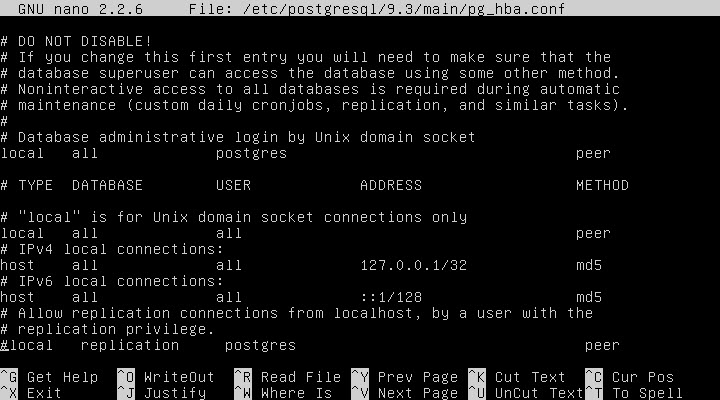 Note the various “local” and “host” lines at the bottom? They define who can access which database from where and by which method. In order for me to remotely connect here, I will have to enable my own network. The line is question is
host all all xxx.xxx.xxx.0/0 md5
where the xxx.xxx.xxx need to be replaced with the correct triplets of my IP Address Scheme.
 After all these changes, I don’t bother with bouncing specific services – I just reboot the entire Ubuntu box…
sudo reboot
Connecting pgAdmin III to the Database Server
The last thing to do now is to fire up the installation of pgAdmin III (see above) and connect to the server:
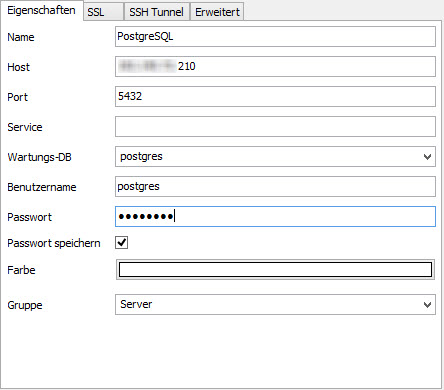 It uses the static IP Address we have defined first, the port we have seen in the configuration file, the user and the user password we have configured and the network in between to connect. If everything goes well, we will see the connection information in the pgAdmin screen:
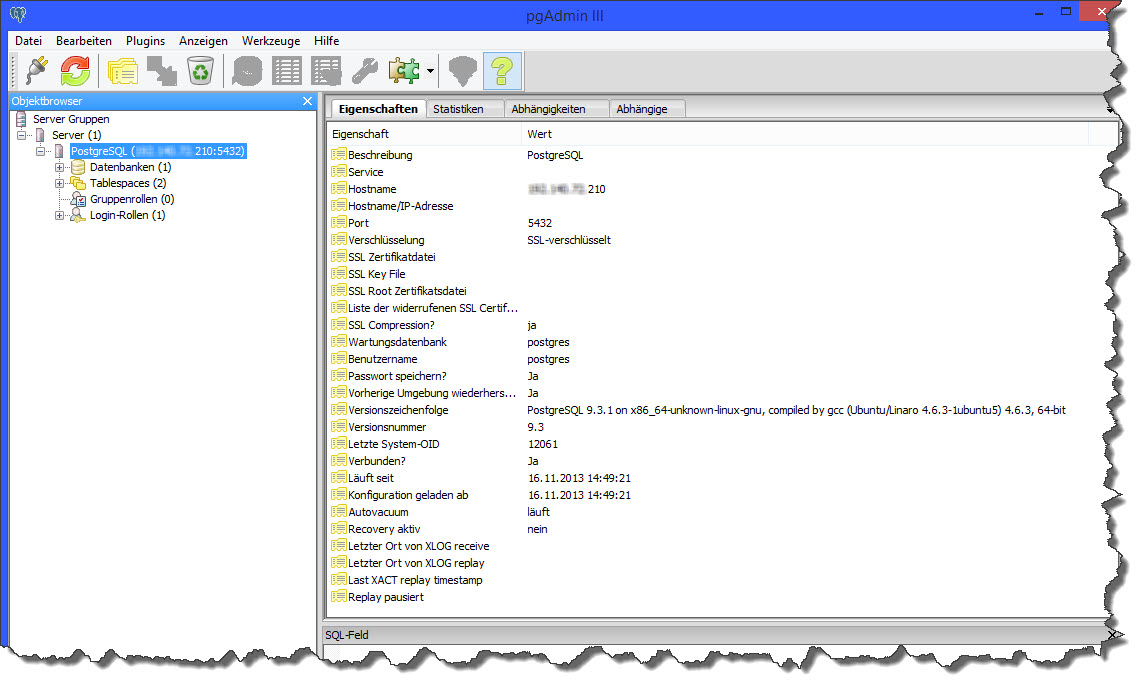 Hooray – Ubuntu 12 with PostgreSQL 9.3 and pgAdmin III up and running… now, we can start working with the database server!