
With the Raspberry Pi now on WLAN and the first impressions of the Nikon D90 as time-lapse device, here is my first improvement.
The camera is back out on the balcony, I have started the Raspberry Pi connected to it and I terminated my autorun script from last night. Last night, I took pictured and stored them on the Nikon’s SDCard (because I did not have any connection to my Raspberry). Now, I would like to change that because I would like to be able to download photos from the Raspberry Pi while the camera is still connected and in operation!
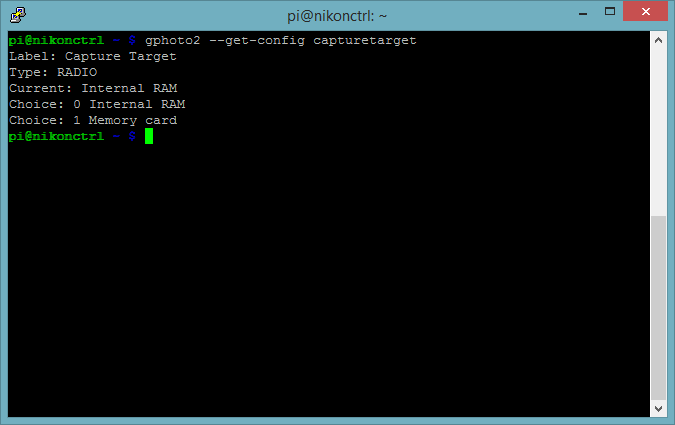
Let’s see where the D90 is currently storing images when triggered by gPhoto2:
gphoto2 --get-config capturetarget
The current storage location is the camera’s internal memory…
 Now, that is not what we want… but funny enough, the switch we are looking for (to store the captured image into a local file) is elsewhere:
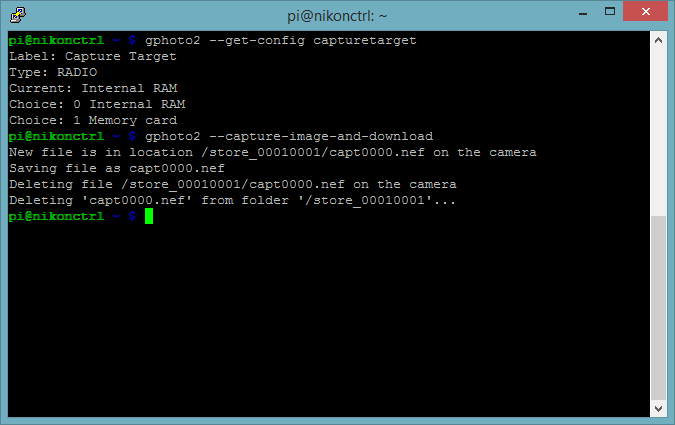
gphoto2 –capture-image-and-download
This will take a while – it takes the image, then downloads it to the Raspberry Pi.
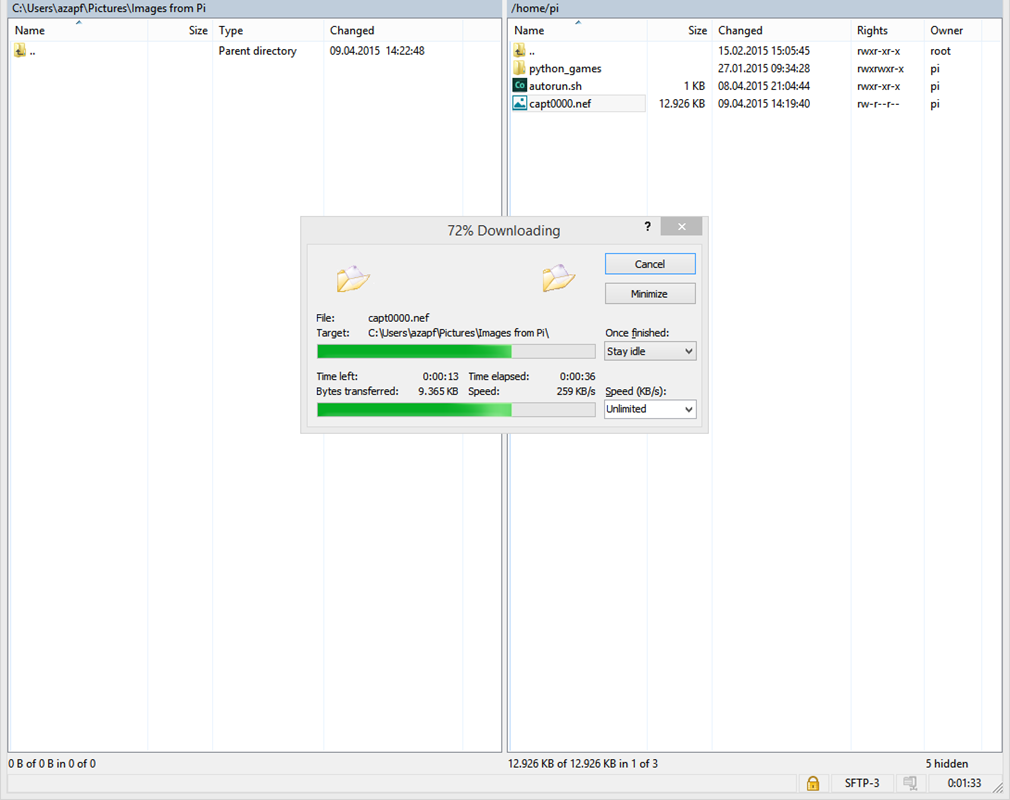
 By default, the image is stored in my current directory – which accidentally also is my home directory. Using tools such as WinSCP, I can now copy the file to my local computer… not really speedy via WLAN but it works.
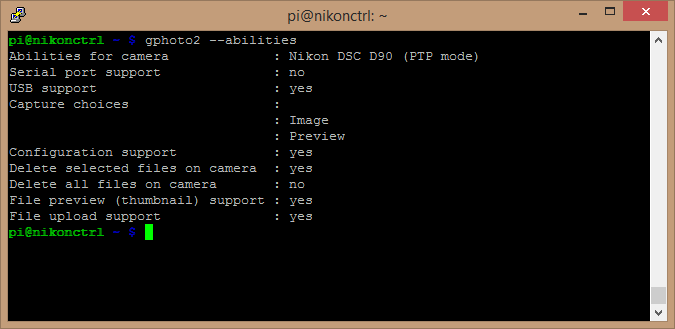
Now, there are a couple of other things to explore than just taking images. Let’s first find out what my Nikon D90 supports (via gPhoto2):
gphoto2 --abilities
So this is what gPhoto2 supports me and my Nikon D90 with:
 Next thing I am interested in is what settings I can control remotely – so far, I have only manipulated the image storage location on the camera – but there should be more:
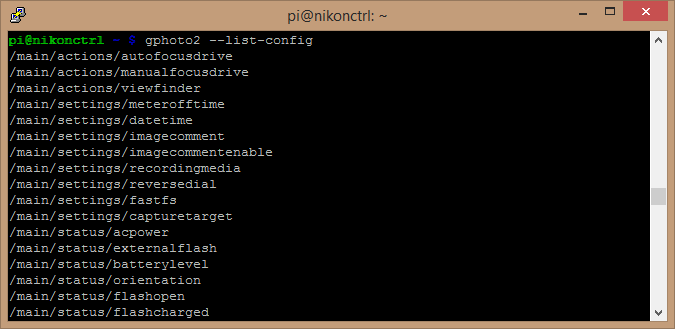
gphoto2 --list-config
This gives a long, long list of configuration values to deal with:
 Now, I might be interested in the details of a special value – say, I want to know the current status of the Battery (Property: Batterylevel)
gphoto2 --get-config Batterylevel
It always takes a moment to respond – but here is the current battery level information:
 How about information about the current ISO Setting (Property: iso)?
gphoto2 --get-config iso
And the result is:
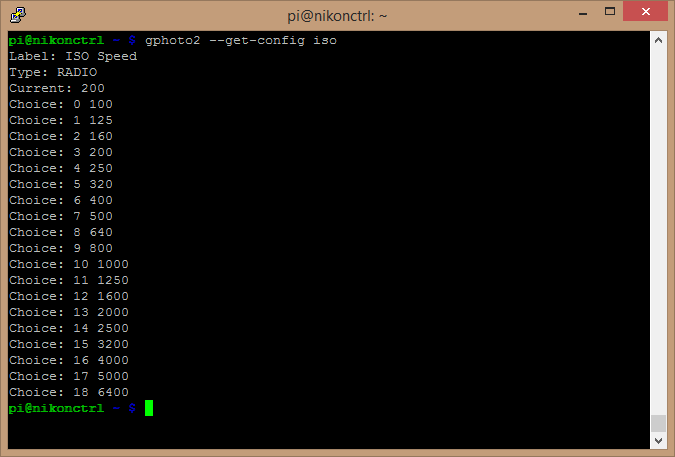 So not only tells the camera it’s current setting – it also tells me what choices I got when I want to set the ISO Value via the command line… pretty cool!
It even is possible to ask the camera for the available focal length (property: focallength), shutter speed (property: shutterspeed in seconds, shutterspeed2 in fractions of a second) and many many other settings.
So there you go – enough settings to spark ideas, a “life” connection to the images taken… what you make from it, is up to you.
To get back to my time-lapse project:
gphoto2 --interval 30 --frames 200 --capture-image-and-download --filename "%Y%m%d%H%M%S.jpg"
is creating the next time-lapse, this time with the images stored on the Raspberry Pi. Next improvement: copy them to my NAS once they are taken… or to a large USB Stick, that also goes onto the Raspberry Pi (but I’d need a current model with four USB Slots or an USB Hub…)
Now, I have taken a series of 200 Images with the aforementioned command – here is the result.
https://youtu.be/ifLlxph3jJc
For another set of night photos, one thing to consider is the fact that I want my stars to be “points” rather than “lines”, which is caused by the rotation of the earth. Obviously, the longer you open the shutter, the more Earth rotates and that creates these lines…
tmax = 500 / (Focal Length * Crop Factor)
is the formula that gives you the maximum exposure time if you want to keep the stars as points. For my Nikon with its 35mm Lens, that is
tmax = 500 / (35 * 1.5) = 9,52 s
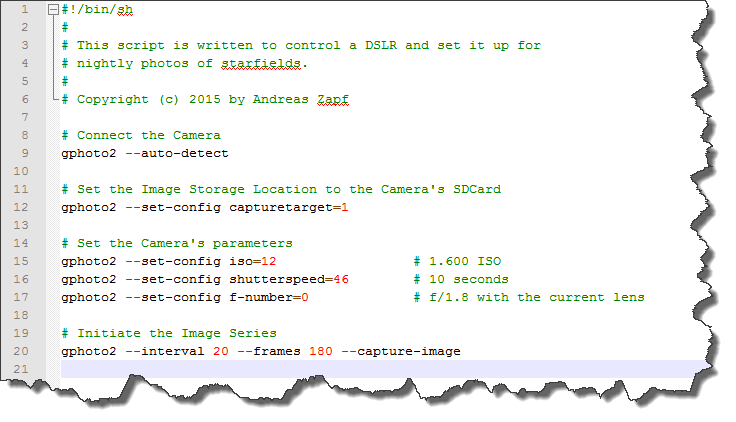
Which means, I am going to work with a 10 second exposure time, 1.600 ISO and an aperture of f/3.5. Last night, my photos were taken with an interval of 60 seconds, I think, i am going to cut this down to 20 seconds. So that is 3 images per minute, 180 images per hour. At least, that is the plan… and here is the script to do it:
 And it worked – OK, the light from the streets did not help to get the excellent view but it is good enough to proof the setup.
http://youtu.be/BMJs-HCAzuE