
I have been playing computer games for almost all my live – the first ones in the early 1980s in an Amstrad / Schneider CPC464 computer. And once in a while, a game comes along that is different. One such game is Foundation which is produced by Polymorph Games.
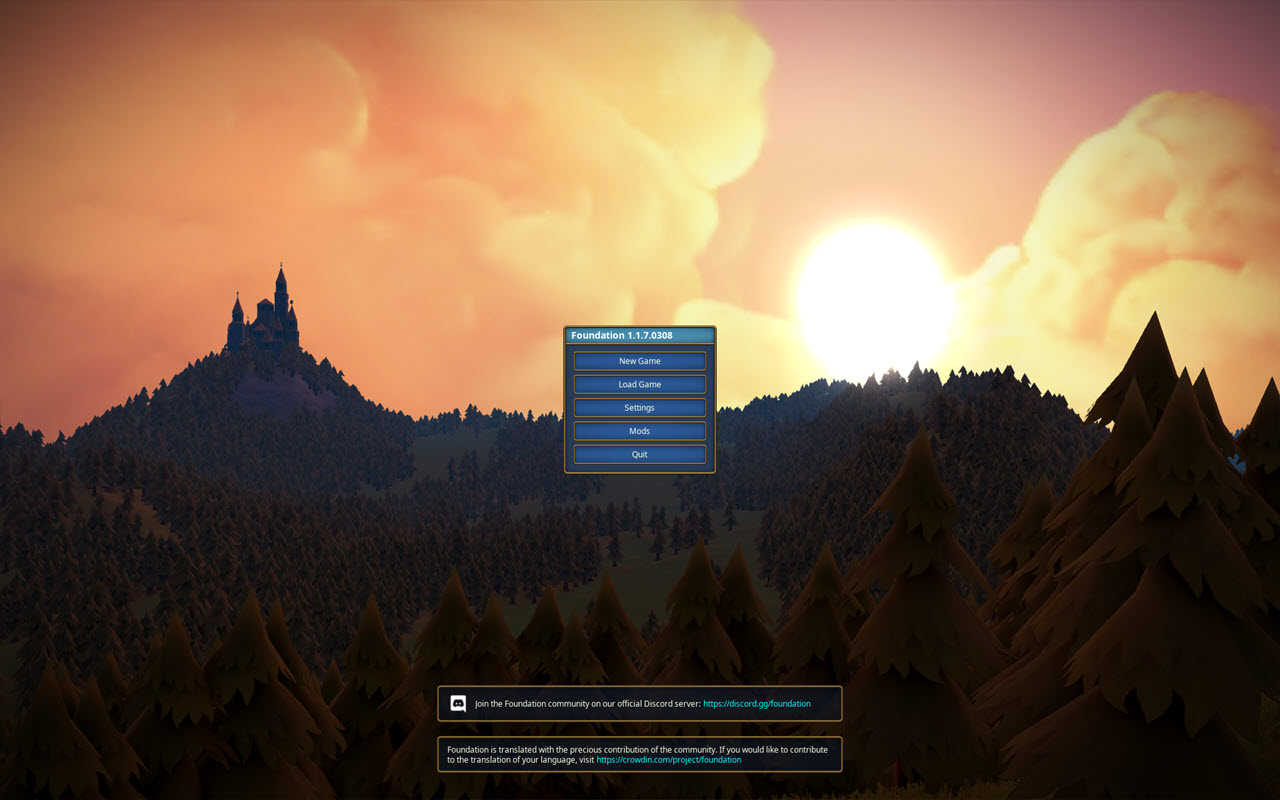
So what is different in Foundation? Well – it is a game without any actual goal or target except naturally growing your little village by adding vital functions and making sure your people are staying happy and productive. This review is based upon version 1.1.7.0308.
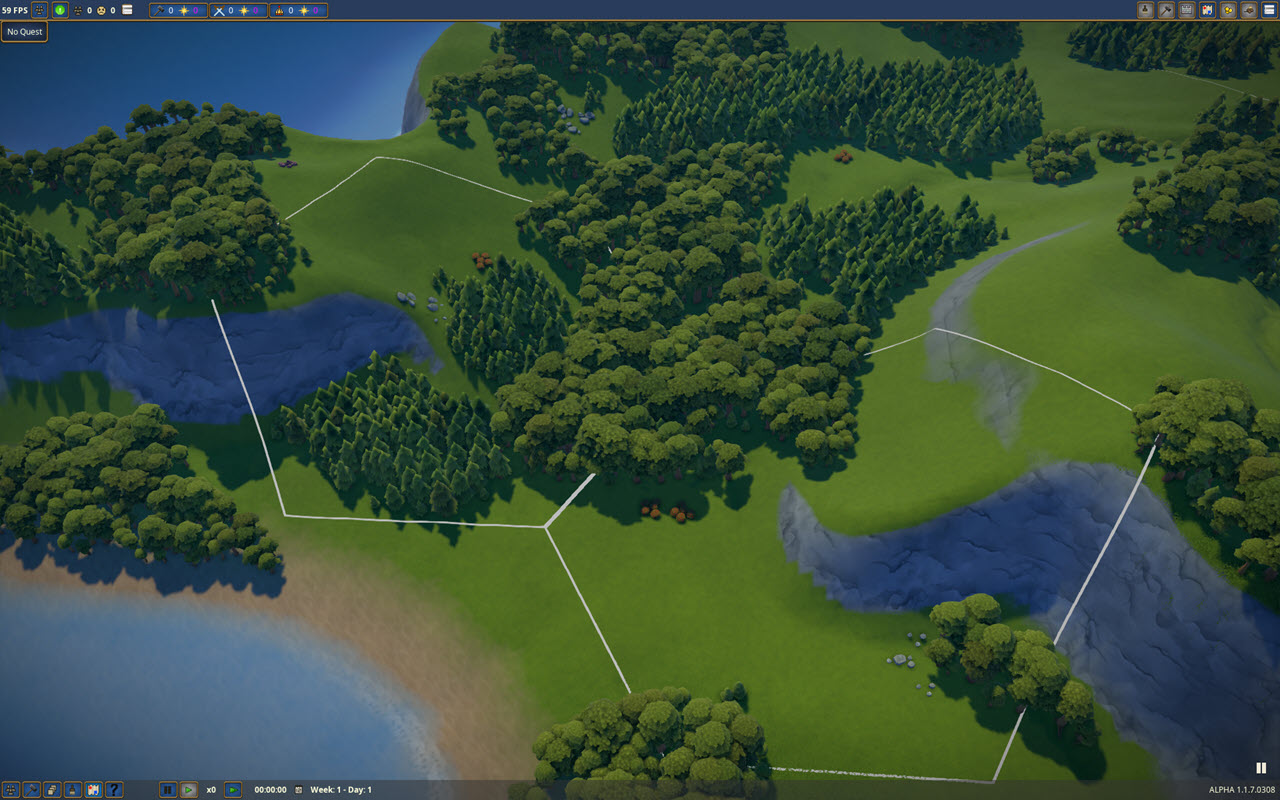
When starting a new game, you have a choice of the countryside you want to play within – hill country, coastal country, a mountain or valley layout or a river-style world. For this game, I will chose “coastal” as it gives me ample access to water (which will be an important aspect of food production later).
First and foremost, you should pause the game when it is started and give yourself a break to explore the map and make some initial decisions on the layout of your settlement. In this case, I am opting to found my village (by placing the village center) in an area that has little forest, berries and stone. These items will provide me with building material (wood and stone) as well as food (berries). I will be able to expand my territory to get some more wood and also access to water soon enough.
Once the village center is placed, the game starts with eight initial settlers that now need to grow the settlement. The first thing we need is wood so I am going to place a a lumber camp (remember: the game is still paused!).

Foundation is all about “efficiency” but in the early stage, with only one field to worry about, this can somewhat be neglected. I am placing the lumber camp within the larger wooden area but I am intending to cut free the smaller forest areas on the right first. The workers have to walk a bit but that will change soon enough.
With the lumber camp in place, the next item that is needed is food – the berries will provide that but the settlers need a Gathering Hut nearby. The Gathering Hut requires wood so therefore, I will prioritize the Lumber Camp on the building list.
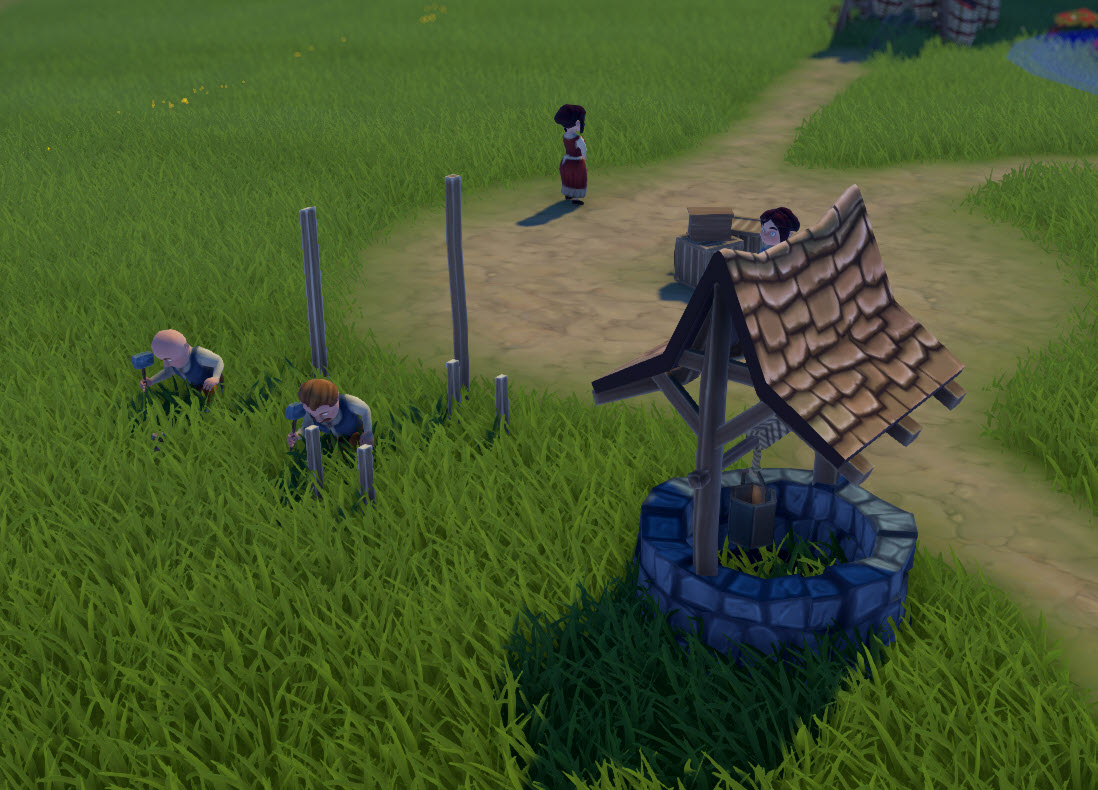
We will then need stones for the other buildings – so a Stonecutter Camp is placed near the stones on the right side. Last but not least, I am building a Well to allow the settlers some drinking water.

You can see that all buildings are saying “Waiting for a Builder” so the last thine to do before unpausing the game is to bring up the settler list and make at least one settler (but preferably more) builders.
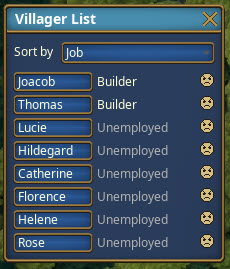
In this case, I have opted for Joacob and Thomas to serve as builders but I could also have picked the women – it does not make a difference in Foundation.
Now let’s run the game and wait for the first buildings to be finished – this will work without additional actions as most of the supplies needed are coming from the village center depot.
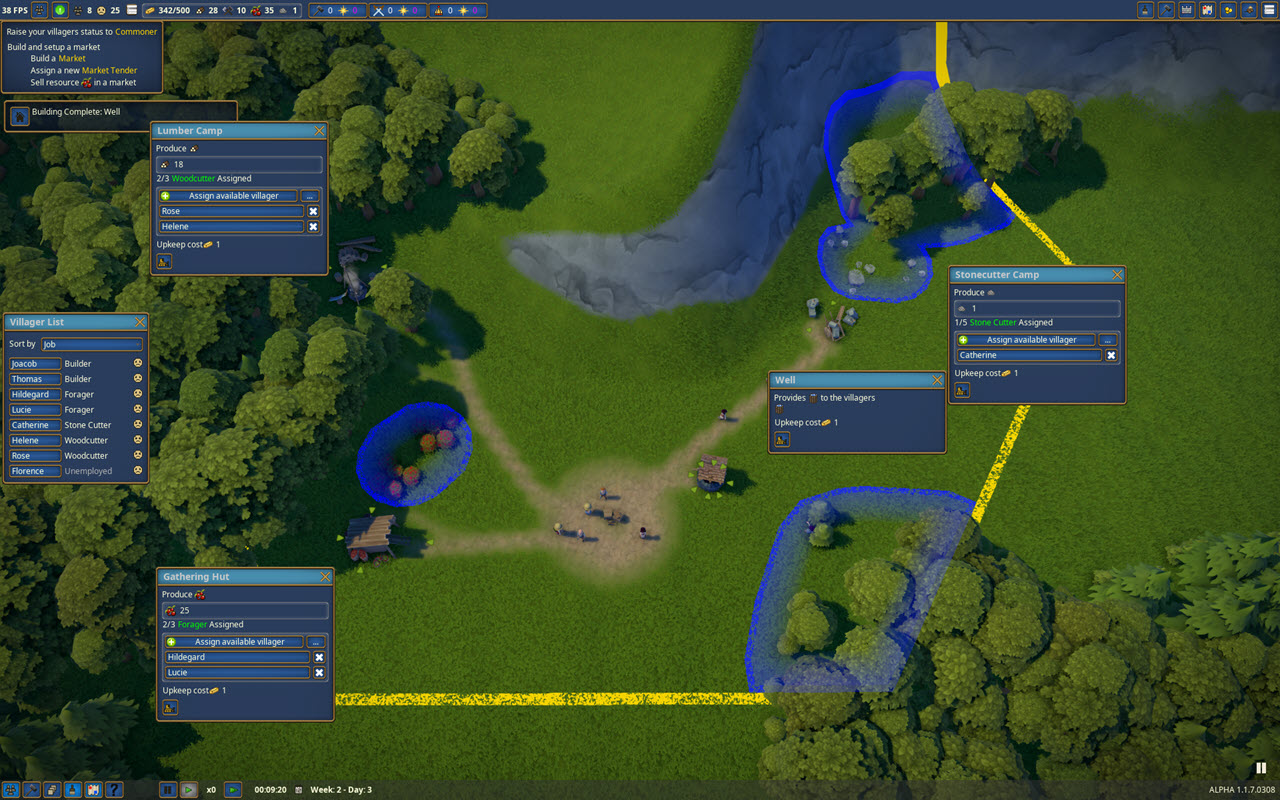
As you can see, the Lumber Camp and the Gathering Hut are done and are ready to have settlers assigned for some work. The Stonecutter Camp and the Well are not yet done – they are lacking resources: the Stonecutter Camp needs Tools, the Well needs Stones.
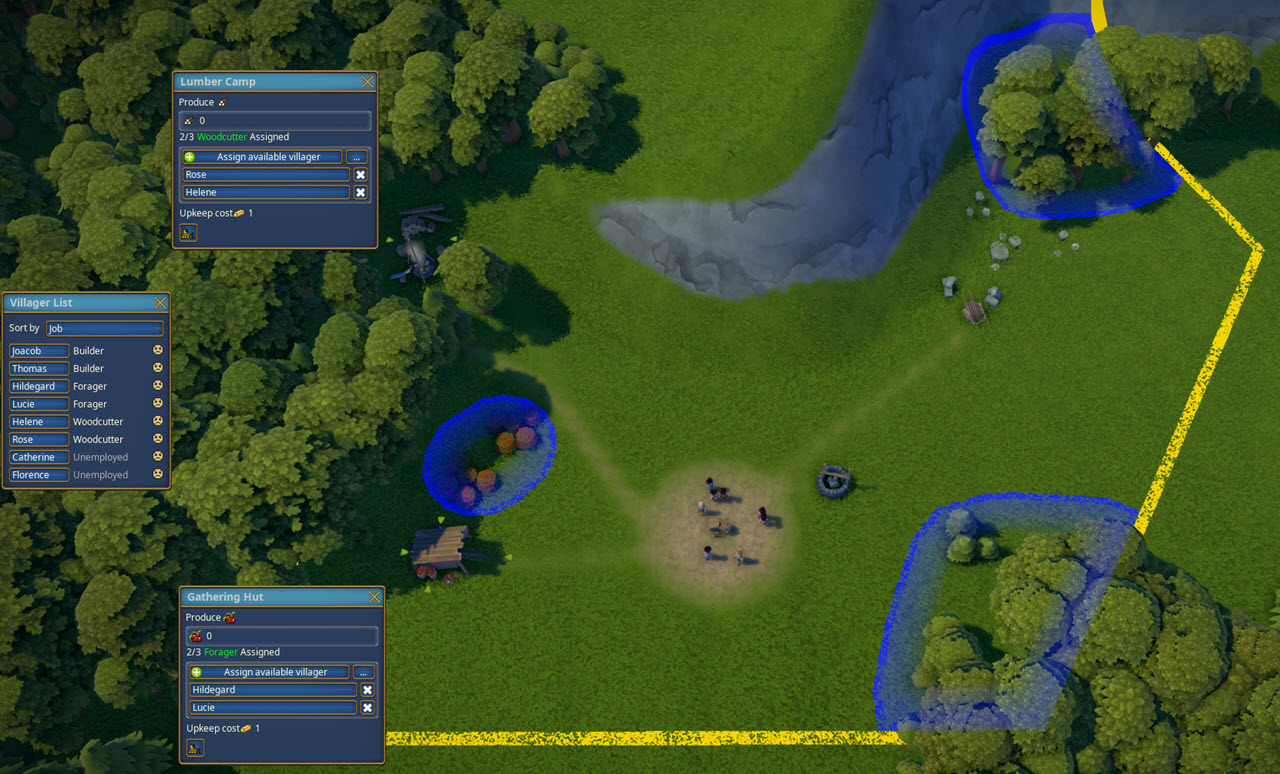
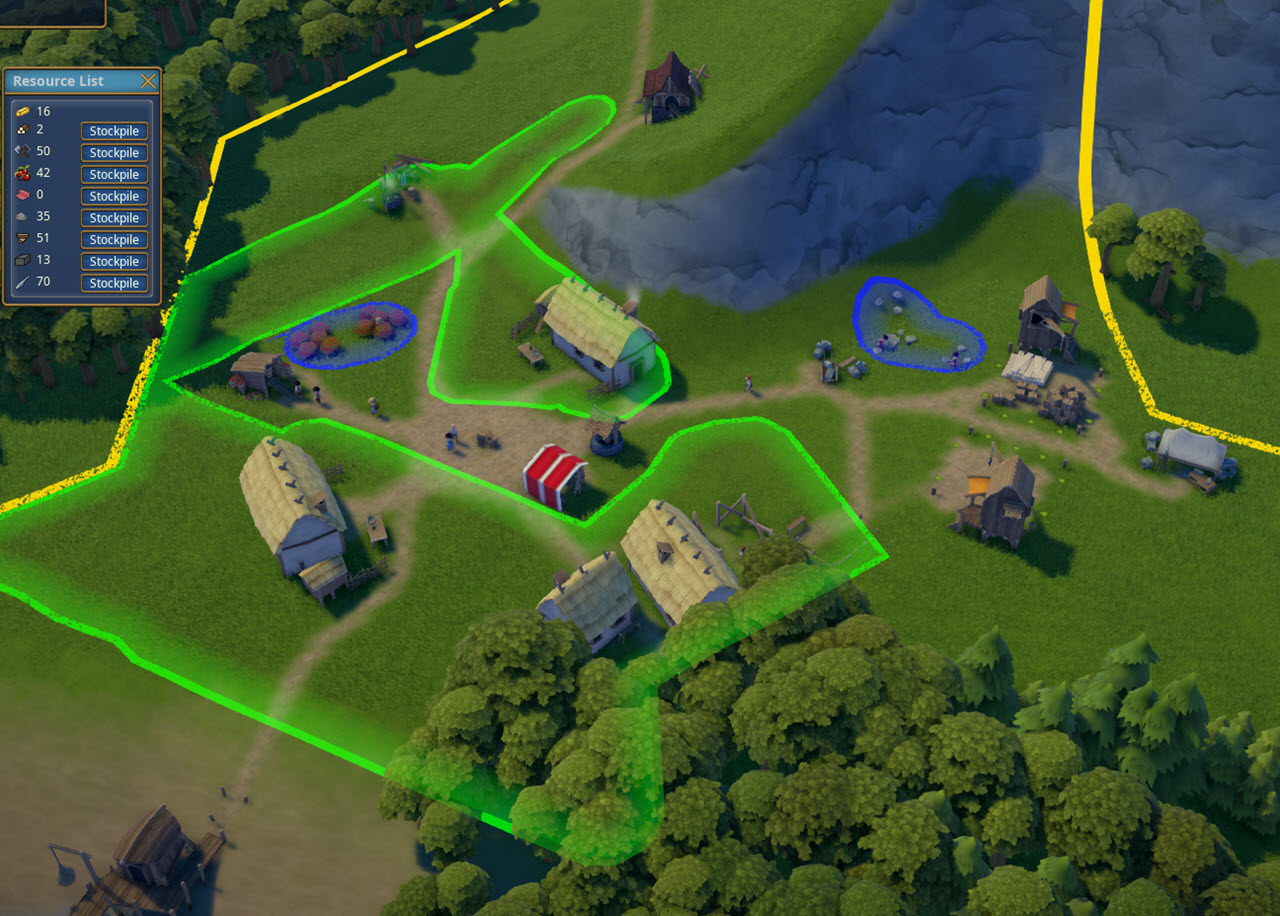
In order to allow settlers to perform work in a Lumber Camp, Gathering Hut or Stonecutter Camp, you need to define where they are going to perform their work and who is doing the work: the “who” is easy: simply assign available villagers to the individual sites. At this stage of the game, you don’t have to worry where they live because everyone will be near to their working place. Of our eight settlers, six are remaining without job at the moment. So let’s assign to gatherers and two woodcutters. Then, we need to define the Extraction Zones (blue) that show where the settlers will be working.
It takes a little while but once we have assigned a stonecutter and defined the Extraction Zone for the stones, the settler will produce stone which the builder will pick up to complete the Well.
So far so good – but our villagers are hungry: we have gathered berries by now but there is no place to sell the berries to the settlers. We need a Market and a Market Tender to collect the berries and sell them as food, thus producing our first income.
The Market should be located close to the Well because the actual distance to travel for a settler for food and drinks is now relatively short. And despite the fact that I currently have a limited supply in Woolen Cloth, I opt for a red tent to make my food stall visible (also to myself in case I need to find out quickly where I am selling food or other goods.
Because this is the only building site I have at the moment, my two builders are working side by side and the Food Stand is up pretty soon. I can then assign Florence as the Market Tender and define that in Slot 1, she is selling berries as food.

Now let the game run for a few moments for things to unfold… after a few minutes, you can see that things develop: food is sold at the market, producing revenue (approx. 64 gold this week). The trees are cut from the Extraction Areas. And two new villagers have joined our prospering community.

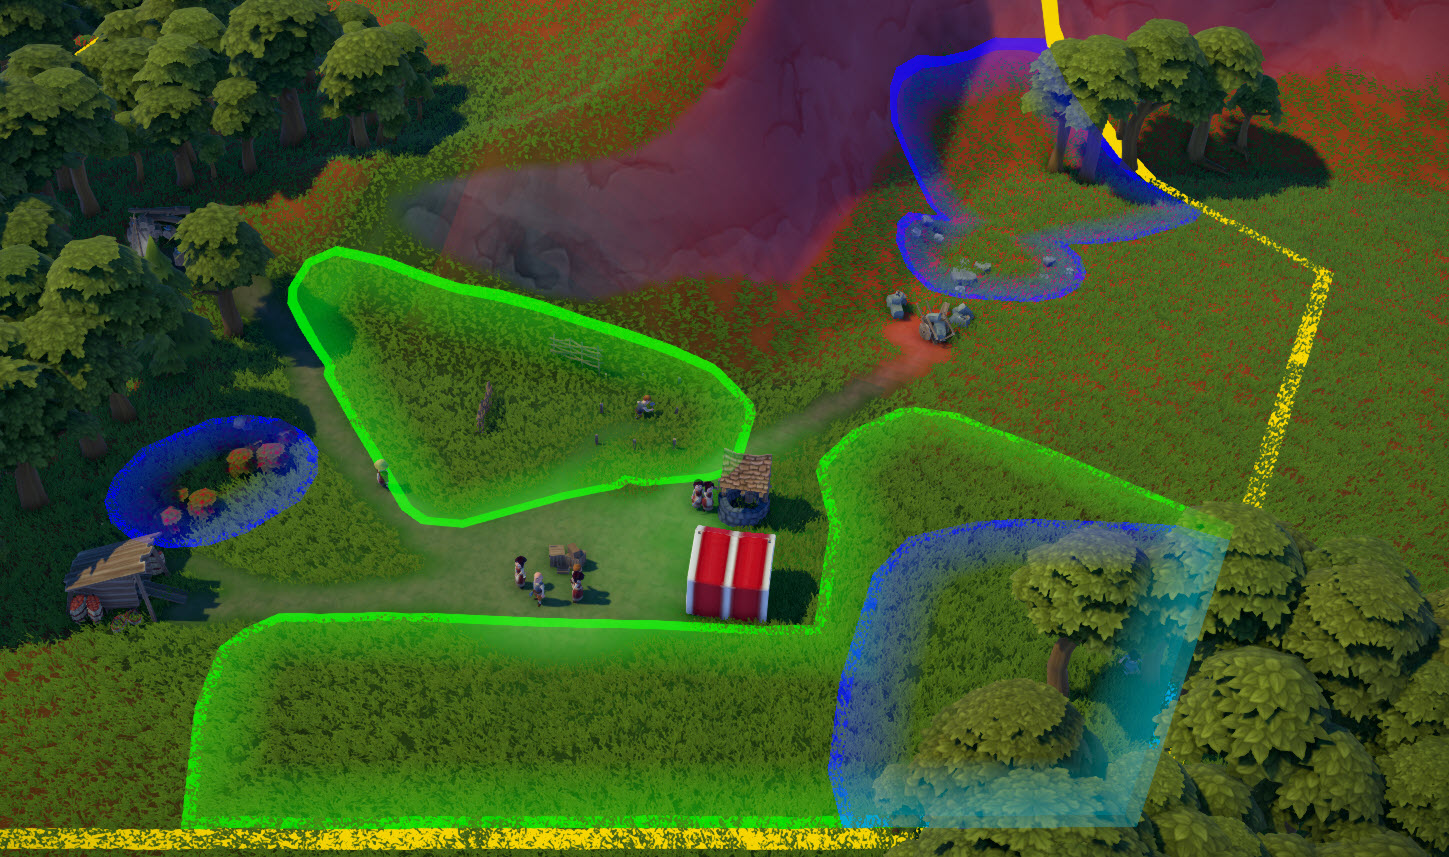
The next step requires a little bit of planning – so far, everything we have built we could place directly. But our villagers need homes – and those are built automatically in Residential Zones.
Unlike the Extraction Zones, the Residential Zones cannot simply be placed anywhere – settlers will only build in areas that are “attractive”. If you switch on Residential Zone marking, the green areas are the ones that settlers will build there houses in – and the red ones are those where they will (most likely) not.
At this time, I have defined that valid residential areas are around the village center and towards the right area of the screen. Which is why I have cleared the trees in that area to secure the wood first.
Just in time, I have accumulated enough money (500 gold) to acquire a second hexagon and I have opted for the one to the “south” which gives me access to the sea. It also allows me to extend my Residential Area into that zone as the initial marking might have been to narrow to support building activities.

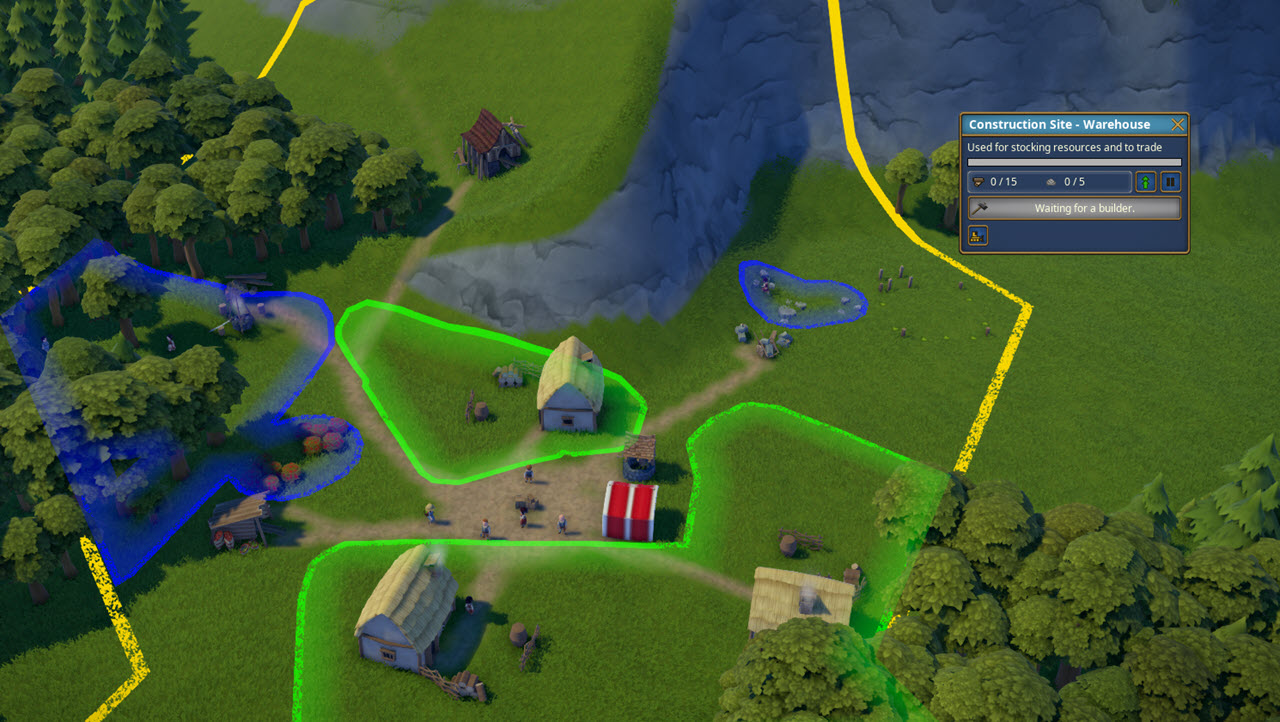
As our community is growing, we will need a Warehouse pretty soon but in order to build one, we need to have the ability to process our raw wood first. However, things are not that easy now: the Sawmill and the Warehouse cost a significant amount of money and we may have to wait for a bit for it to be available.
The Money System
You will need money to grow your village – and although the money system is straight forward, you need to pay attention to your income and spending. Each building you have essentially “costs” maintenance. Territories cost tax and trade also consumes money.
On the income side, you have the trade you are profiting from – to your villagers as well as externally. Use the budget screen to get an overview.
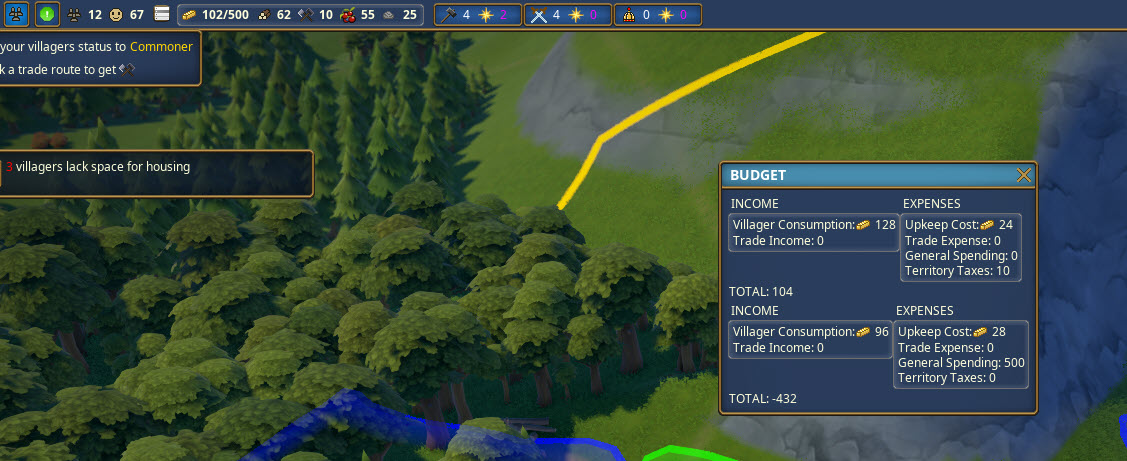
At this moment in the game, I have 102 gold available – just enough to pay for my Sawmill. But that will produce the Planks that I need. Location-wise, this goes close to the Lumber Camp’s current position and into a place where it does not take valuable Residential Area from me.
Next to consider is the building place for the Warehouse. The Warehouse can hold up to 50 items of four different goods. And it changes the way the distribution of goods works: so far, our villagers have picked up their good from wherever they were produced and stored. But with a Warehouse, they get a second choice of where to get their goods as long as a Warehouse has them in stock as well.
So Warehouses should be placed strategically – they can greatly help to streamline the distribution and availability of goods across your settlement.
With the Warehouse built and four new arrivals of settlers, next things need to be considered. In order to enable the first Trade Route, 20 planks are needed in a Warehouse. Also, pretty soon some quests will start to pick up that will require Berries and later Fish. And the first Trade Route will allow to buy Tools which we will need for a variety of buildings until we can produce them ourselves. In addition, Polished Stone (which we could produce by building a Stone Mason hut and Planks can be sold for money.
So let’s define that our Warehouse shall store Planks, Berries, Fish, and Tools (when we buy them). And let’s unlock and build a Fisher’s Hut which needs to be build – surprise, surprise – on the waterline with the ladder facing seaward!
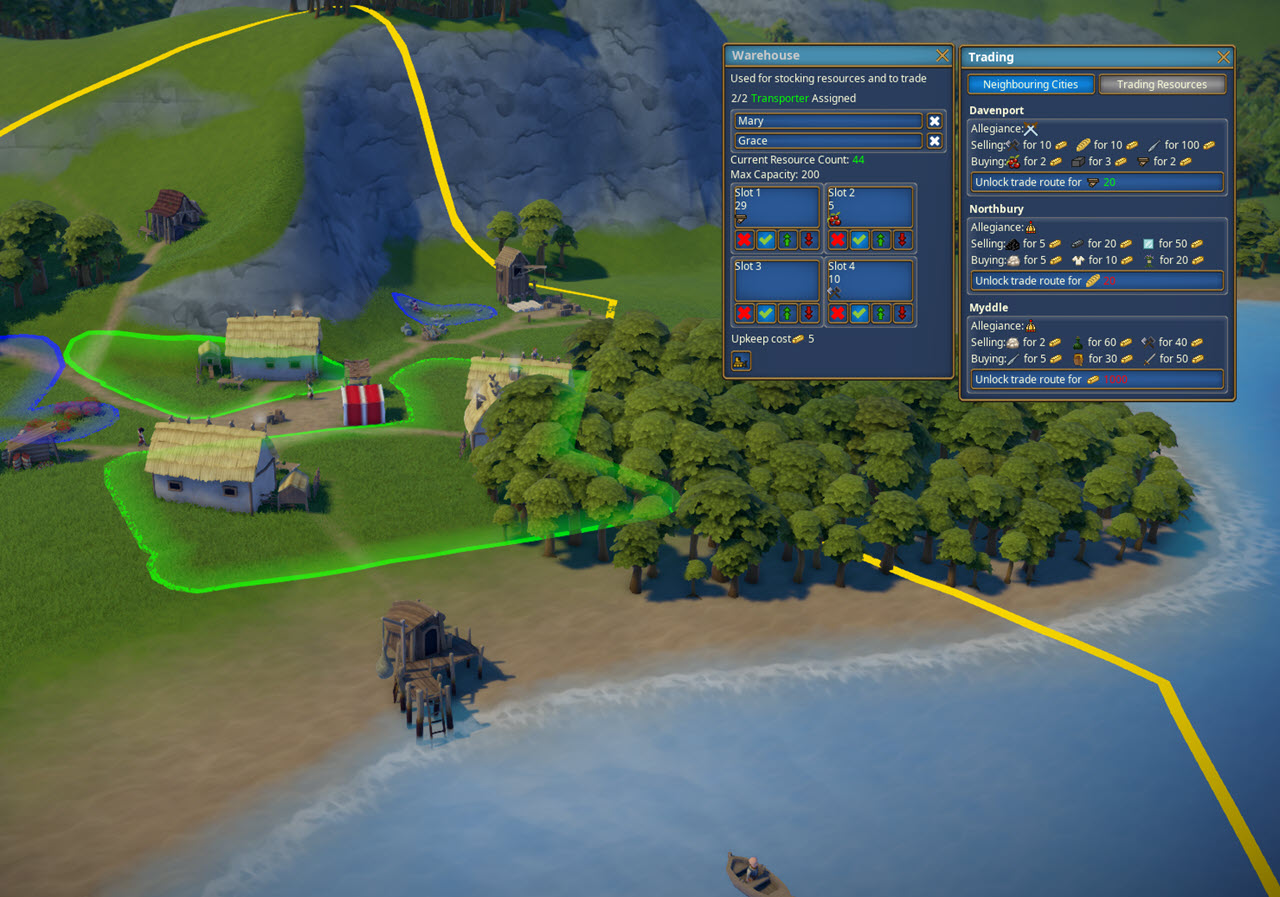
With the Warehouse built and an initial set of 20 planks available, you can enable the first Trade Route. Once established, you can buy Tools, Bread, and Fish (if you want) – but more importantly, you can sell (and make money from) Berries, Polished Stone, and Planks.
In order to buy and sell, you need to adjust the settings on the Trading Resources screen – basically, you will need to specify which goods you want to trade at all and – when buying – to what extent to buy or – when selling – what you want to keep as minimum reserves.
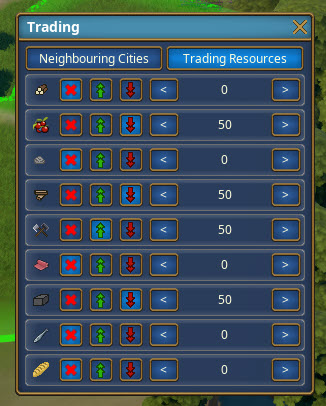
In our case, we are going to trade all of the items we can sell but keep a minimum of 50 from each one. And we are going to buy Tools, again until we reach the maximum of 50 units in stock.
You correctly might have noticed that we are trading a good we don’t have yet: Polished Stone. And you are correct – but we are going to change that and build the Stonemason’s Hut to produce it.
Reason is simple: it sells for 3 gold (instead of two for the food) but we also need Polished Stone for future buildings anyway.
When you are trying to build the Hut, you will see it requires Woolen Cloth, a good we also do not have available. However, we will find that we are lucky and have some rest of it in our initial supply. With that done, we will be able to produce Polished Stone and sell it from the Warehouse for profit.
Quests
Very soon, the first quest will pop up. All it is about is delivering a certain resource (mostly bread, berries, or fish) to one of the parties to gain reputation with: the King, the Clergy, or your People. When successfully completed, you gain points with the respective party with – together with the splendor for that party – help you to unlock other important items.
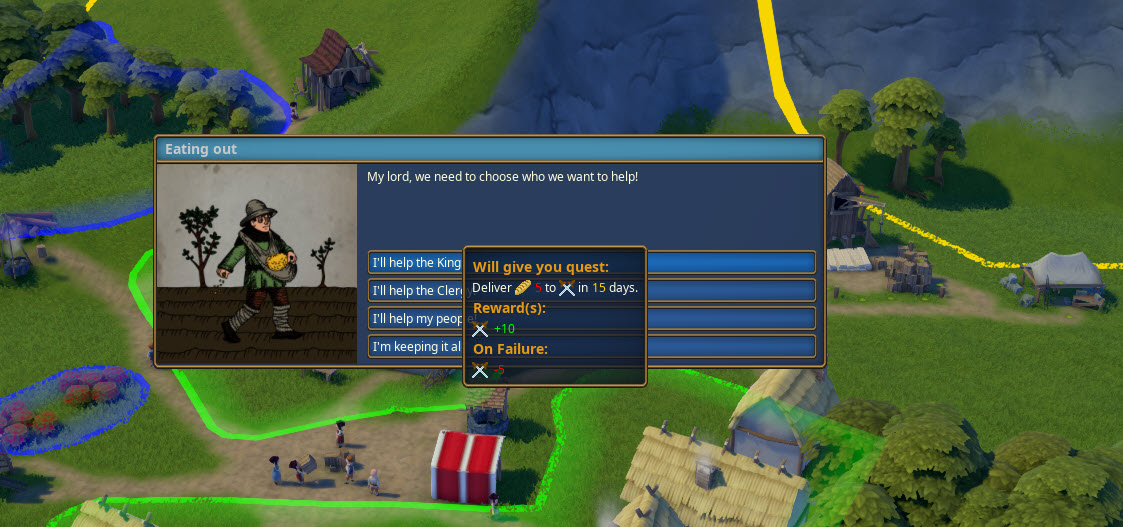
This one is a bit unfortunate: we need to provide bread (which we don’t have but could buy) but it needs to be in the Warehouse (which is currently busy in all slots). I will let this first one go by but we need a second Warehouse to stock goods for the Quests. Meanwhile, I am using my last remaining points with my own people to unlock the Lord Manor which we will need to increase the possible maximum our treasury can hold.
Resources
Typically, resources such as Berries and Stone (or later iron) are non-exhausting. A different story is wood – or rather the trees your tree cutters are cutting down: you can use a Forester to re-grow the wood… or you need to move your Lumber Camp elsewhere.
Our original woodcutting area is now making better use as a residential zone – the new Woodcutter Camp will be setup next to the forest in the lower part of the screen. So I will abandon the initial camp and build a new one. The Sawmill will stay in the original location, the distance is larger than I want it but not large enough to justify the cost for a new one.
And then… I will simply grow my village until the next part of this tutorial…