For a bunch of projects, I am envisioning the use of the BME/BMP280 Environmental Sensor. After having received a bunch from AZ Delivery, I hooked them up to an Arduino Nano – and failed. So just to make sure that the sensor and the code are actually working, I switched over to an Arduino Uno board.
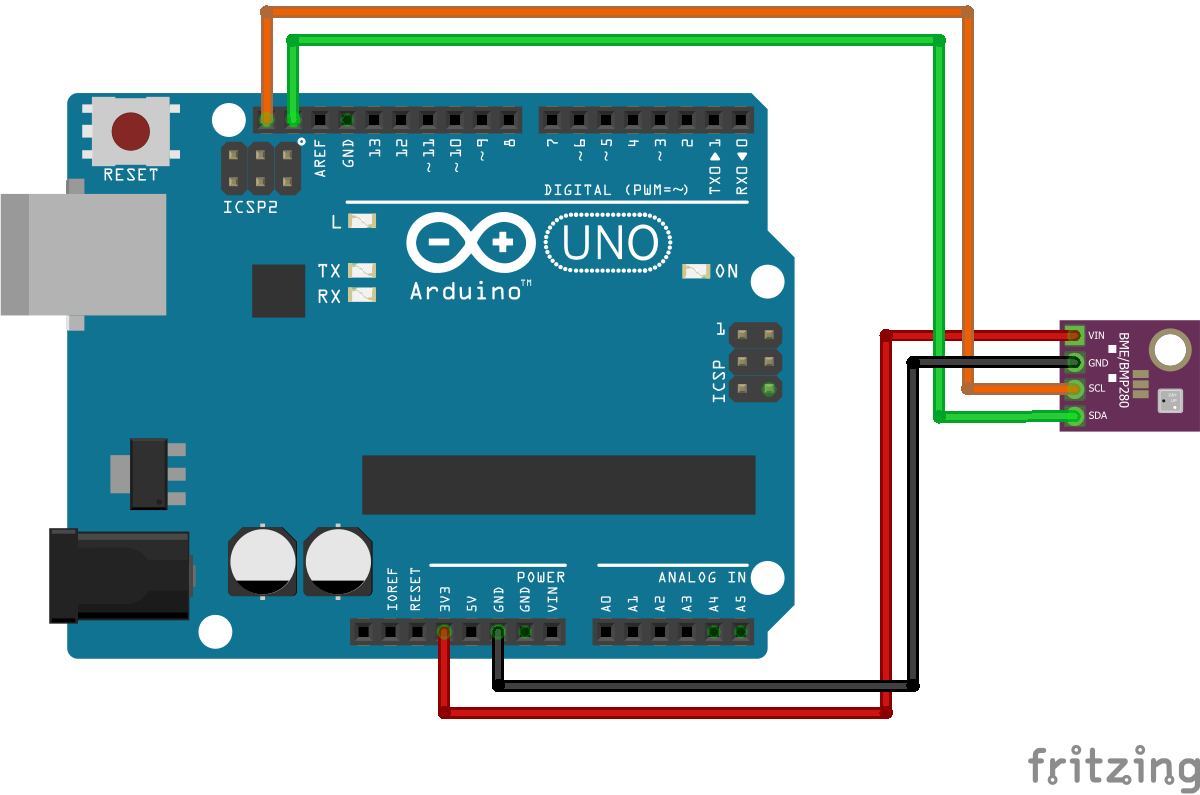
I decided to use the lower 3.3V power supply, wired this one up and connected GND. The unit is addressed via the I2C-Bus, consequently, the other two wires for SCL and SDA are going to their respective counterparts on the Arduino Uno.
Coding the Sensor
I actually did not expect much issues accessing the sensor through the code – but the battle was a bit harder than anticipated: the sensor was not identified at first.
Using the two libraries Adafruit Sensor (Version 1.1.4) and Adafruit BME280 Library (Version 2.1.2), the initial code is as follows:
#include <Adafruit_Sensor.h>
#include <Adafruit_BME280.h>
The sensor is then defined as
Adafruit_BME280 bme;It was expected that the only thing that was required now would be to initialize the BME280:
bool status = bme.begin();But apparently, that was a bit too naive – there was no response from the sensor at all. After a bit of searching and trial & error, it turns out that the circuit board has three solder jumpers next to the chip and they are responsible for defining the I2C Address of the sensor.
Almost all libraries are assuming 0x77 as the default address but the solder jumpers – at least on this circuit board – are set to 0x76.

Which means the only thing that really needed to change (in my case) was the following correction to the last line of code:
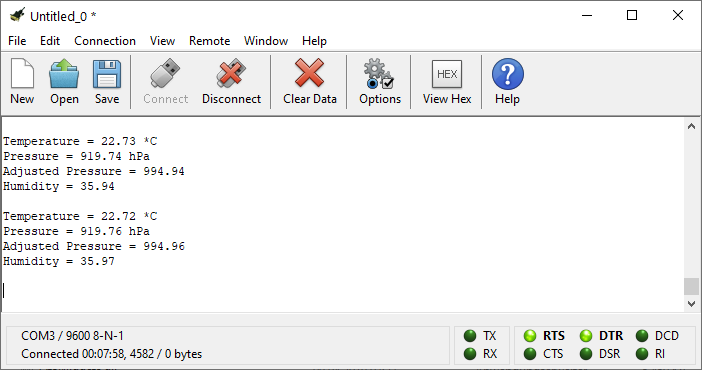
bool status = bme.begin(0x76);With this, the sensor initialized and started providing values immediately. Just three calls are required to read the data – temperature, pressure, and humidity.
void loop() {

  Serial.print("Temperature = ");
  Serial.print(bme.readTemperature());
  Serial.println(" *C");

  Serial.print("Pressure = ");

  float fPressure = (bme.readPressure() / 100.0F);

  Serial.print(fPressure);
  Serial.println(" hPa");

  float compensation = bme.seaLevelForAltitude(658.0,fPressure);
  Serial.print("Adjusted Pressure = ");
  Serial.println(compensation);

  Serial.print("Humidity = ");
  Serial.println(bme.readHumidity());
  Serial.println();

  delay(10000);

}
The seaLevelForAltiude compensation is required to convert the air pressure appropriately, taking the sensors actual height into consideration. At some later point in time, I hope to combine the BME280 with a GPS Sensor and provide the value automatically. For the moment, the 658m of my home location are hard-coded into the sketch.
…and back to the Arduino Nano V3.0
After I was sure the sensor was working, I wanted to see why I had failed to do the same on the Arduino Nano V3.0 – so I exchanged the Arduino Uno for the Arduino Nano again.
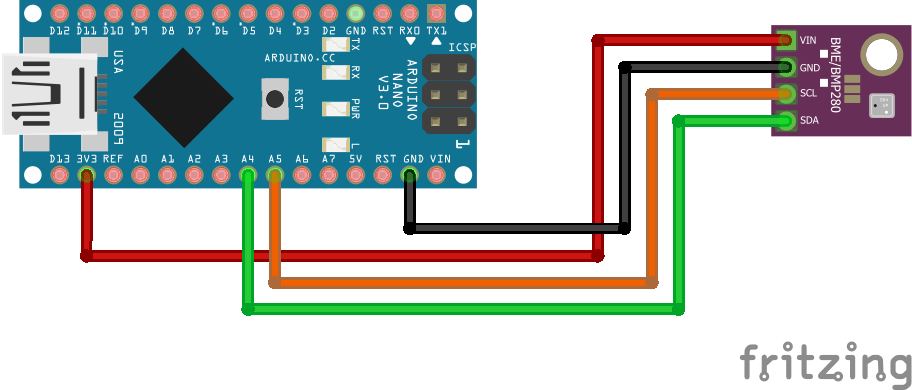
Long story short (and for all those that don’t know: the I2C Pins on the Nano V3.0 are A4 (SDA) and A5 (SCL) and I have no clue why it did not work before… now, it simply compiled and worked…