
Ever since I started taking images of the nightly skies, one of my biggest issues was “focus”. Not the focus on the topic itself but literally getting the stars into perfect focus. One of the difficulties was buried in my setup: I am using a Raspberry Pi and I am doing a remote desktop session to control it – unfortunately, setting focus manually also means that there is a significant delay of the image from the ZWO ASI Camera to the Raspberry to the Cell Phone running Teamviewer…
The software I am using on the Raspberry, StellarmateOS, supports an auto-focus feature with a motorized focuser and although I initially planned “to build my own”, I eventually succumbed to simply buying the ZWO EAF (Electronic Automatic Focuser). Here are the images of mounting the device to my Skywatcher Evostar 72ED telescope.
Step 1: Make sure your scope is secure!
You want to make sure that your scope and all your other equipment is secure and cannot be damaged or dropped during the installation. The best possible way: put the scope on a table in front of you and remove any attached equipment. It may rest in its mounting plate, but you want to turn it upside down to see the underside of the manual focuser.
Step 2: Remove the Manual Focus Unit
This might sound a bit awkward at first but trust me, this us nothing more than four screws and a basic mechanical disassembly/assembly.
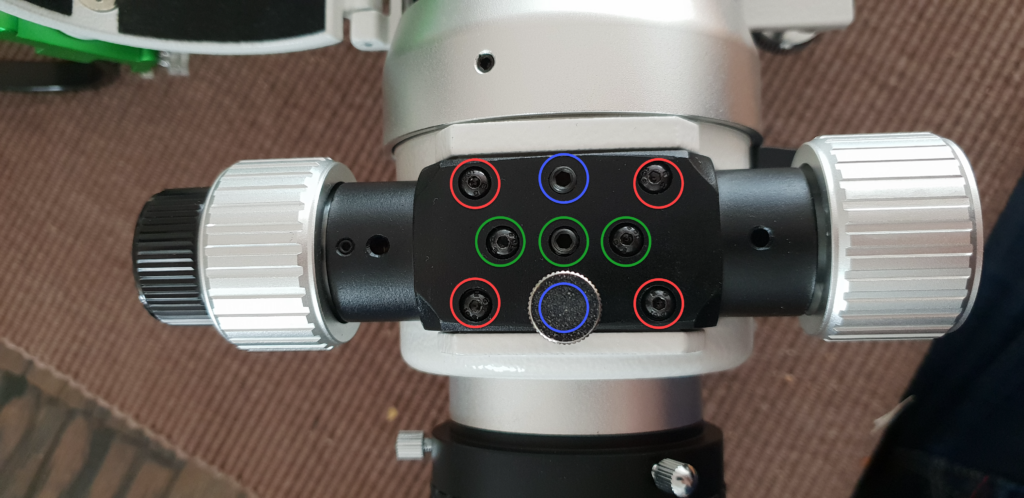
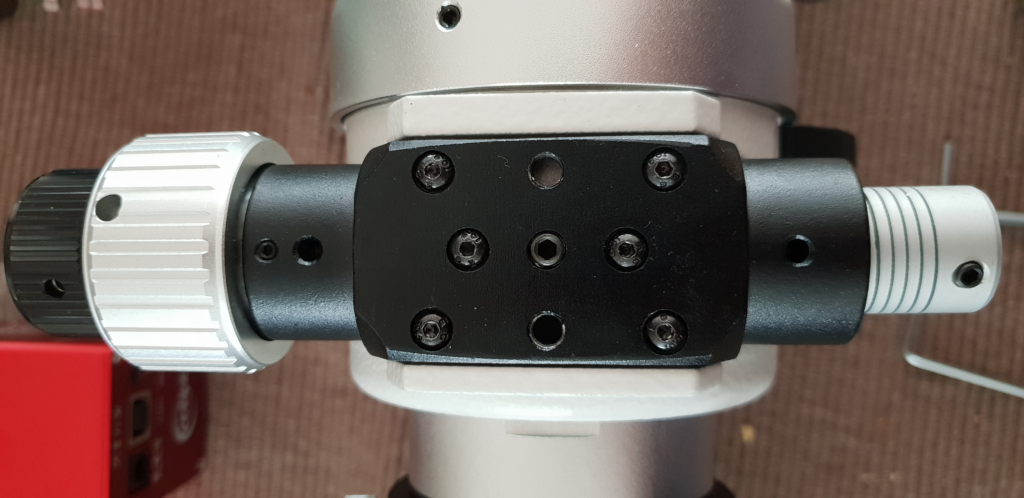
It is worth paying attention to the use of the screws: the four red ones are the mounting screws that are fixing the unit to the telescope. The blue ones are the actual “fix focus” screw and a blind screw (no use). The three green ones control the pressure used to press the axle against the focus unit, the center one is pressure, the left and right ones are balance.
To remove the unit, unscrew the four red ones and carefully lift the unit from the scope. There are four rubber rings below the red screws, make sure they are staying in place on the telescope!
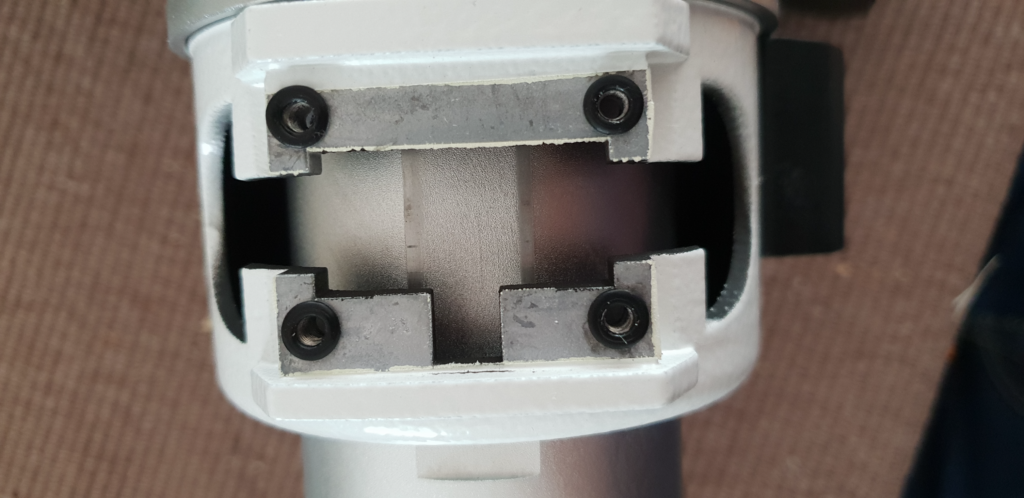
You are now holding the Manual Focus Unit and you can see just how simple the mechanism really is: the axle is pressed to the underside of the moving tube any by rotating it, it “rolls” the tube in and out.
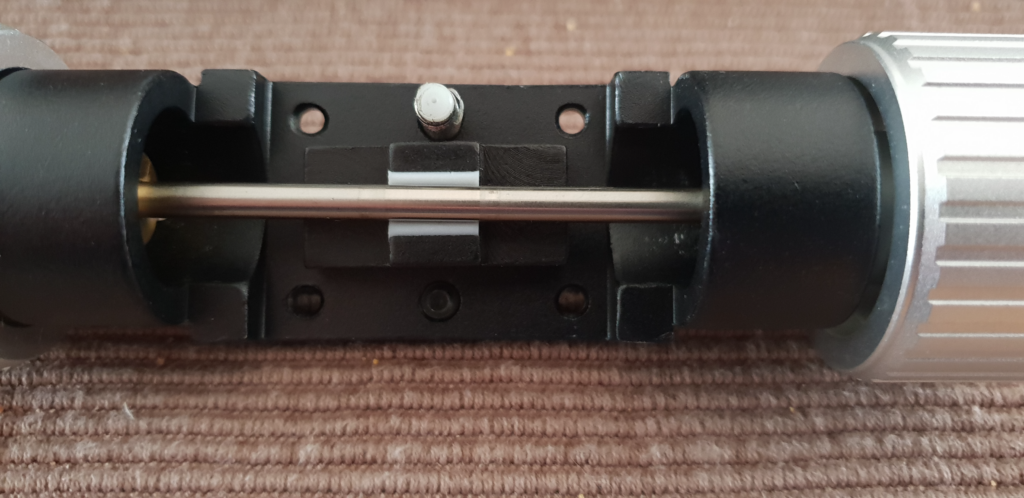
If you turn the unit 90°, you can also see how the pressure of the axle against the moving tube is controlled.
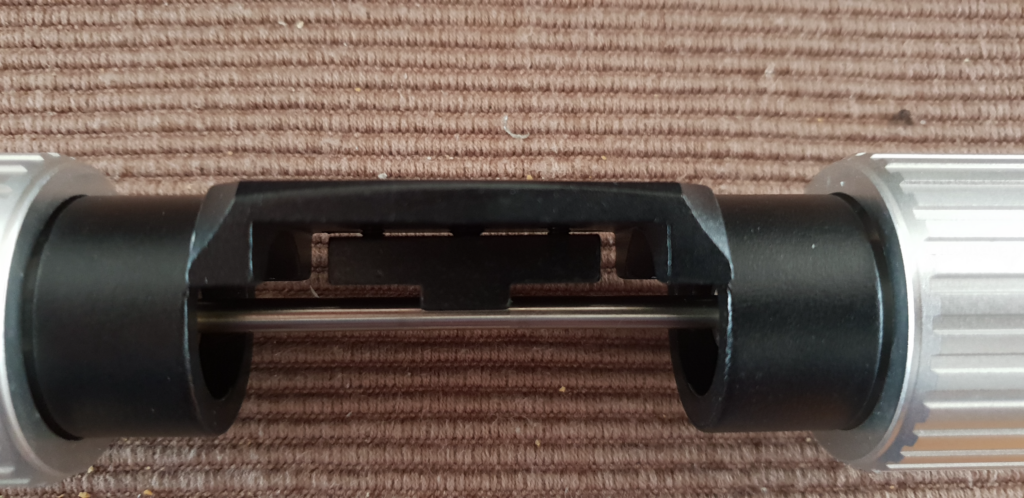
See? A very simple mechanism (but as long as it works…) – keeps Skywatcher’s prices lower than a more complex mechanism here. But back to the installation of the ZWO EAF unit.
Step 3: Remove the single-speed Focus Knob
In order to attach the ZWO EAF to the Manual Focus Unit, you need to remove the single-speed focus handle.
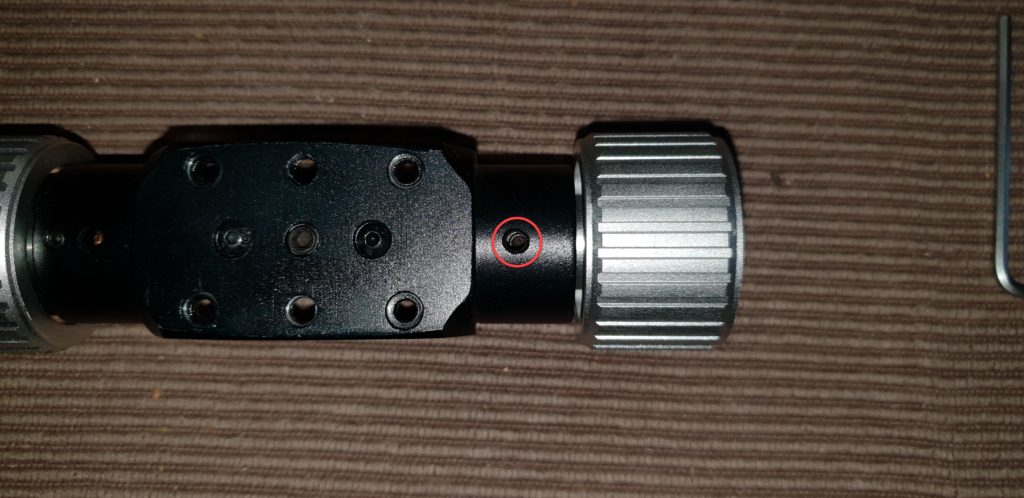
The knobs are fixed to the axle by a screw you can access through the small hole (red circle above) but in order to find the screw underneath, you need to turn the handle until screw and hole are lining up. Then slightly losen the scew and pull the knob away from the axis.
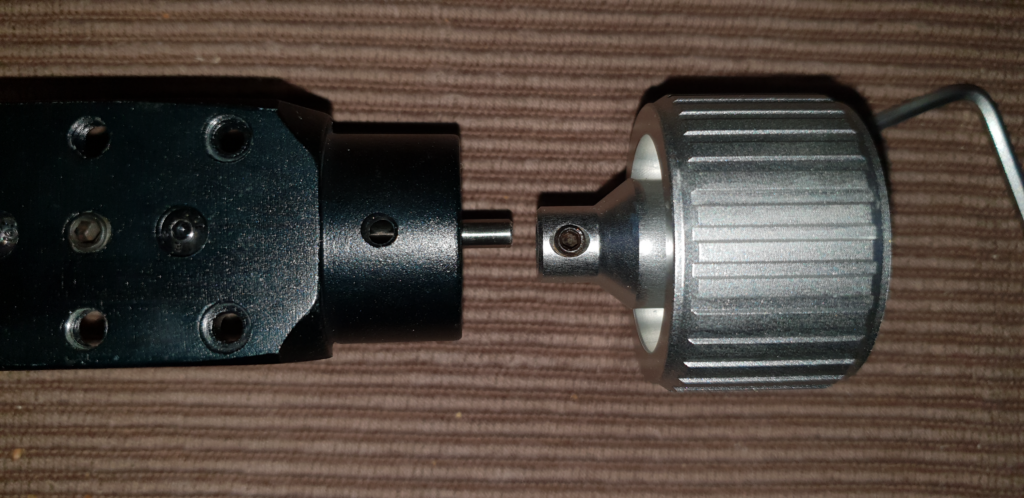
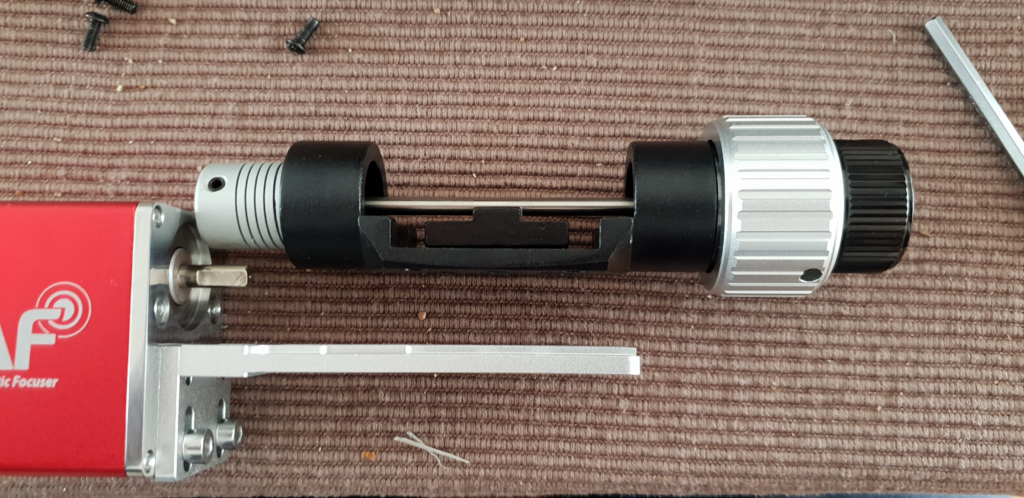
Step 4: Installing the Flexible Coupling
The removed knob is replaced by the flexible coupling device that came with the ZWO EAF. Pick the one that fits the diameter of the axle best.
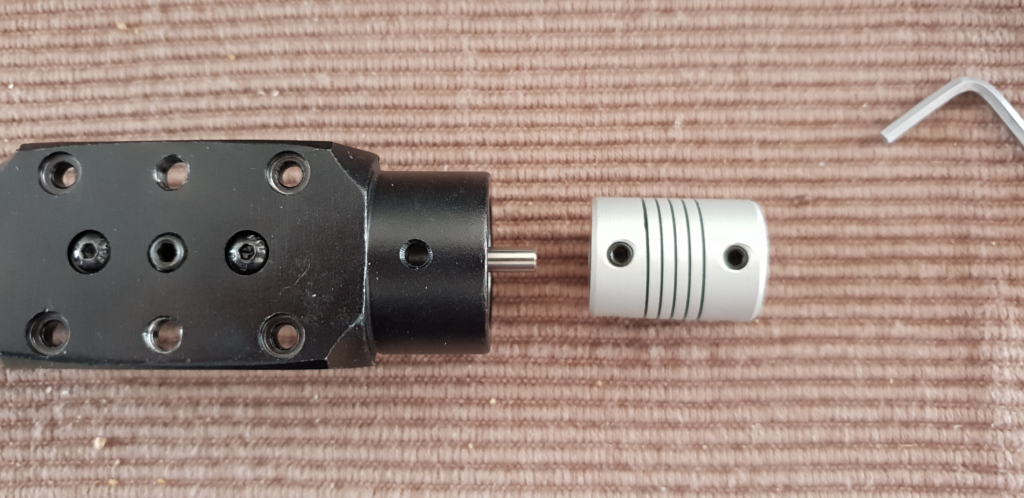
Things could have been so easy but unfortunately, the Skywatcher’s focus axle is either too long or too short, pick your choice: in order to fasten the telescope-side screw, it needs to either sit outside the focuser’s mounting or it needs to line up with the hole as the knob’s did. You can push it back in enough, no problem but then the axle also blocks the second screw.
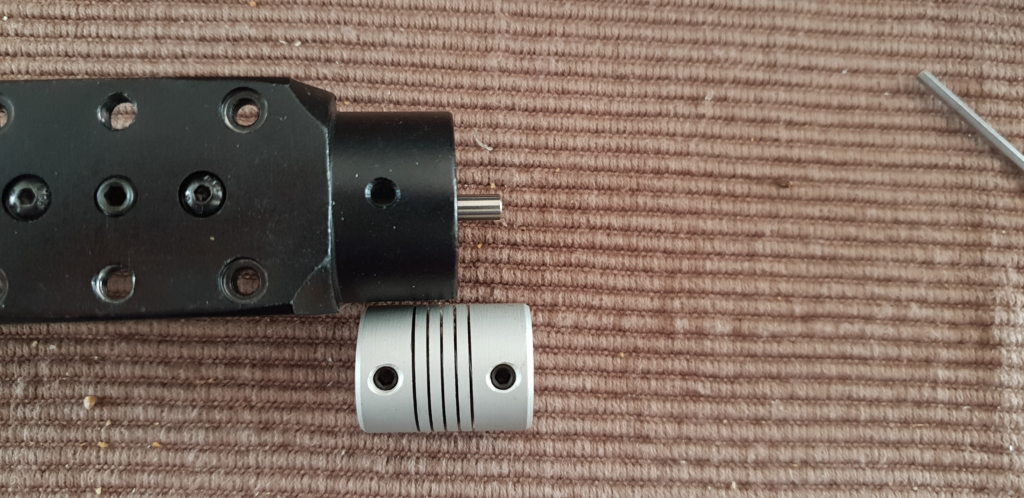
The solution: also loosen the other side of the axle and push the axle out enough to fix the coupling dead center. Then shift the axle back into its original position (the coupling will nicely move inside the housing) and tighten the screws on the other side as well. If you now rotate the focus knob that is left, the flexible coupling should also rotate.

Step 5: Fixing the Bracket to the ZWO EAF Unit
This is a preliminary step so don’t fix it to tight. This is merely to make sure that bracket and focus unit can be attached properly – we are doing some fine adjustment later.
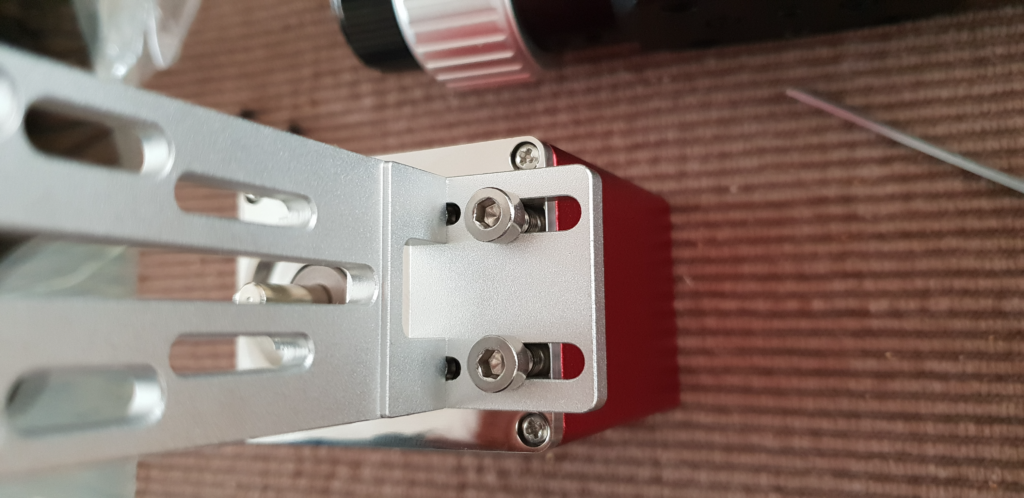
You can also to a “test assembly” with the Manual Focus Unit to see that everything falls in place and the two outer center holes (the one with the blind screw and the one that originally took the Fix Focus Screw) are lining up with the bracket’s mounting holes. But do not attach the two units to each other now!
Step 6: Putting the Manual Focus Unit back onto the Telescope
First, the Manual Focus Unit goes back to the telescope, and you need to put in the four mounting screws. Make sure the rubber rings stay in place!
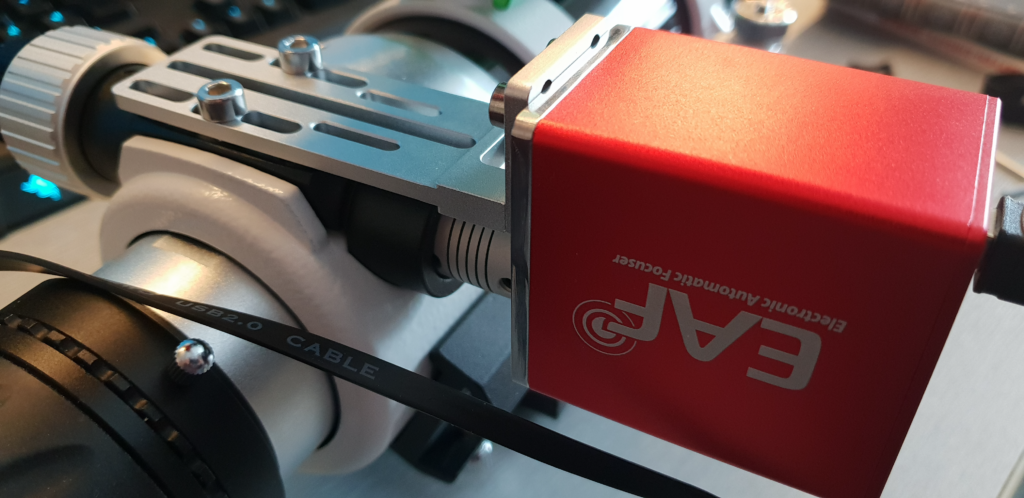
Step 7: Mount the ZWO EAF Unit
In a final assembly step, mount the ZWO EAF Focuser using the two outer center holes and the two screws mounting the bracket to the ZWO EAF focuser unit. Makre sure all screws are sitting tight also make sure that the flex coupling is not touching the Manual Focus Units’s metal frame (you might have to push the ZWO EAF a little bit “down” before tightening the two screws on the side.
Some additional Notes
When the ZWO EAF Unit is assembled, the manual focus will no longer work! However, for testing (and in case you do need it) you can simply loosen the two screws on the ZWO EAF’s flex coupling device.
My focus unit gave some “eerie sound” once everything was reassembled and that came from the flex coupling device actually had contact with the metal frame of the Manual Focus Unit. So a bit of playing with the screws (including the Manual Focus Unit’s Pressure and Balance screws!) might be required.
Operational Test
Finally, I had everything put back together, connected the camera to my Raspberry Pi and configured by EKOS/INDI Profile to include the ZWO EAF Focuser. Started, connected, and did a manual focus in and out…