
Luckily, these days you can see trouble coming – if you pay attention. And you can prepare – if you care.
I am running a Windows Home Server installation for many years now. It is placed on An Acer H340 Home Server. The system has done a tremendous job, unlike others that used it, I never had issues with it and it has been operational since 2009!
But all good things gotta come to an end – the H340 is running a four-disk configuration, all disks have reached a 20.000 hours operational threshold now. Also, the old Windows Home Server OS is no longer supported and in the past weeks, the system has shown some signs of aging.
A long time ago, I have moved most of the data off the system and used a QNAP TS-421 as storage device – the only data remaining on the Windows Home Server these days are my SVN Repositories. And although they are regularly backed up, it is time to consider a move…
Ultimately, I want to move the SVN Repos to a Linux-based system, possibly another small QNAP I would purchase. But before I will consider this, let me try and migrate the Repos to a Virtual Machine running Ubuntu Server 14.04.1 LTS.
Ubuntu 14.04.1 LTS & SVN Server
So far, I have performed a standard installation of the Ubuntu Server 14.04.1 LTS Operating System. Now it is time to add Subversion. The first thing to do is to make sure (as always) that the Repository Catalogue is up to date:
sudo apt-get update
Next, the software itself – Subversion and the Apache Webserver – need to be installed. Let’s do Apache first.
We need to install the following packages: apache2, apache2-utils, and libapache2-svn. You can either install the packages individually or with a single command:
sudo apt-get install apache2 apache2-utils libapache2-svn
Next, you need to install the Subversion package:
sudo apt-get install subversion
With that, the software is installed and ready to be configured.
User Configuration
Next, we need to do a bit of administrative housekeeping. The user I am using to connect to the system as well as the Apache2 User need access to my Subversion Repositories.
First, I will create a new group called subversion.
sudo addgroup subversion
Next, I will add myself and the Apache2 User to this group
sudo usermod -aG subversion [myAccount]
sudo usermod -aG subversion www-data
Directory Configuration
Following the users, we need a storage location for the SVN Repositories. I create the SVN Root Directory in the /srv directrory.
sudo mkdir /srv/svn
Next, I create the Repository itself – simply calles svntest this time.
sudo svnadmin create /srv/svn/svntest
This will also create a repository directory in /srv/svn. Finally, we need to adjust the file system permissions.
cd /srv/svn
sudo chown -R www-data:subversion svntest
sudo chmod -R g+rws svntest
Configuring WebDAV Access
Finally, we need to make sure that we can actually access the repositories from a remote machine. I am going to set this up so we can browse all SVN Repos in the location.
You need to add the following section to the dav_svn.conf file located in /etc/apache2/mods-available.
<Location /svn>
   DAV svn
   SVNParentPath /srv/svn
   SVNListParentPath On
   AuthType Basic
   AuthName "Subversion Repository"
   AuthUserFile /etc/subversion/passwd
   Require valid-user
</Location>
Now, the password file needs to be created – the very first time after the installation, you will have to use the -c switch, but only the first time (otherwise, you will overwrite the existing file!)
sudo htpasswd -c /etc/subversion/passwd [user name]
It will prompt you for a password and confirmation thereof. Once created, you can always review which users are allowed to access your SVN by using
cat /etc/subversion/passwd
to retrieve the currently enabled users. Finally, let’s reboot the system.
sudo reboot
Testing the Connection
If everything is set up properly, you should now be able to browse the repository through a web browser by using the following URL: http://[SVNServerIP]/svn
 Likewise, you should be able to connect to the Repository using a SVN Client such as TortoiseSVN.
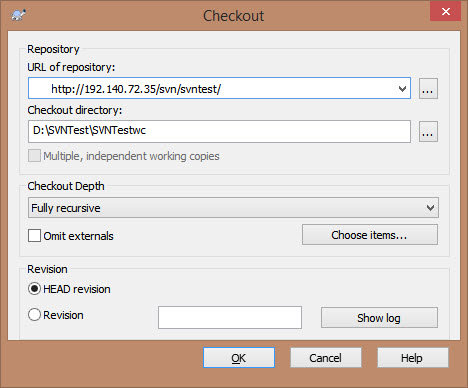 Now, you should be able to work with the repository as you see it fit.