
A little while ago, I wrote about building a Classic-Space-style LEGO MOC from scratch, a sort of homage to LEGO Set #6970.
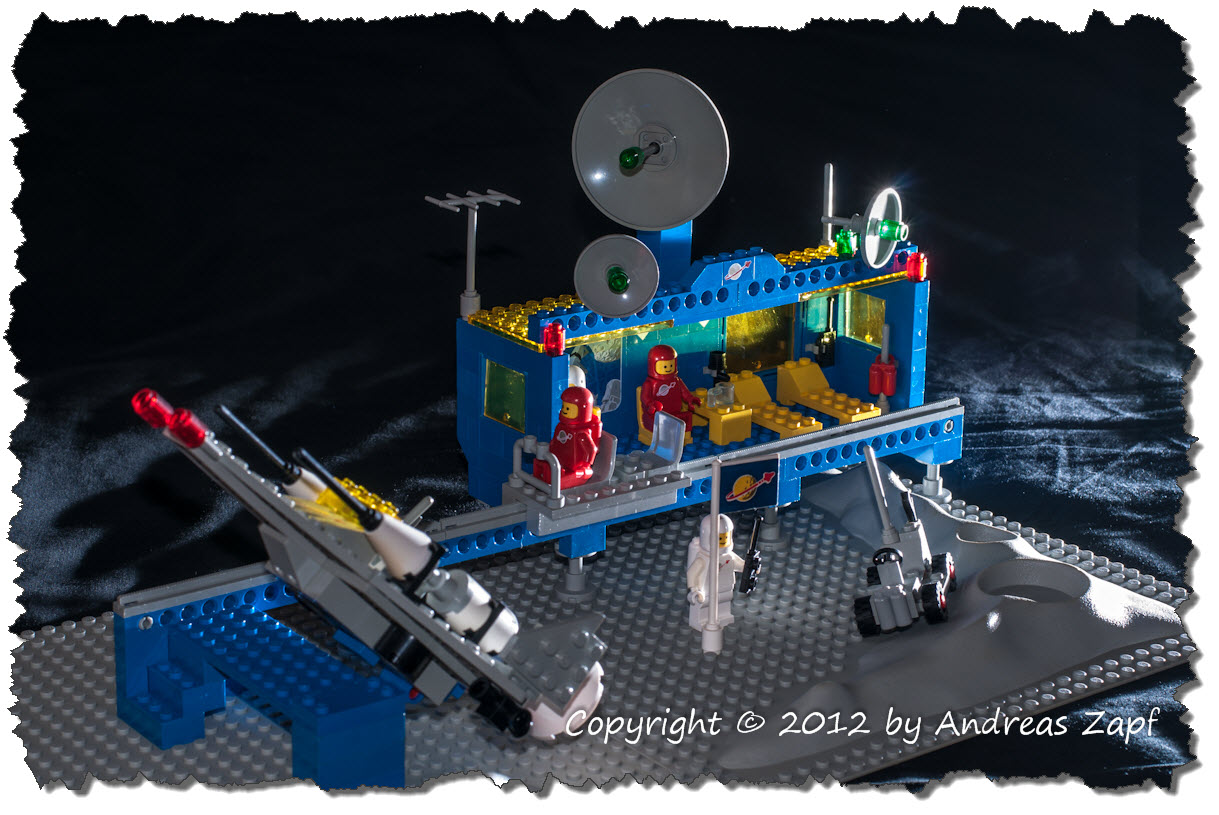 Two main thoughts had been driving the idea: I wanted it to become more “realistic” and I wanted it to maintain the old “Classic Space Feeling”.
I had a first MOC designed and described here but it was a monolithic set. What I really was after was creating some standard building blocks that I could use to extend and rearrange to build a variety of MOCs from a standard set of bricks (which makes ordering bricks easier and my stock of bricks more “organized”).
 With that goal in mind, I started ordering bricks – which cost me a small fortune in Euros and also made it obvious: some parts are harder to find than others…
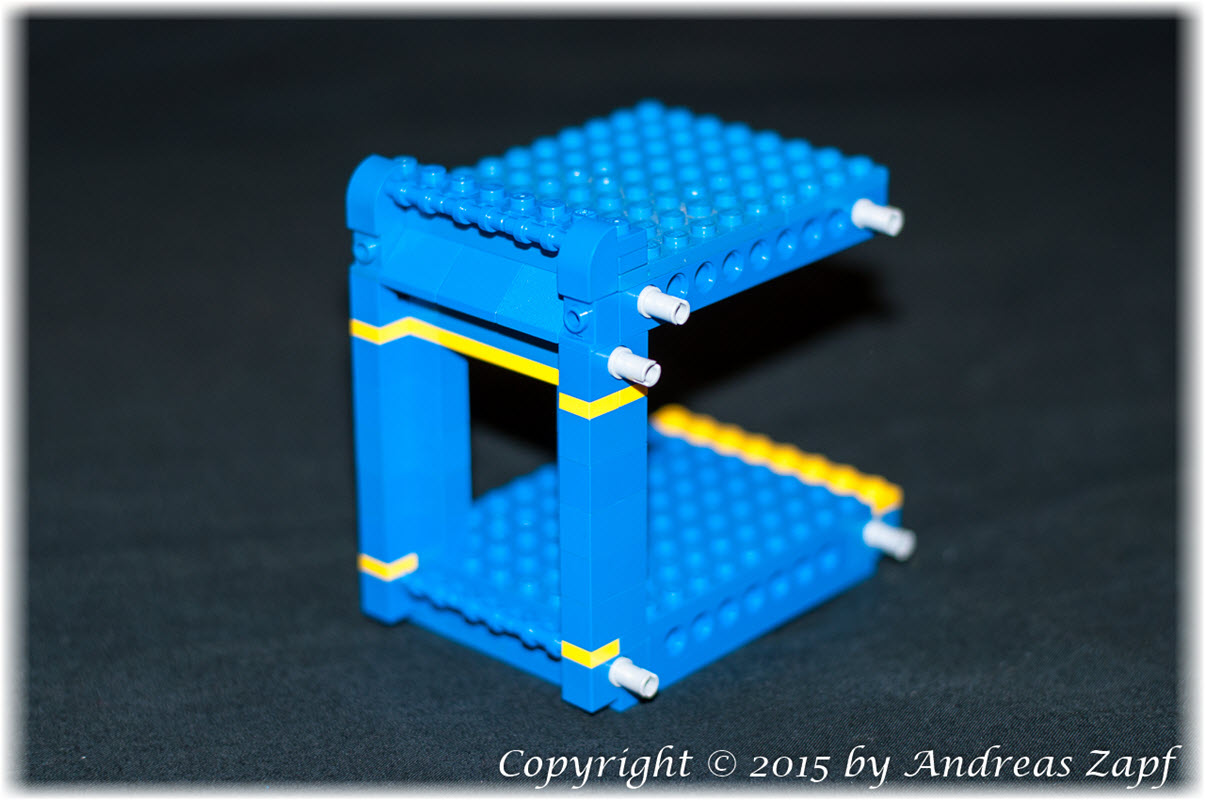
The Section Module
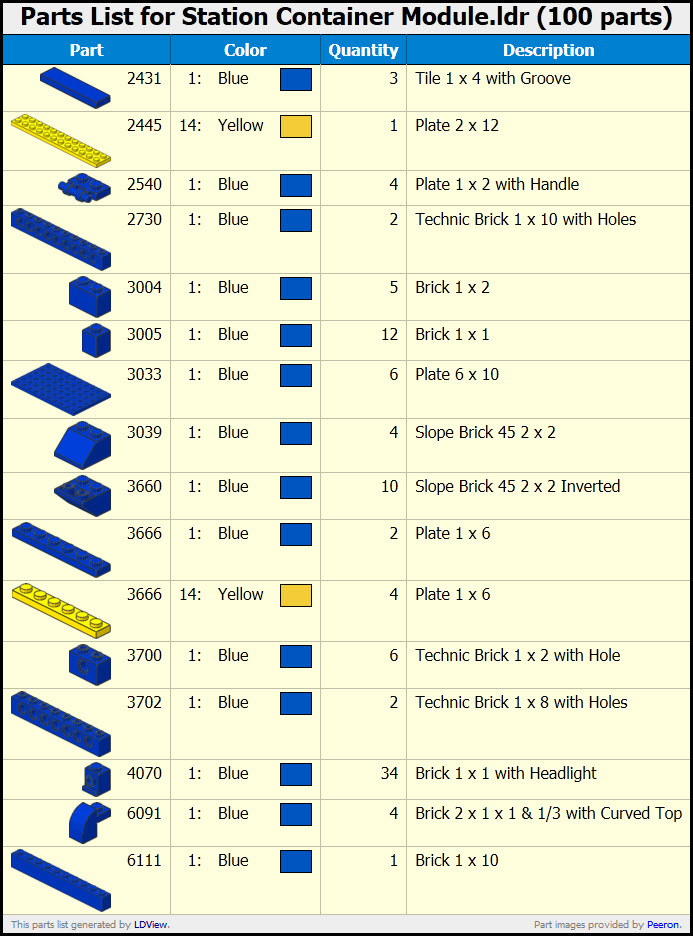 I have split the station into “modules” – the core one being the Section Module, the easiest station would have 1 Section Module and 2 Side Modules.
To the left is my Parts List, created using LDView. It is exactly 100 bricks, the large number is basically coming from the intense use of brick #4070 which I used to created the outer appearance with the open studs.
The module features a “double floor” which would allow interested parties to implement under-floor installations (if really wanted) and provides the foundation of the assembly of multiple modules modules using Technic Bricks and pins to connect the modules. The module is also slightly larger than the original Classic Space Sets but it still fits in with the other models. At today’s rates, the price per section is a little bit over 8€. But the first important question is: can it be built?
 Well, yes, it can. But building it is a bit tedious with all the 1×1 Bricks – it also is a bit instable by itself (the instability will be eliminated once the window sections have been implemented and when the whole model is connected).
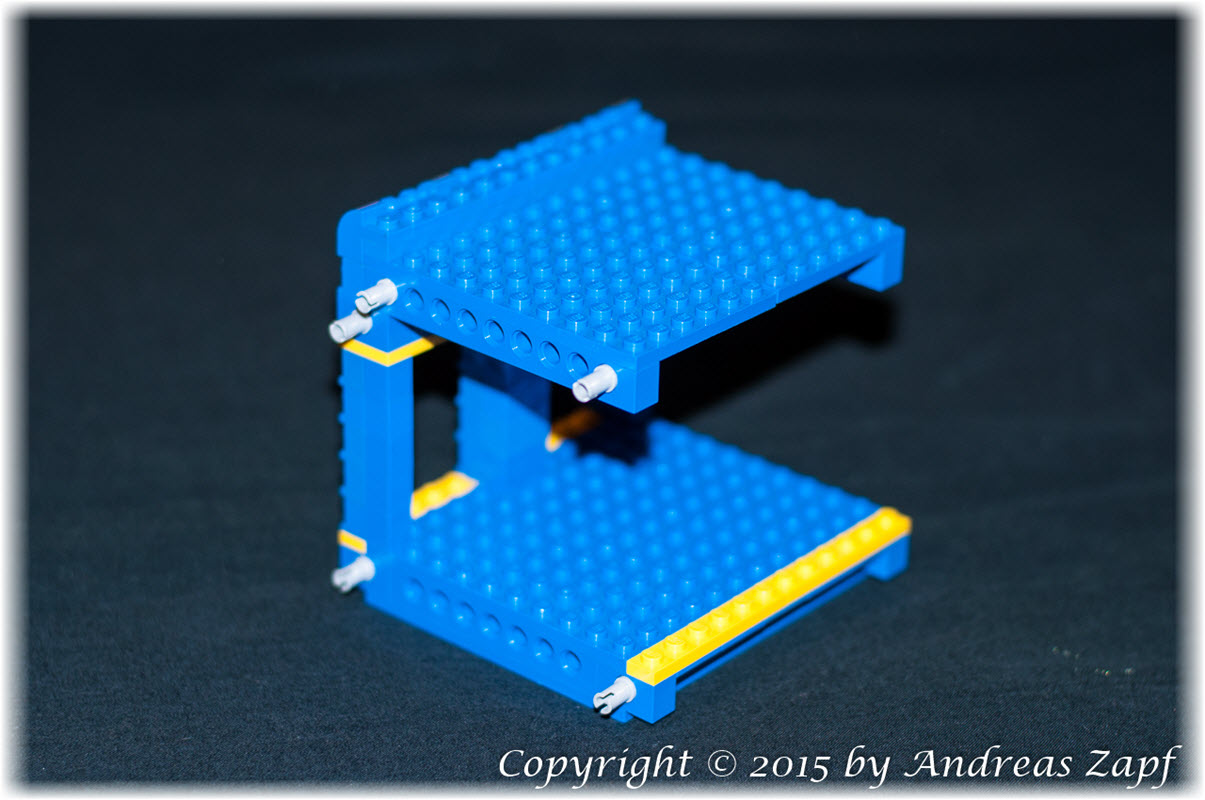 Also, the double-floor works out quite nicely but the Technic bricks at the top are somewhat “standing out” – other than that, the build works just fine.
The Side Sections
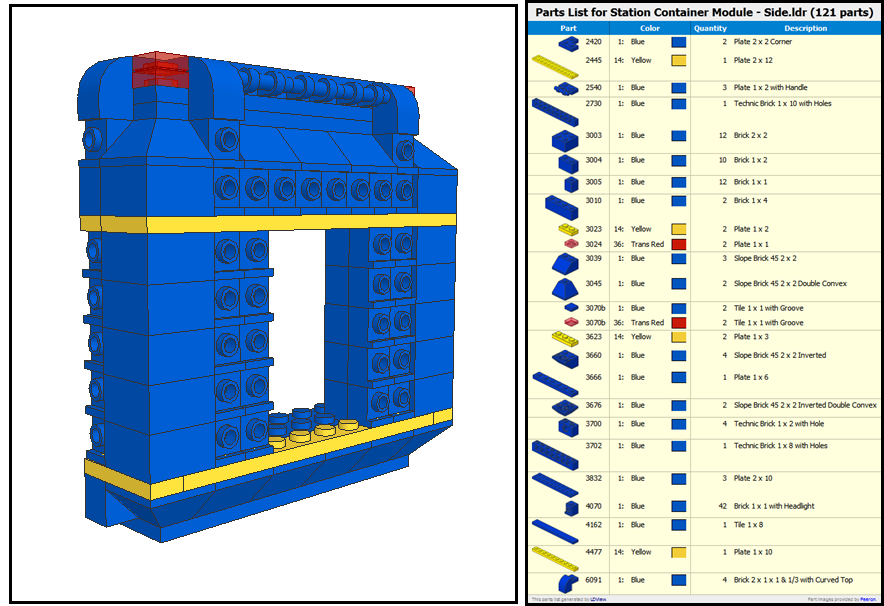 This is what I originally had in mind – the module is built absolutely symmetrically so it can be used as left and right side without changing the instructions.
 I managed to build the module – at least the important parts. Was did not bother finding the “edge” bricks – LEGO 3045 and LEGO 3676 as they were not available with my bricklink sellers that I used for the rest of the bricks. The rest of the bricks, however, helped to proof the case.
Again, building it in that design is a bit… fiddly due to the 1×1 bricks and the instability resulting from them if you look at the section only. Again, it sorts out and becomes stable but building it was a different story.
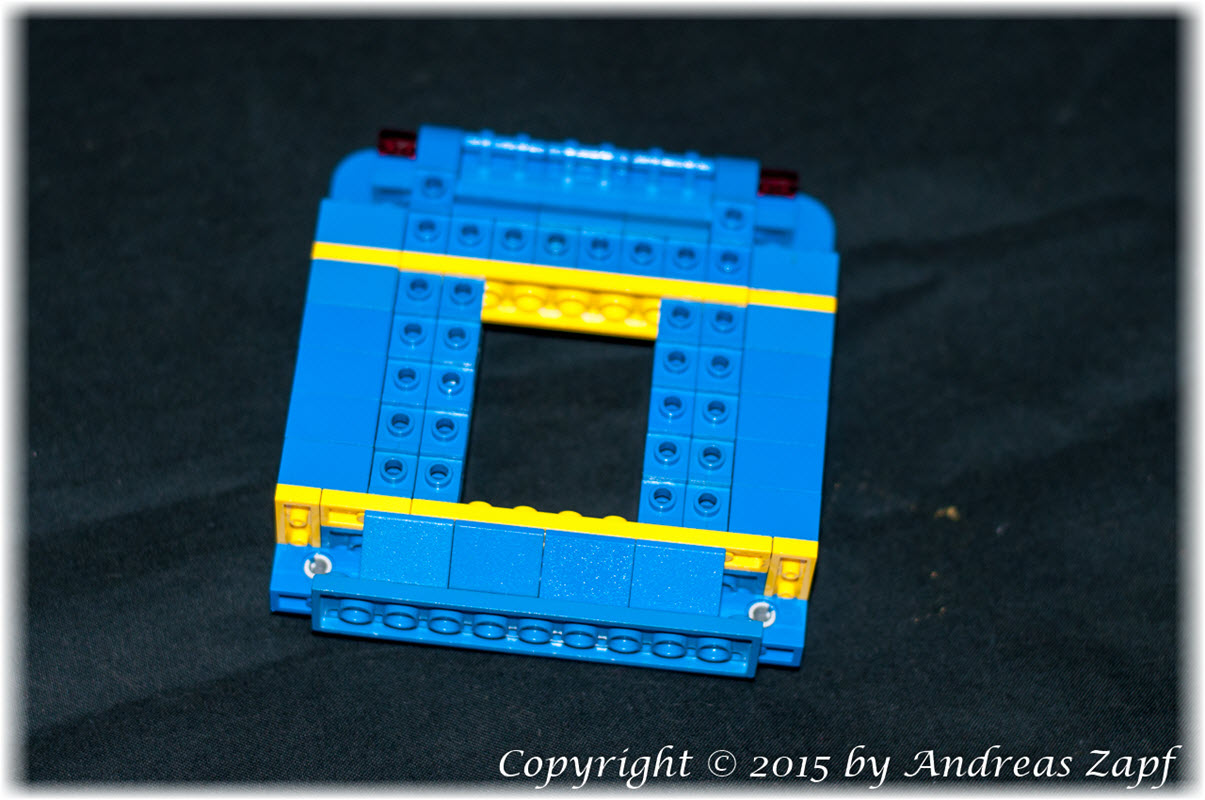
The internal Door Section
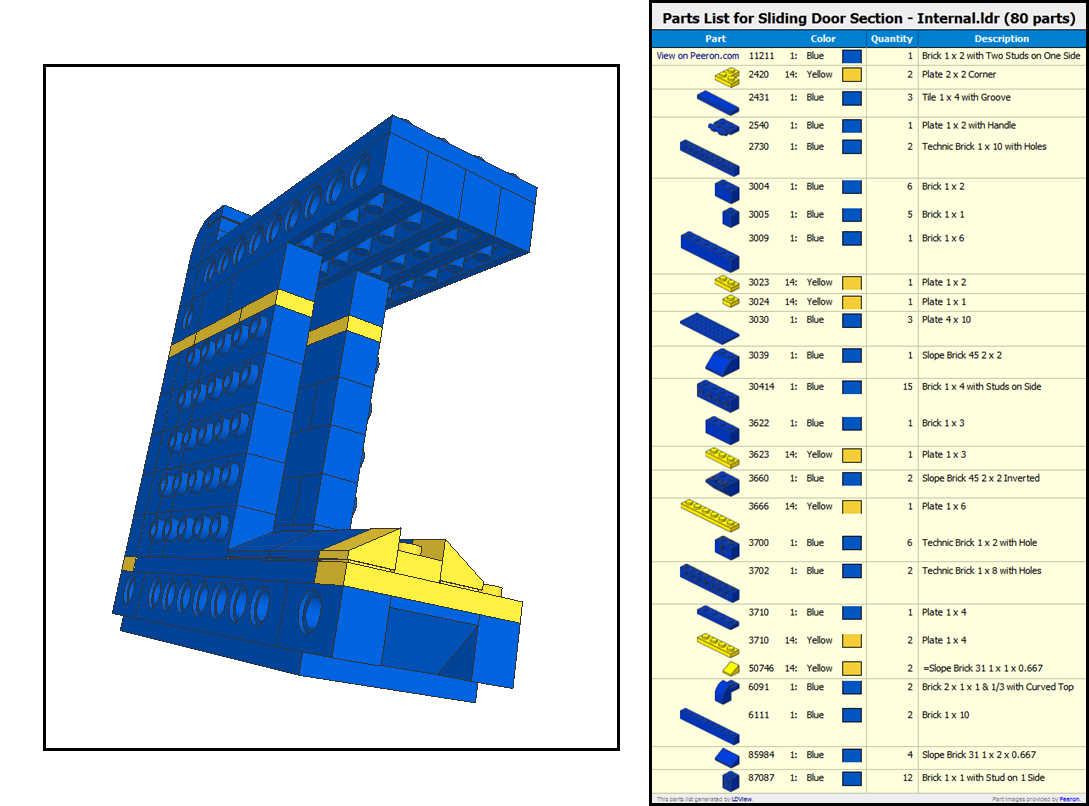 One of the things that always “bothered” me in the Classic Space sets was “how do they get in and out?”. So with my set, I decided we need a proper airlock section and the living compartment must be sealed off against the airlock. This small section allows for a “sliding door” as the inner separator.
 Again, it can be build but with this part, the first design flaw I made became obvious: the level of the studs on the 1×1 bricks is not the same as with the 1×4 bricks – as a result, I was not receiving the “flat stud area” I was hoping for to use as “vertical mounts” for internal parts such as computer screens, etc. That is one of the things that needs to be rethought when redesigning the modules.
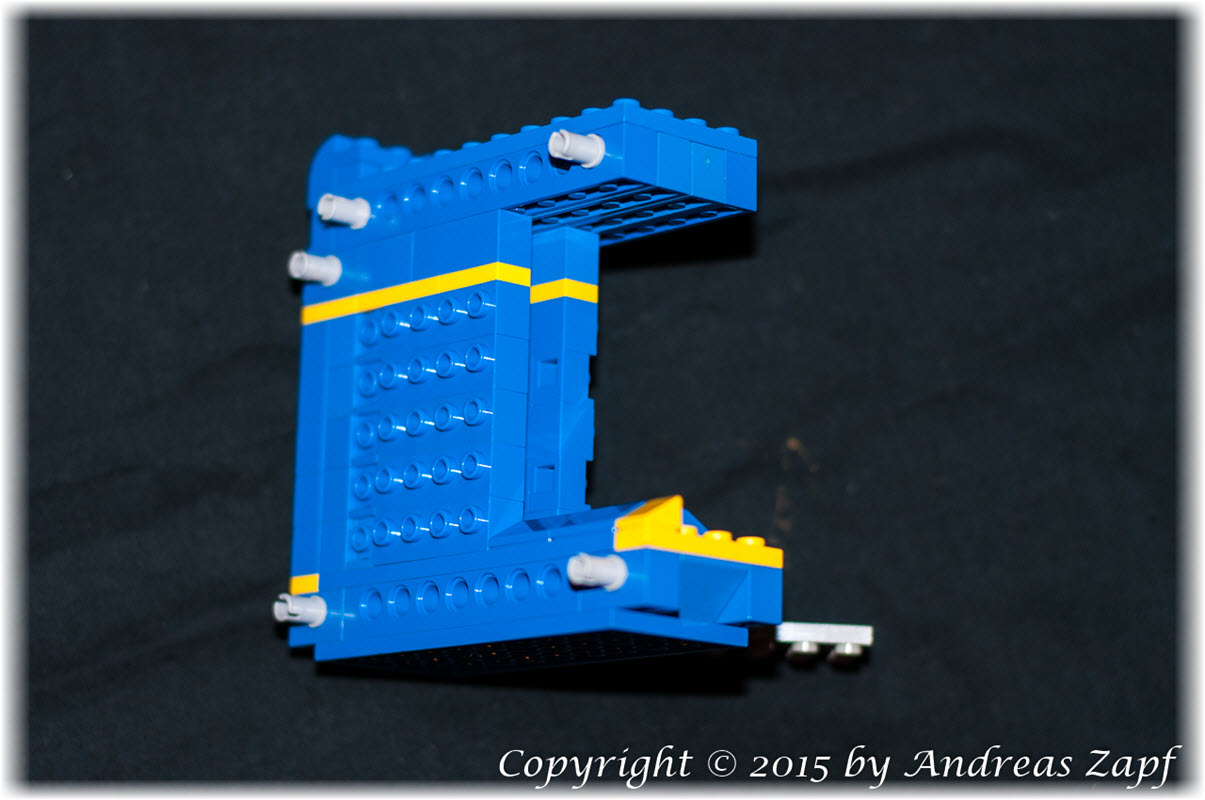
The Airlock Section
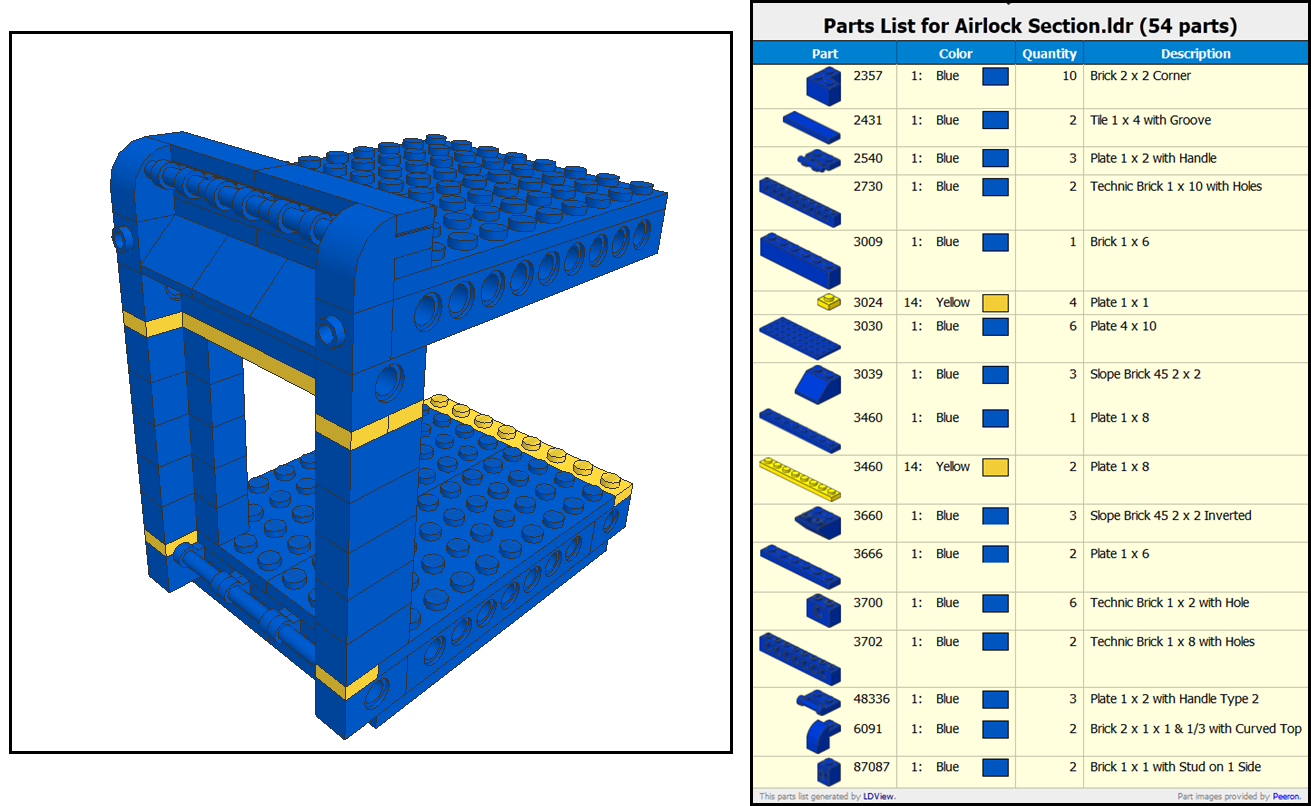 The Airlock section is the final section I need for my MOC – this one is supposed to allow our Classic Space Men to step out of their housing “properly” without having to jump through the open “back”.
 Once more, building it was not an issue and it pretty much came out the way I wanted it to. But while physically building it, I got a couple of ideas to extend the design already – but that is a different story.
Putting it all together
The LDDraw Image on the top of this post already shows “the idea” of putting all the elements together – here it is again:And here is what can be made from it with the physical bricks (and by the way: the one used here is lacking the “airlock” section). Physically built, this is what I get.
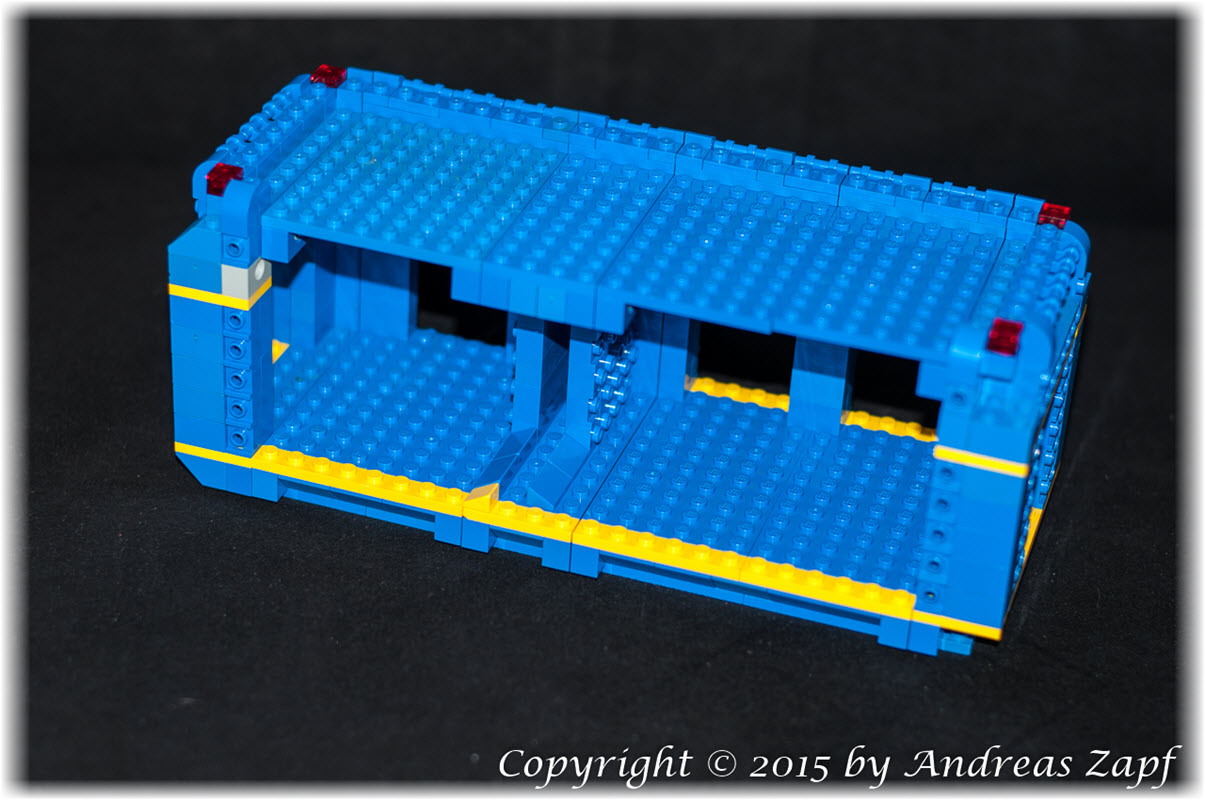 A slightly different angel here:
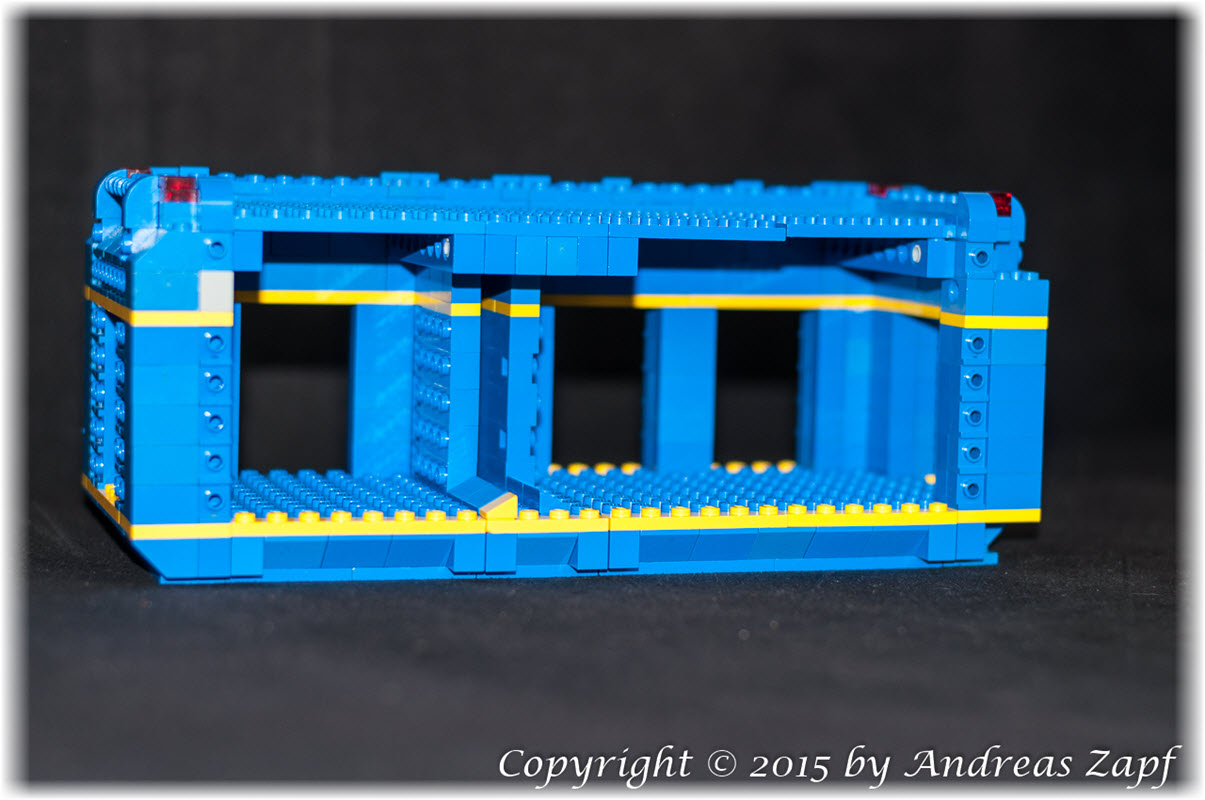 And finally the “rear” side here:
 Conclusions
First of all, the primary “finding” is: it can be build. BUT there are a couple of different conclusions along with that:
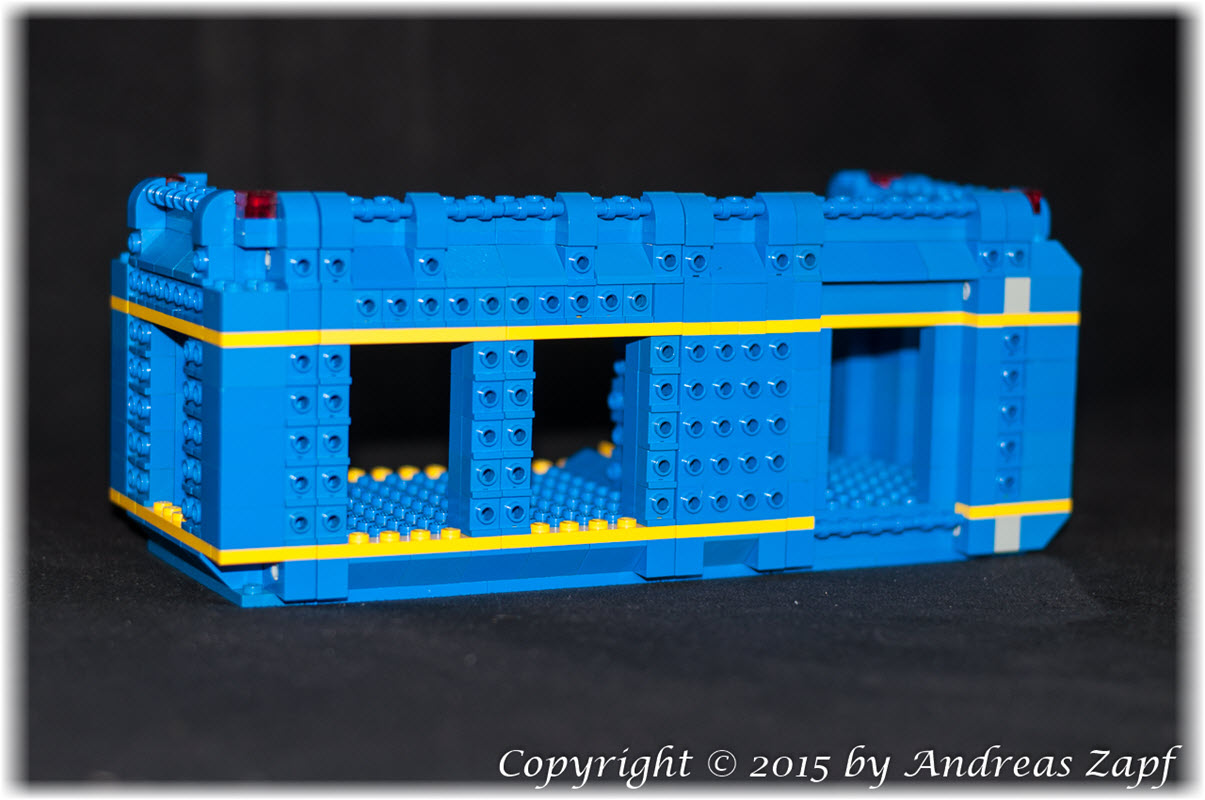
- Compared to the Classic Space Sets, this one looks a bit too “massive” for me while the slightly larger size does not bother (me).
- The idea of using the 1×1 Bricks with Holes as vertical mounts seemed nice but lets you end up with a huge number of bricks – and it creates a certain “instability” which goes away with the complete module being assembled but still was not very much favored during construction.
- The model ends up with wall sections being 2 studs wide – which is not an issue in general and I might keep it but I will eliminate the left and right sides “drawing” into the front area.
Good thing about it: I got some new ideas, I now got enough “standard” bricks to develop the idea and I got a good sense for what is working and what is not working so well…