
Two days ago, I got myself a GoPro Hero action cam – just because it was down to 139€ at the local market. The camera has a time-lapse feature but this beginner’s version of the cam (which I knew is what I was getting myself!) does not allow to change the parameters of the time-lapse, it takes an image ever 0.5 seconds.
Which brings me back to the fact that I wanted to turn one of my Raspberry Pi’s into a time-lapse camera for some time now. But first, I needed to add a few things to the equipment list:
- the Pi Camera (which I already had bought before)
- an external battery pack (I have chosen a 13.000mAh Anker Astro E4 2nd Generation)
- a Pi-Case that allows to mount the camera in a satisfactory way (mine is currently dangling from its cable)
- an USB Stick to store the photos on… a simple one with 8GB will do for the test…
Auto-Mounting the USB Stick
One thing I noticed is that if you plug in the USB Stick into the Raspberry Pi, it does not automatically mount. But there is a little tool that helps: usbmount. To install, simply type
sudo apt-get install usbmount
and confirm the action. The installation will not take long. By default, only root can write to the USB Device(s) mounted – if you are working as any other user (as you should), you need to update the configuration.
sudo nano /etc/usbmount/usbmount.conf
In the configuration file, you will find a line FS_MOUNTOPTIONS=”” which you need to update. Change it to
FS_MOUNTOPTIONS=“-fstype=vfat,gid=users,dmask=0007,fmask=0117”
This will mount the USB Device – the fstype parameter specifies the file system type (“vfat” means an extended FAT File system), dmask and fmask are specifying the permission flags to be added to the mounted drive’s directories (dmask) and files (fmask). The gid parameter finally allows access to the group users, you could alternate to uid=pi which would then allow the user pi to work with the USB device.
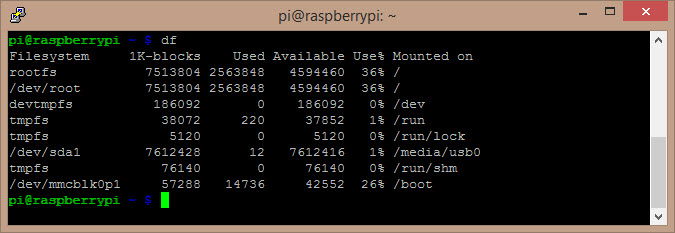
If you got it all right (which includes rebooting the Raspberry Pi after changing the configuration!) you should see your USB Stick mounted in /media – mine is /media/usb0.
Installing PiCamera
PiCamera is a module which eases access to the Raspberry’s camera module. It is the only module needed for a very basic time-lapse script. You can install it by typing
sudo apt-get install python-picamera
Then confirm – as usual.
A very simple Time-Lapse Script
The easiest Python script I found allowing for a time-lapse operation was issued in a German magazine, Raspberry Pi Prokjekte (March 2015).
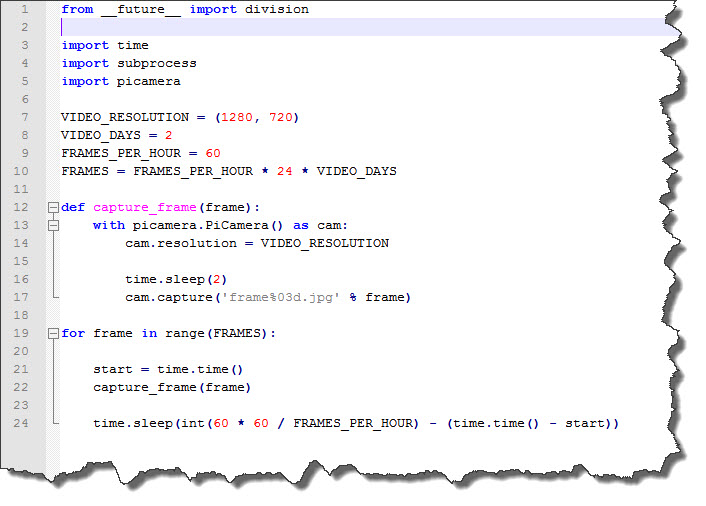
I even stripped it a little bit (the original is also creating a movie from the frames but I wanted only the pictures). So it will take 60 Images per hour (so one every minute) for two days. It will simply store them in the location where the script is stored (which in my case is on my USB Stick).
Auto-starting the Script
One last problem remains: when I set up the Raspberry to take the time lapse, I won’t have it connected to any keyboard & monitor or network. In other words: I will not be able to log in. So I need the script to automatically start when I power on the Raspberry…
The easiest way – once more – I found was using Cron. You can edit the job table using the following command:
sudo crontab -e
At the bottom of the script, the new job (and the event under which it is invoked) can be defined. Adding
@reboot python /media/usb/timelapse.py &
would make sure that Python is run every time the Raspberry is rebooting. One problem I have with this: it does not change to the USB Stick as “home directory” prior to launching the script – and as a result, the script writes the image files elsewhere…
The little trick is to write a Shell script that does the directory stuff first, and then invokes the script:
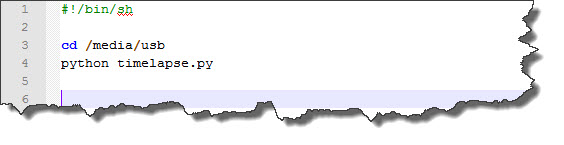 Now, instead of executing Python via Cron, I execute the Shell Script:
@reboot sh /media/usb/launchtimelapse.sh
With that done, my Raspberry Pi will automatically start into taking time-lapse photos when it is powered on and the USB Stick is connected.
Testing the Time-Lapse Camera
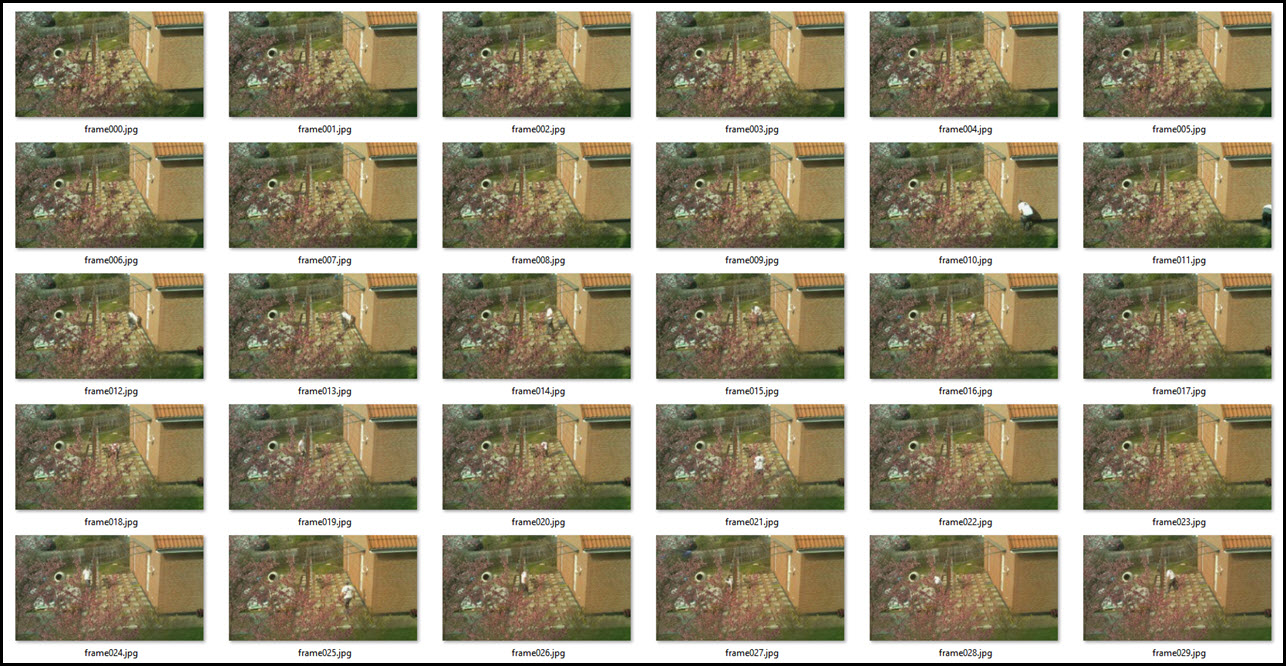
Of course, I was eager to test the Rasperry Pi Time-Lapse Camera. Lucky enough, my neighbor has his patio done which means that there is some action and progress to document. This is just a short test (running about 3.5 hours) which produced roughly 270 frames. But it works:
Oh, one last thing: the way the script is written, it will most likely cause an error after 999 frames (because of the formatting definition in the file name). But this is easily changed…