This post assumes that you have already gone through the previous post about the Windows Server 2008 R2 Base Configuration. If not, your system may be in a different state and may show different results on the screen-shots.
With the basic configuration of the Windows Server 2008 R2 done, we already know that we are missing Server Roles and Features – and a look at the Server Manager confirms this:
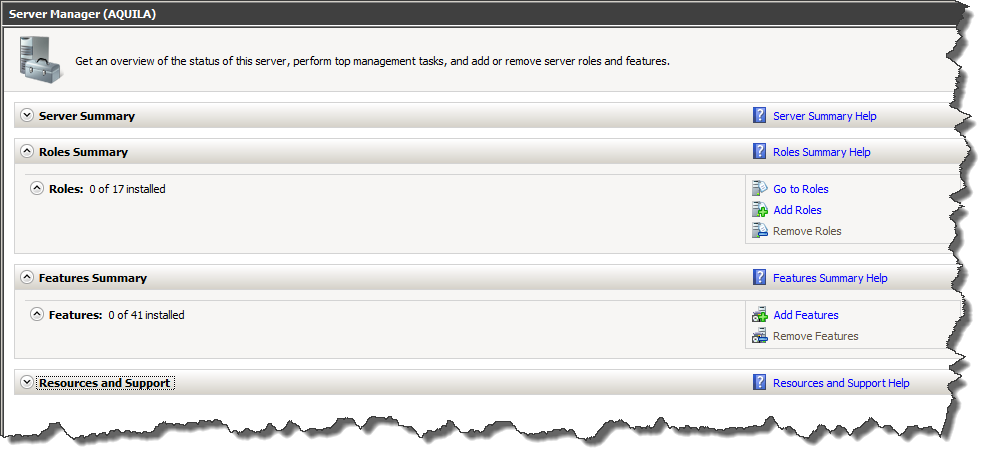 Roles and Features & what they are
So what are Roles and what are Features and how do I know which ones I need? Good questions – let’s look at the available Roles first:
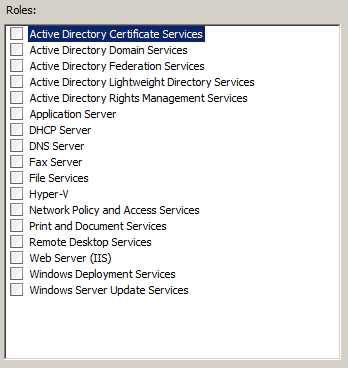 First of all, I want to point out that the list of available Roles is determined by the type of server you have chosen to install: Standard, Enterprise, Datacenter, Core or Web Server.
Now let’s look at the available Roles for the Standard Edition: some of them we may understand easily, others not – but the thing that becomes obvious: a Role is not something that only impacts the server we are currently working on.
Consider a Role more as a service your service provides to the network of computers that can reach it. Take the Role Web Server (IIS). It installs and pre-configures the Internet Information Server (IIS) on your machine. But usually, this is not done because your machine needs it – it is done because you want your machine to provide that service to the environment – your system assumes the role of the Internet Information Server.
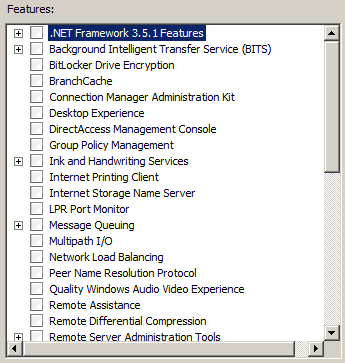 Let’s look at the Features in comparison. Wow – there is plenty of Features listed – significantly more than there are Roles.
Let’s pick one: BitLocker Drive Encryption. Microsoft’s TechNet has the following description for BitLocker:
“BitLocker Drive Encryption allows you to encrypt all data stored on the Windows operating system volume and configured data volumes, and by using a Trusted Platform Module (TPM), it can also help ensure the integrity of early startup components.”
Microsoft TechNet
So BitLocker is something that adds functionality to your machine – in this case encrypted storage of data. How about another Feature – .NET Framework 3.5.1 Features.
Well, this one we are going to actually install a bit later but essentially, it is installing and enabling the .NET 3.5 SP1 functionality on your system.
I think, you are already getting to it – the difference between Roles and Features is their impact on the outside world: Roles offer services that can be consumed by other computers while Features are adding to your system but usually do not have an impact on the outside world.
Roles and Features & Dependencies
Cool, so now that we know what a Role is and what a Feature is, let’s add .NET 3.5 SP1 capabilities to our server – we are going to need them for an application we want to install later. So in the Server Manager, click on Add Feature and select .NET 3.5.1 Features from the list of available Features. Then click Install… wow, wait!
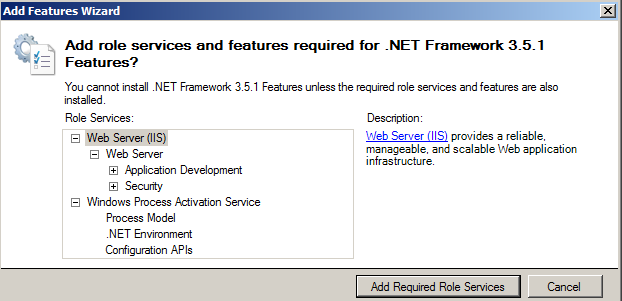 As soon as we have selected the .NET Framework 3.5.1 Features, the system confronts us with a dependency dialog: in order to install the selected Feature, other Features and/or Roles are required.
Thanks to Microsoft, the system know about these dependencies (in earlier times, we might have just ended up with a system not working and a lot of question marks in our eyes…)
Since we got no choice, click the Add Required Role Services button. As an immediate result, we can see that now the Feature Windows Process Activation Service is also selected – that was the one Feature Dependency listed above.
Click the Next button – the system will now show you the configuration section for Web Server (IIS) which is the Role that was selected as a dependency. Click Next again to leave the summary screen and take a look at the Role Services dialog:
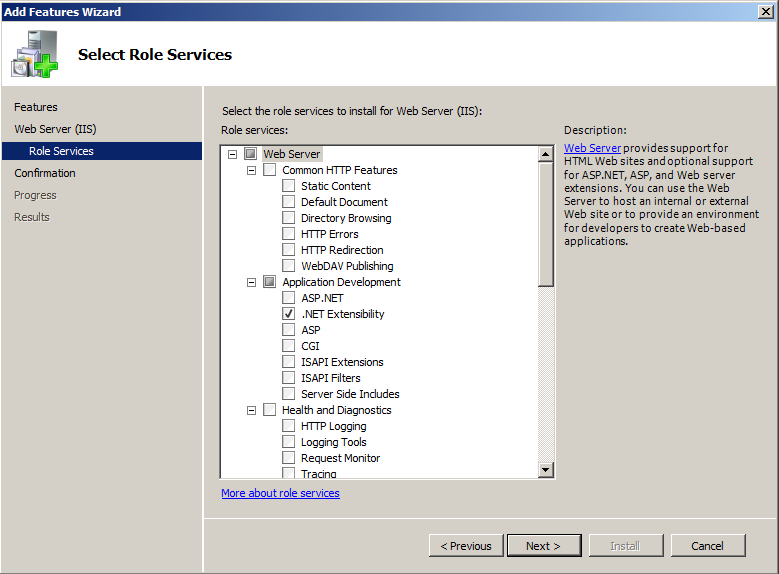 Quite obviously, only very few of the available characteristics of the Web Server roles are selected – only those that are required with respect to the selected .NET Framework Feature. Clicking the Next button takes us to the Summary screen and clicking the Install button there actually kicks off installation. Once finished, you are provided with a summary screen and the kind reminder to update your system using the Windows Update feature because the automatic updates are disabled.
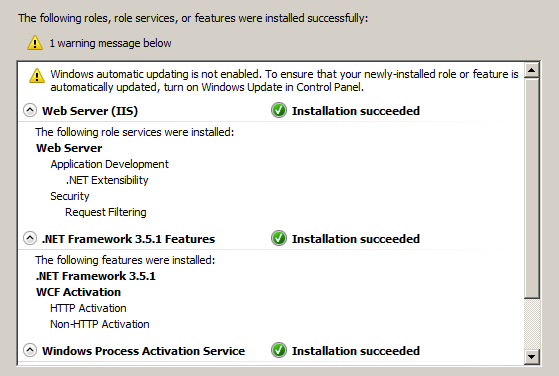 And as a result, the Roles Summary and Features Summary section on the Server Manager have been updates, now showing the Roles and Features we just have installed.
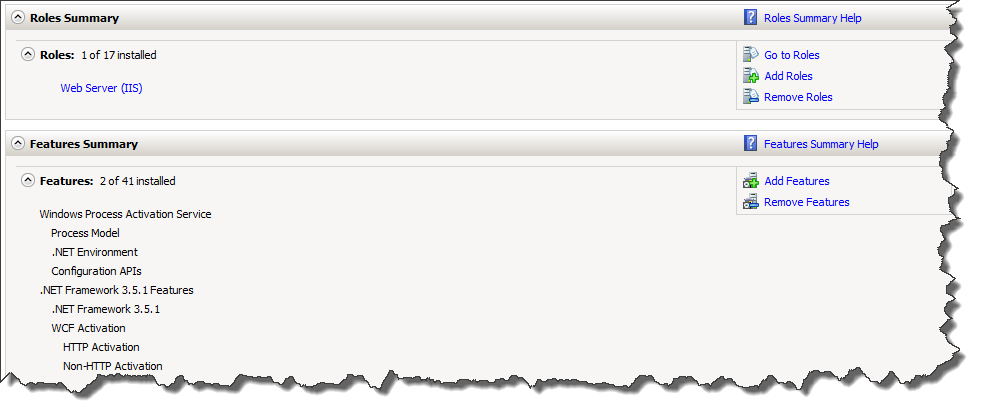 Back to our Web Server (IIS) Role…
… which is what we wanted to install in the beginning. Funny enough, that seems the be taken care of at first glance, the Role is already listed amongst the installed Roles. But as you might remember – the installation was limited to only a few pieces of that role. Clicking the Role takes you to the Role Service Details – and sure enough, amongst the installed Role Services, only five are listed:
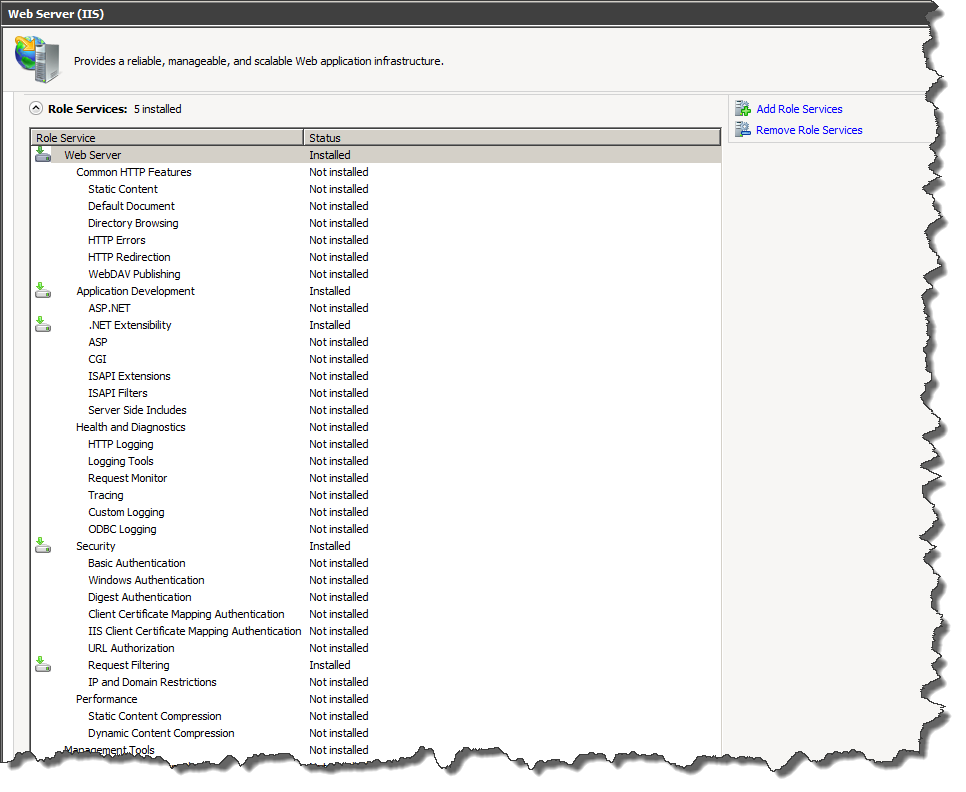 Yes, by clicking the Add Role Services link in the upper right corner, we can add additional Role Services but… we do not know which ones to add since the Wizard will only provide us with the set of available Role Services but does not pre-select the ones required for a Web Server to work…
Warp back in time
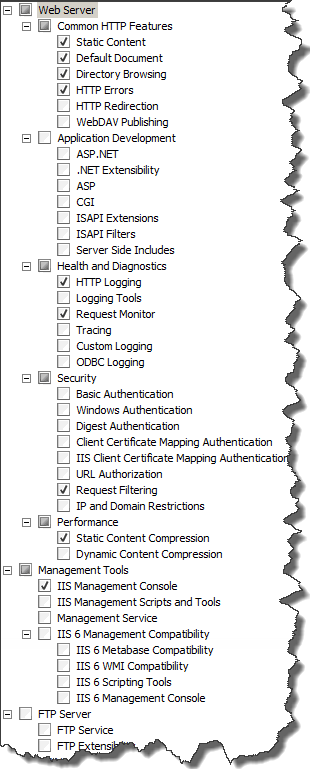 One of the nice things about VMWare are the snapshots – so I take a snapshot now, role back to a previous one and find out which Role Services the system would pre-select if I would install the Role Web Server (IIS) instead of having it installed as a dependency to the .NET Framework.
See the result on the left – that is what would have been selected if we would have chosen to install the Role first instead of the Feature.
At least, we know know which items to check so when I go back to my service with the .NET Feature installed (and with it the Web Server Role), I know can check the missing Role Services for the role manually and correctly.
Doing so and then installing the selected Role Services will bring my system to the point where it has a working Web Server as well as the .NET Framework installed.
Once the installation is finished, it is good practice to perform a Windows Update to see if there have been any patches to the components just installed – remember, the automatic update is switched off and the last update did not consider anything we just installed…
How can I see if the Web Server has properly installed?
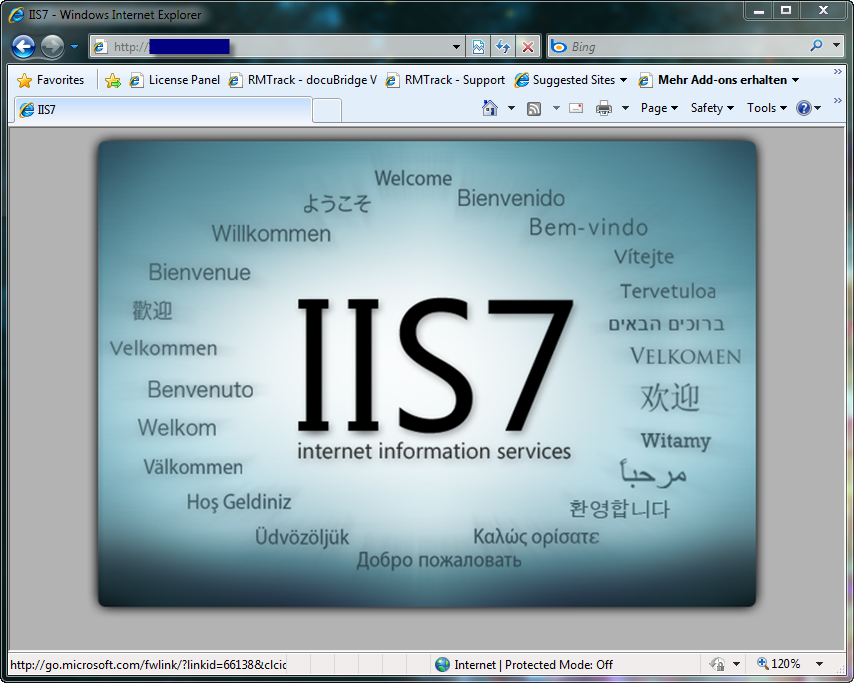
Well, after the Windows Update has been performed and the required reboot has taken place, the easiest thing to see if the Web Server is really running would be to try to open a web page from another computer’s web browser and type the address of your server – http://aquila or http://<ServerIPAddress> into the Internet Explorer’s address bar. You should then see the Web Server’s default Welcome page:
 Conclusion
As with the operating system itself, installing the Web Server is easy – especially once you have understood Roles and Features. However, that just gives you a basic (but working) web server – you would still have to worry about the configuration yourself and that is – as usual – the bigger tasks. And the one that requires a more in-depth knowledge of IIS. Nonetheless, you now know how to get yourself a working web server for simple tasks.
