Dynamic or Static IP Address on the Raspberry Pi?

By default, the Pi’s Operating System is set to work with a dynamic IP Address – assigned by a DHCP Server in your network upon request. While this is very handy, it also is an issue because the IP address is not “guaranteed”. In many cases, your device will receive the same IP Address than during the previous session but it may change.

First of all, it needs to be determined which IP Address is currently used by the Pi – the command do list the information is

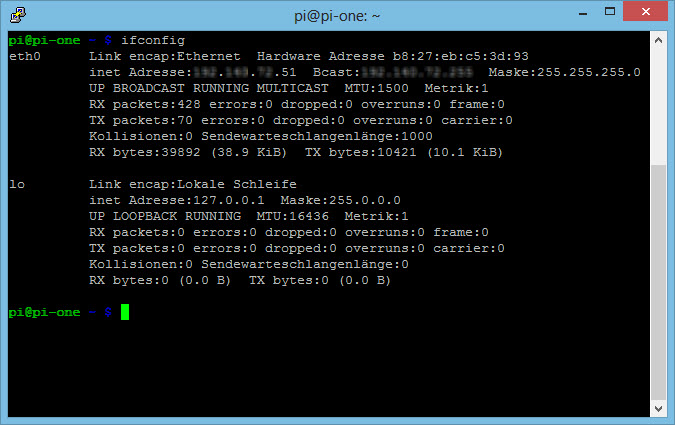
ifconfig

and it will produce an output similar to the one below.

01 - ifconfig InformationNotice where I have masked by private information – the first interface listed is eth0 – the first Ethernet Network Interface Card (NIC). The second line gives the inet – the IP Address. You can also take a look at /etc/network/interfaces – use the cat command:

cat /etc/network/interfaces

and you will see all defined interfaces listed.

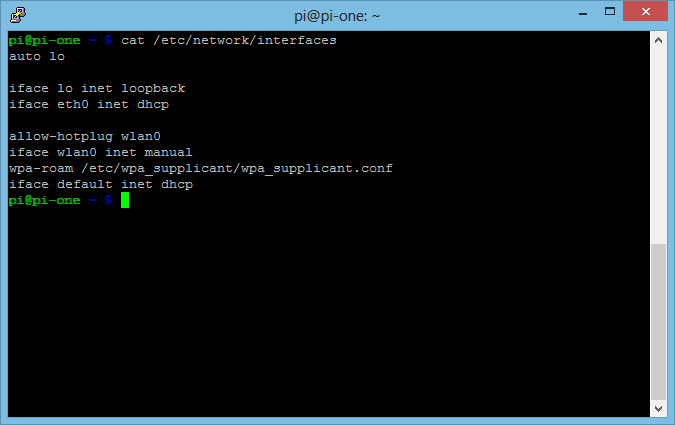
02 - Network InterfacesSee the definition of eth0? It specifies the IP Address is assigned via DHCP. Dynamically… now let’s see how we can assign a static IP Address. And to do that, you need to edit the configuration file:

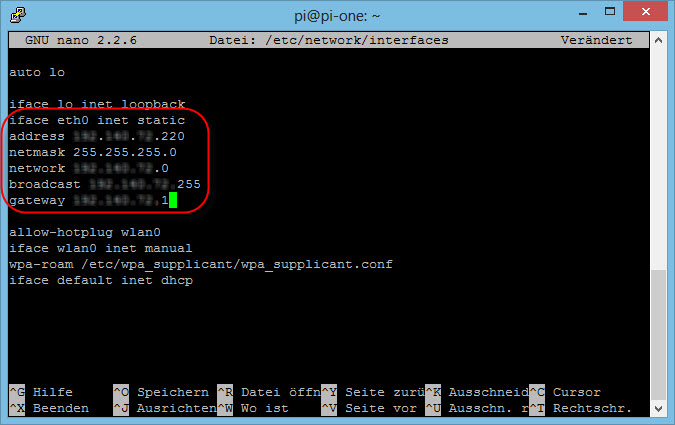
sudo nano /etc/network/interfaces

03 - Making the IP Address staticObviously, you need to specify your own network settings – I have masked mine again but you get the scheme, I think. Finally, you need to reboot the Pi:

sudo reboot

and now you should be able to see the new (static) IP Address using ifconfig. If everything is all right, the two network LEDs on the Pi should light up and you should be able to work – if not, you will (in case you did the configuration remotely via PuTTY) have to connect a monitor πŸ™‚

Posted in Raspberry Pi | Tagged | Leave a comment

Getting C to work on the Raspberry Pi

Once every while, everybody has an idea that requires some development on a computer system. While the more basic ideas can be put into scripts (and scripts can be very complex!), the more elaborate ideas usually end up with a higher programming language such as C or C++.

“Hello Raspberry!” on the Pi

The first program almost everywhere is “Hello World!” – a one-liner that usually display exactly this string… it was my first program on my very first ZX81, it will be the first one on the Raspberry… yet, it needs to be written which requires a text editor being available.Β For the Pi, this is nano… and guess what: the command is

nano

Nano is a most basic text editor, yet it holds everything we possibly ever need when working with text files… it is just not very… well, not the easiest thing to work with for a Windows Boy.
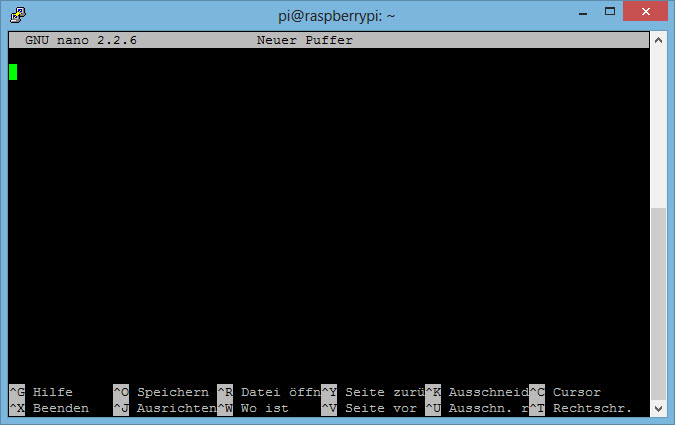
01 - NanoThe program itself is rather short – as you can see, I am using PuTTY again for the SSH connection (like explained in my previous post) and there really are just a few lines of coded.
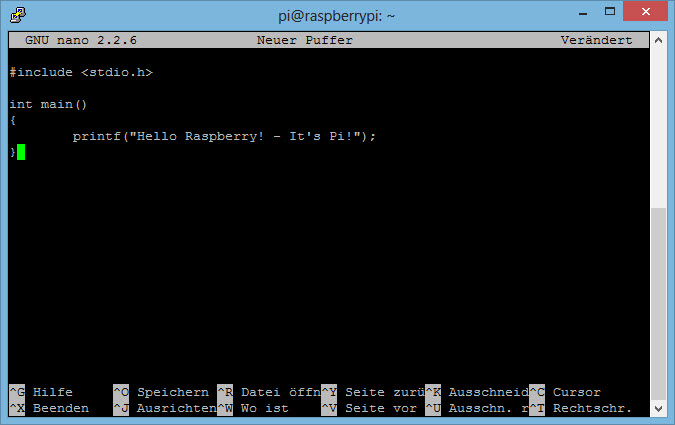
02 - The C ProgramCtrl-O will save the file and you will have to provide a file name – hello.c seems appropriate. Once saved, nano even provides syntax highlighting because it now knows the type of file – a C-File.

Now, the next question is: where did I save my file? So I leave nano using the Ctrl-X shortcut (which brings me back to the command line) and ask the system “Where am I?” – or, in command form – “Print Working Directory!” – the actual command is

pwd

and the response is /home/pi which is my personal home directory. And surely, my newly created file is listed there.
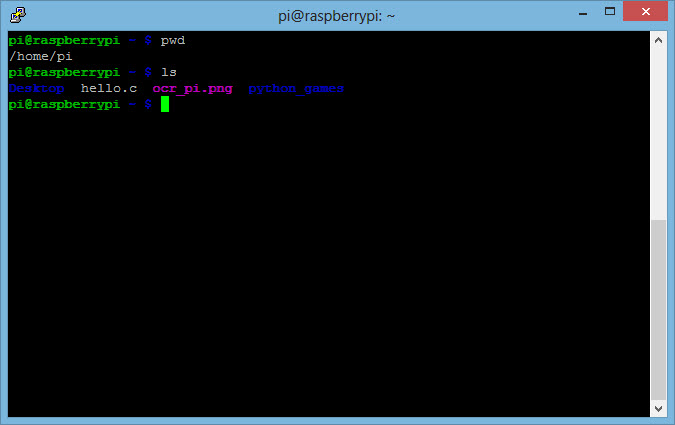
03 - Listing the C FileNow the problem with that is: I don’t want every single one of my files to stack up directly in my home directory! So let’s create a sub-directory within /home/pi called sources. The command to create a directory is mkdir (short form for make directory) and it requires a name for the new directory.

mkdir sources

creates the directory, the ls command – ls for list – shows the result.

04 - mkdir ResultsLast thing to do is to move the hello.c file into the sources directory (or a subdirectory within, if you want further separation). The command is mv (for move) and it can also be used to just rename a file. The format is mv [options] oldname newname. In our case

mv hello.c sources/hello.c

because we want to keep the file name but place it in the sources directory. Once done, we can use the ls command to show the file is gone, then use the cd (for change directory) command to go into our sources directory and issue the ls command again.
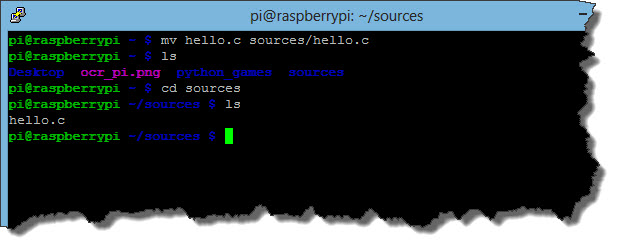
05 - mv ResultsCompiling & Running the Program

Writing the source code is actually only the first step – C is a so called “higher programming language” and the source code needs to be translated into machine-readable code. This process is called compilation. The program that compiles the code is the Compiler.

Luckily, we don’t need to worry about a compiler being installed on the Raspberry – it is already there. The default C-Compiler is GNU C Compiler (GCC) so let’s just ask the compiler which version is installed.

gcc --version
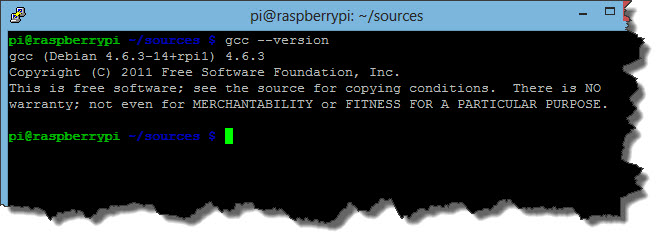
06 - GCC VersionCool – we got version 4.6.3. And at the same time, we also learn that the Raspberry Operating System is actually a Debian Linux. Next step is to compile hello.c and make it an executable program.

gcc hello.c -o hello

Which means “Dear Gnu C Compiler, please take the file hello.c and create an object file called hello from it!”. The result is less than spectacular… the output is… nothing. But a ls command shows the result.

07 - Compiling the ProgramYou can now execute the new program – just call it from the command line:

./hello

and you will see the result.

08 - Result of HelloEvery C-Programmer in the world should now complain I could have at least made sure it moves the cursor to a new line after the text but hey, this is the most simple interpretation πŸ˜‰

Getting a more elaborate Development Environment

Let’s make a few changes to the Hello.c program but let’s make them in a more decent development environment – we want a so called IDE (stands for Integrated Development Environment) – many hard-core developers will now say that is nonsense but hey, I know you can cook your steak over fire but when you got a nice BBQ, you will use the BBQ…

For our purpose, an IDE called Geany will do the trick – but it needs to be installed onto the Raspberry.

sudo apt-get install geany

and off you go. The installation will kick in but there will be a confirmation required. The installation will succeed but when you try to run the program from the command line, you will receive an error: the IDE is written for the XServer Desktop which in return requires us to switch from our commandline PuTTY to an RDP Connection. You will find Geany on the menu. I have already loaded our hello.c program…
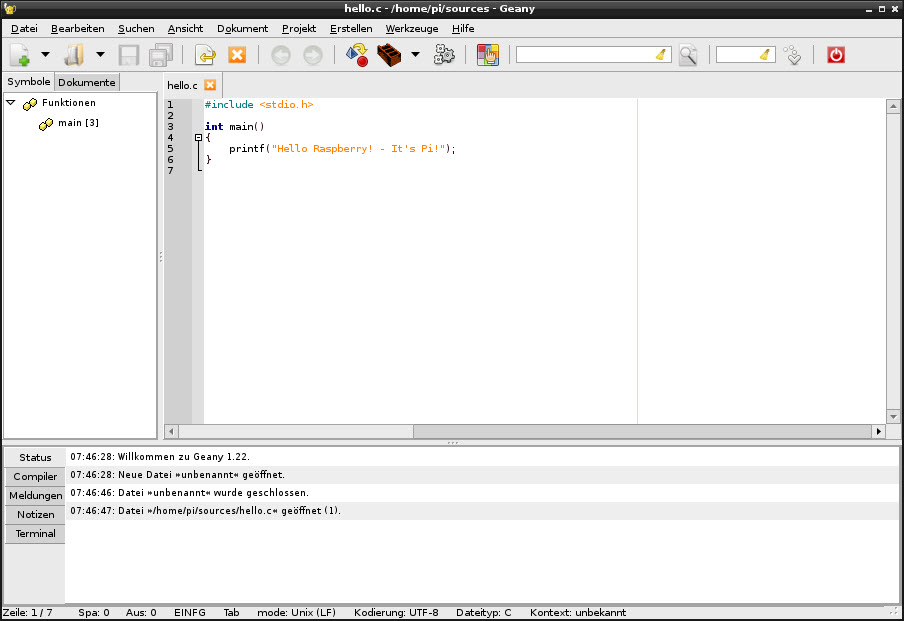
11 - Hello World in GeanyFirst of all, we will make sure we get the cursor into a new line when the program is executed this time – this is simply achieved by adding a \n to the output, a control character which will add the new line. We also need the program to deliver a return code (otherwise the compiler will complain…) so another line is added: return 0;

You can now press the F9 key to start the compilation…
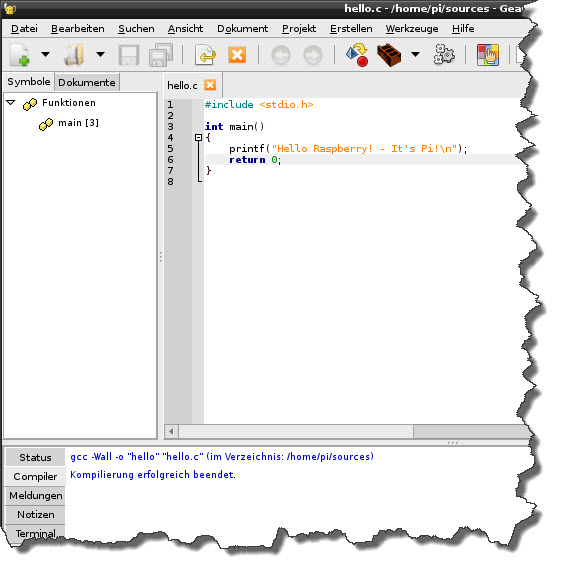
12 - Compiling the new VersionWe could now go back to our PuTTY session and review the sources directory using the ls command. Again, we will find the source code and the compiled file – executing it again will now make the output look different.
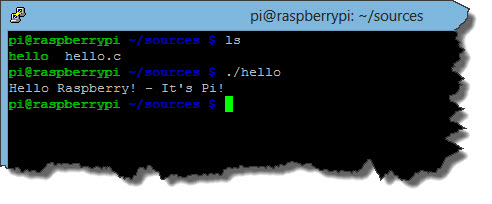
13 - The final Result

Posted in C/C++, Raspberry Pi | Tagged | Leave a comment

A new Toy – Raspberry Pi!

I have a confession to make: I am a Windows-Boy through and through! Of course, I used to do DOS way back when Windows was not out… I used to do the other Operating Systems on by computers before I owned a PC… but ever since Windows 3.0, I am a Windows Boy… and now, I got myself a Raspberry Pi!

Let’s just say I am a little bit curios – and I like the idea of a card-sized computer for very little money. And it might also be time to pick up a bit more on Linux…

Getting the Raspberry Pi installed

This really comes down to installing the actual software – the hardware, if “installed” at all, is limited to be mounted into one of the many cases around (an investment worth it because you don’t want to drop anything on the bare mainboard).

So the software: the operating system, a Debian derivate specifically released for the use with the Raspberry Pi, can be found at www.raspbian.org. Just grab your current copy from the download section. At the time I am writing these lines, the current version of the raw image is 2013-09-25-wheezy-raspbian.zip.

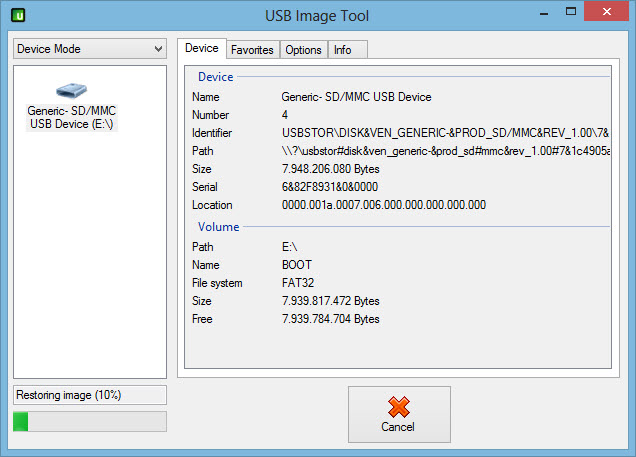
The downloaded image is the “final” operating system – there is only one thing to be done: it needs to be written onto an SD Card and I am using a tool called USB Image Tool which can be downloaded here.

Finally, you need some sort of SD Card Reader because that is the target – a Class 4 (or higher) SD Card of 2GB or more storage.

01 - USB Image ToolOnce the process has finished, you can insert the SD Card into the Raspberry Pi, connect the device to a monitor using the built-in HDMI Port and power the device up. A network connection (Ethernet cable for the moment) would also help…

Starting up for the first time

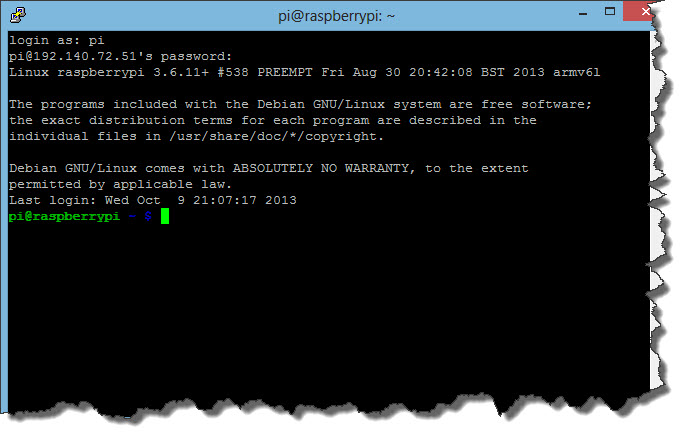
Current versions of the Rasbian OS don’t even require you to have a monitor and a keyboard attached to the Raspberry Pi: the installation has SSH enabled by default which allows you to directly connect to the device through terminal emulation, e.g. using PuTTY. The only thing you will need is the Pi’s IP Address… the user name (by default) is “Pi”, the password is “raspberry”…

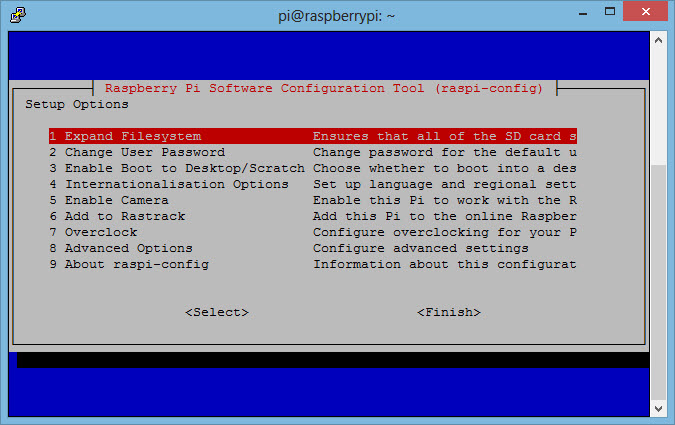
02 - PuTTY Connection to the PIIf not done yet, you can configure the Pi via the SSH Session – you just need to start the configuration tool but it needs to run as root so (being “pi”), you have to issue the following command:

sudo raspi-config

and you are ready to go.

03 - raspi-config Main MenuYou won’t have to go through all of the possible choices now (or at all) and you can always come back later – but a few things I am going to do to my installation:

  1. I am expanding the file system to make full use of my 8GB SD-Card.
  2. I am making sure I can use my German keyboard layout and set the locales for Germany.

Once this is done, I need to reboot the Pi for the file system expansion to take effect. Conveniently, raspi-config is asking me if I want to reboot when I finish the program. I agree…

If you are working via PuTTY, your session will be terminated – and if you also have a monitor connected to the Pi, you will see the shutdown and restart progressing…

The Pi and the Remote Desktop

PuTTY is working but the command line is a tedious tool – as I said: I am a Windows Boy and I am used to Remote Desktop Connections… but for now, we need to go back into the Pi using PuTTY.

Before I am going to install any software, I want to update the repository for the package management database. The comand is

sudo apt-get update

and this will initialize and update the local package management database. The sudo command is required because this needs to be run with root privileges. This will take a little while… a few minutes.

Once that is done, I can install the Remote Desktop Server software using

sudo apt-get install xrdp

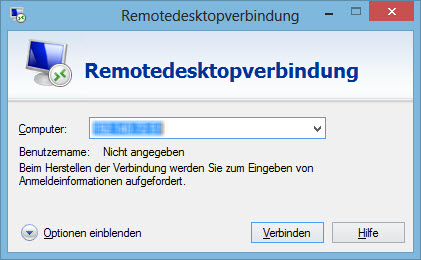
as command. Again, this will take a few seconds – about a minute or so. When finished, I can connect to the Pi using the standard Windows RDP Client:

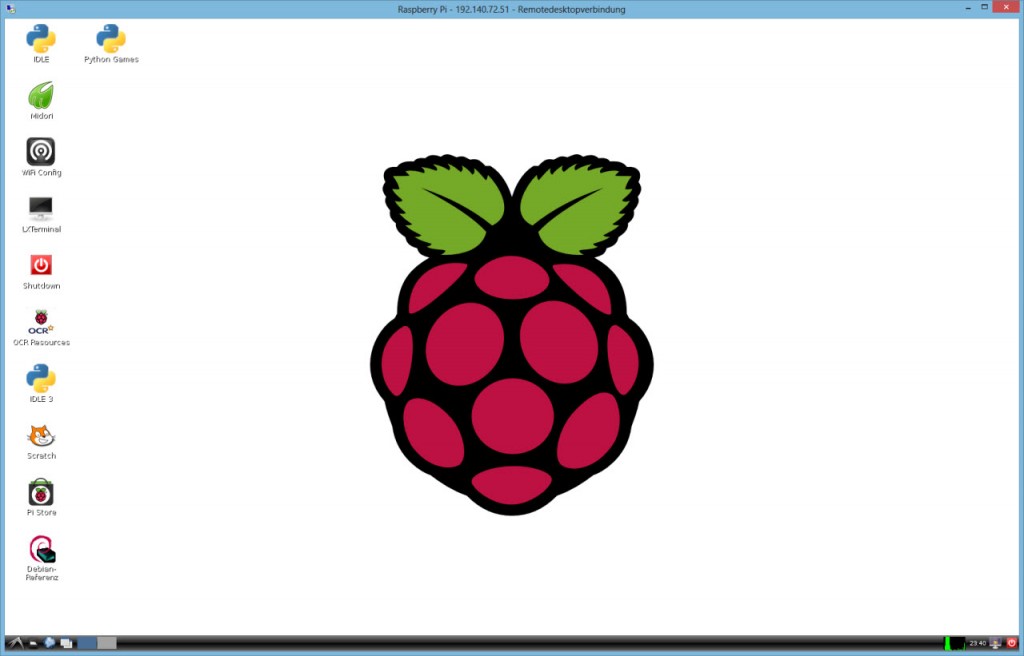
05 - RDP ClientIt will be only a few seconds and the Pi shows its Graphical User Interface… so from here, the fun can begin.

06 - GUIAnd this is it for the moment – the system is set up and remote connection capabilities are established…time for the little machine to go to sleep for now.

sudo shutdown -hP now

…and I am off to bed as well…

Posted in Raspberry Pi | Tagged | Leave a comment

Astronomy on your own Computer – where it all began

Sometimes, you just need luck. For quite a while now, I have been looking for an old computer program called Skyplot. Next to some very cold nights out under a clear Bavarian sky back in 1985, this is probably what sparked my initial interest in the skies above – and although I did not touch a Schneider CPC Computer for more than 30 years, I never forgot about Skyplot.

The program is rare – I found some people on the Classic Computer Forum and they rendered some help (including the offer to send a copy over on a 3″ Disk) but I was after the original listing (or at least a scan thereof). And then I bought ZX81 Magazine on eBay. And it just crossed my mind to see what else the seller had on sale – a couple of CPC Magazines along. And then, there was a copy of a magazine from Austria – released in January 1987… I took a look… and there it was… right on the cover!

From the Magazine to the PC…

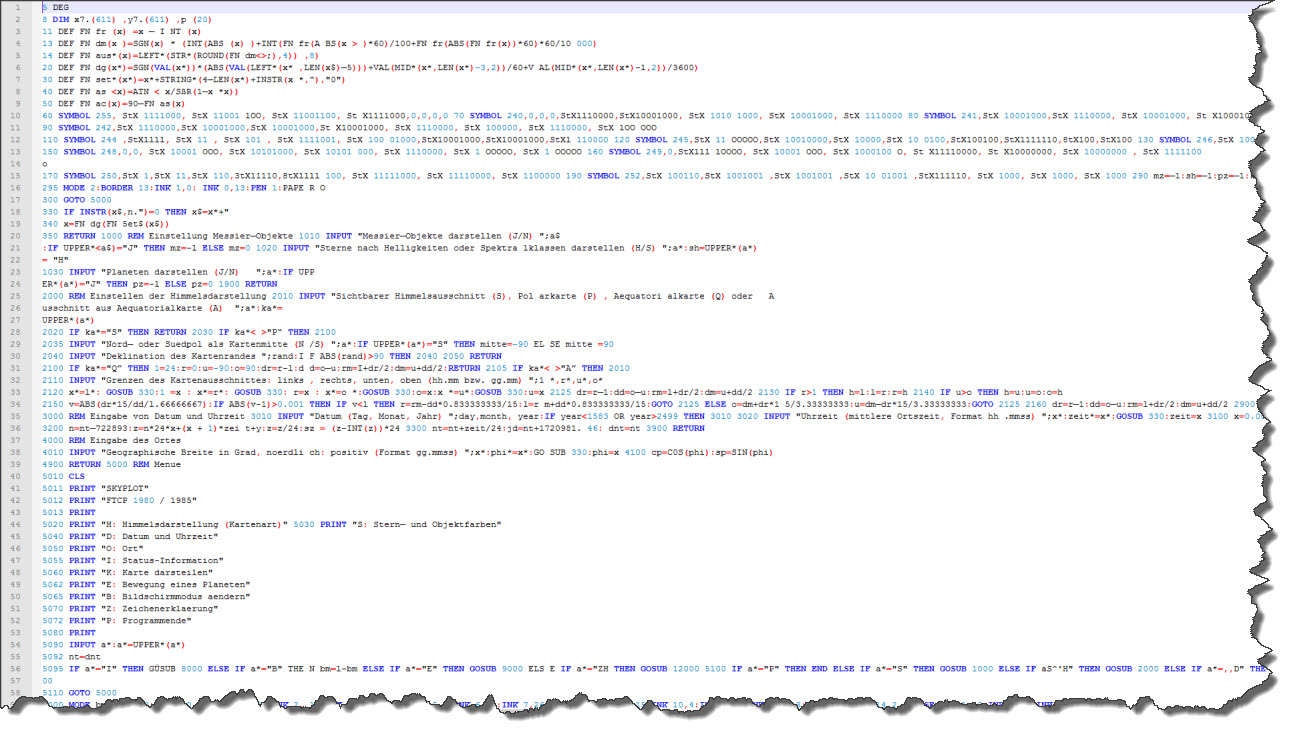
I have written about getting the code from the magazine into the system using Scanning, OCR and Notepad++ – I am not going to repeat the story here. I placed the initial, uncleaned text file right in Subversion to have a baseline in case anything goes wrong and started cleaning the code in Notepad++.

Code 01 - Uncleaned VersionYou may already be able to pick up some of the more obvious problem areas:

  • Percent-Characters (“%”) have not been OCR-ed properly…
  • Spaces (” “) in places they should not be in…
  • Ampersand-Characters (“&”) not properly OCR-ed…
  • The number “1” and the character “l” are not properly OCR-ed which is extremely difficult to see in the result… and so are the number “0” and the character “O”.

… and into the CPC Emulator

So here we are – the code is in the PC, possibly written using a tool like Notepad++ and has been reviewed and corrected. Now what?

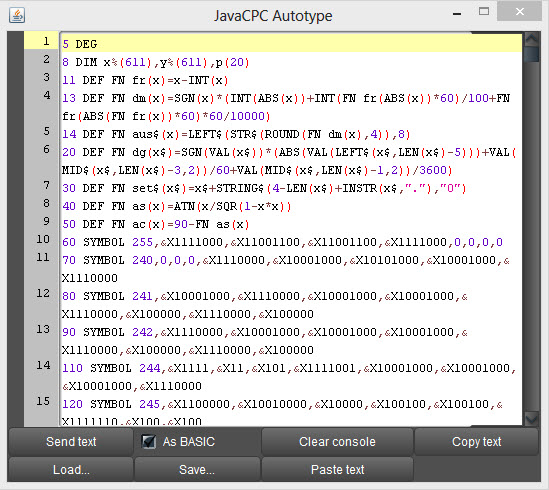
With a little bit of help from the author, I managed to use JavaCPC Version 2.2b and it’s AutopType feature to get the code over – important hint was to use the “As BASIC” option. Paste the code into the AutoType window, select the “As BASIC” option and hit the Send to CPC button. It will take a while but it will bring your code into the emulated CPC.

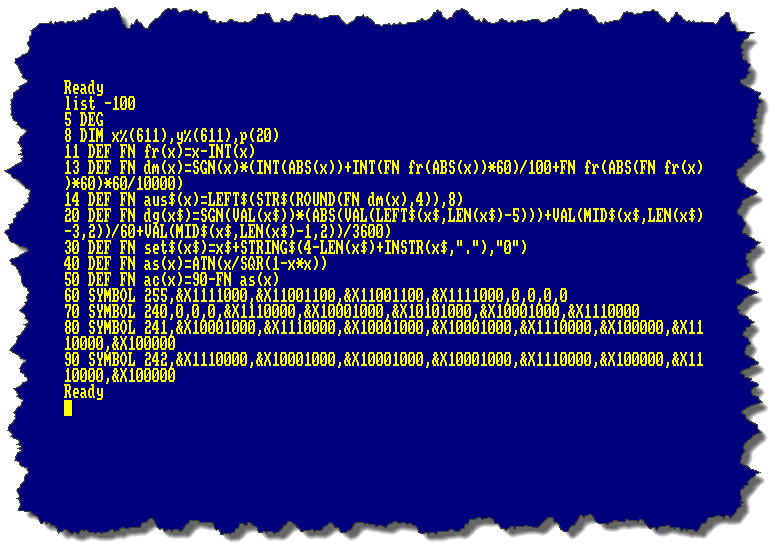
JavaCPC 01 - AutoType as BASICOnce the auto-typing feature is done (after a few minutes for a listing of this size) we are able to use the emulated CPC and look at the first line of code within. For a better overview, I have switched to MODE 2.

JavaCPC 02 - The CodeNow, some 28 years after it has been published, the cleaned and imported code (hopefully) runs again.

Skyplot 01 - Main MenuI have left the program in German as this is the original language it was published in. Just for a quick functional check I will ask Skyplot to draw us a map of the stars today, Thursday, October 3rd, 2013.

Skyplot 02 - Full Map of the SkyBut I am more curios about the exactness of the calculations of a software almost 30 years old – so the next thing to ask for is a map of the visible sky for November 15th, 2013 at 22:00 local time for 50Β°N.

Skyplot 03 - Visible Sky mid NovemberA comparison with astronomical literature reveals: spot-on! Except, of course, two objects that have been of interest when Skyplot was published in the mid 1980s – but not today: Pluto can still be seen among the planets and Comet Halley is also on the screen – of course, not visible today…

And – if you look closely: there is a bug somewhere πŸ˜‰ – but I’ll leave that for the next session…

Posted in CPC | Tagged , | Leave a comment

Windows Server 2008 R2 & Folder Redirection for Start Menu

This one has really gotten some time to sort out – here is the scenario: I am running a Windows Server 2008 R2 SP1 as Domain Controller (Host: WINDC) and a second Windows Server 2008 R2 SP1 as Terminal Server (Host: WINTS).

When my users log in to the Terminal Server, I want to present them with a common Start Menu but I do not want to maintain each user’s Start Menu individually (my working through their profiles).

Creating the “new” Start Menu

The new Start Menu structure resides on the host WINDC – that way, each Terminal Server that I might add in the future can also access it without additional work.

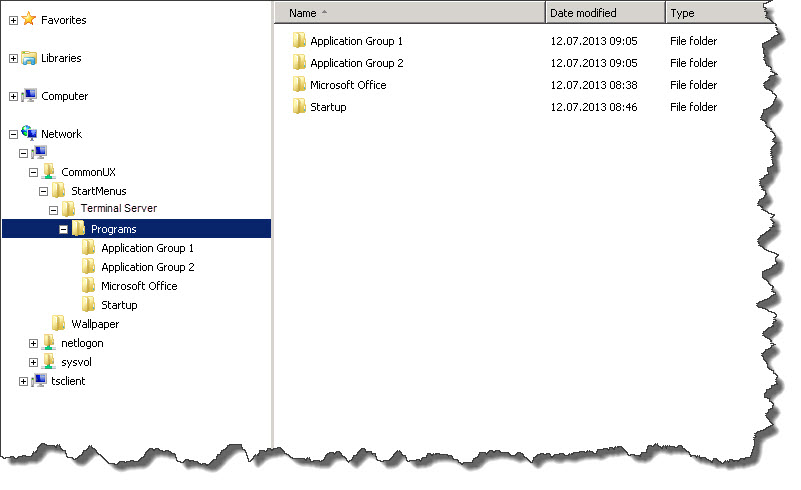
On this host (WINDC) I have created a directory called CommonUX, within it there are two subdirectories: StartMenus and Wallpaper (for a common Wallpaper). Within StartMenus, I have created a single directory for the (currently only) Start Menu structure I need: Terminal Server.

Image 1 - Directory Structure on DCFinally, I have shared \\WINDC\CommonUX and granted Share and NTFS Permissions for Authenticated Users as Read.

Within the Terminal Server diractory, I have then started to build my Start Menu items, Application Group 1 and 2, Microsoft Office, and a Startup Folder.

The Group Policy

Now this one has taken me a while to figure out – especially since there are a couple of settings that “collide”. First of all, the easier one:

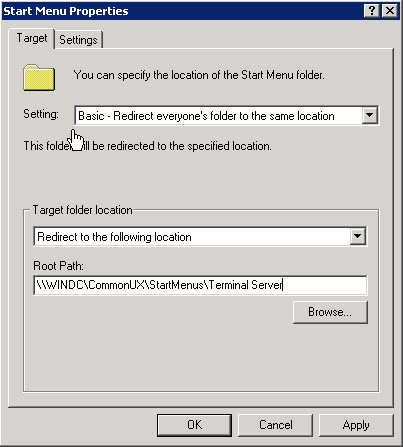
Under User Configuration -> Ploicies -> Windows Settings -> Folder Redirection -> Start Menu, I have chosen the Basic Redirection (everyone will receive the same Start Menu) and directed the redirection to \\WINDC\CommonUX\StartMenus\Terminal Server.

Image 03 - Redirection Target

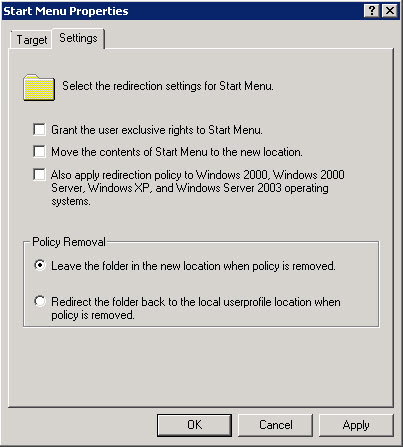
On the Settings, I have disabled all options – I do not want the user to gain exclusive rights on the Start Menu, or move contents from the current one into the central location. Also, I do not have older OS Clients so there is no need to enforce the policy on those.

Image 04 - Redirection Settings

I applied the new GPO to an Active Directory OU and logged on with a user belonging to this OU – and got… an empty Start Menu! WTF?!?

The Dependencies

Unfortunately, it took me a while to find out what has happened… I stumbled across some other settings, both in User COnfiguration -> Administrative Templates -> Start Menu and Task Bar:

  • Remove common program groups from Start Menu
  • Remove user’s folders from the Start Menu

The second one was the critical one: it looks like Windows treats the items in the Custom Start Menu on my \\WINDC Host as “user folders” – if this second item is enabled, I redirected but then immediately removed the new menu. So I set it to disabled.

The first setting is more of a clean-up one: despite the redirected Start Menu, Windows still pulled the Start Menu Items from the public Start Menu on the Terminal Server – so my Start Menu contained the items from the redirected location but also those from the public Start Menu… this settings removed the common program groups.

And the result…

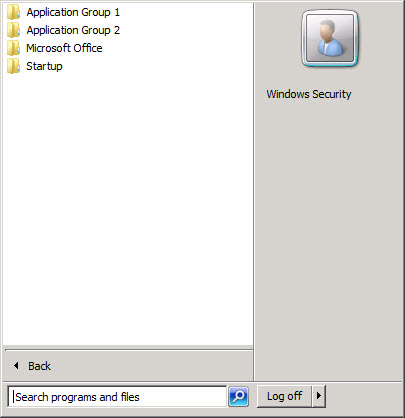
…is a stunningly clean (because I have actually enabled a couple more GPO Rules) Start Menu for my users

Image 05 - Redirected Start Menu

I hope, this quick walk-through will help people to achieve this task faster than I managed to by pointing out two of the traps that I stepped in – there are more, especially when you are using a more complex GPO structure but these mentioned here had been my major issue…

Posted in Windows Server | Leave a comment