Another Home Computer Veteran

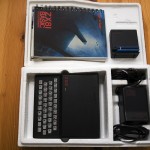
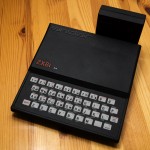
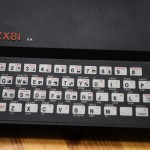
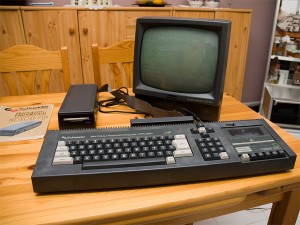
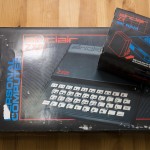
Besides the CPC464 that has been described in some of the previous blog posts, I also managed to get hold of an Sinclair ZX-81 via eBay. This one came at 54,50€ plus shipping.

The box arrived today and – you may imagine – I opened it fairly soon after the mail man had handed it over. At first glance, the ZX-81 is in a pretty good shape. I have not been able to attach it to any TV or monitor yet but the outer inspection makes me hope that this one will work as advertised.

Posted in Classic Home Computer, ZX-81 | Tagged , | Leave a comment

An Autumn Beef Stew

Guests in the House

There will be guests tomorrow and I need something to serve – something to match the time of the year, can be prepared with fresh ingredients and can cook today and be served tomorrow. My choice: an Autumn Beef Stew.

Credits

This one is inspired by a beef stew I have seen in a Jamie Oliver book – it looked great, sounded tasty and sure enough a stew is easy to make and can be served the next day. As always, what I had seen in the book served as “inspiration” but I made my own changes to it – namely, I like my stew with either home-made Spätzle or dumplings on the side so I remove anything that would not go with that (such as potatoes in the stew, etc.)

What you need

I quickly stopped by the local grocery shop this morning to pick up the following (preferably fresh, not the supermarket stuff):

  • about 1000g beef, suitable for a stew (that is a lot of meat, if you like it less meaty than I do, take about 800g)
  • Garlic, 2 onions, 2 parsnips, 4 carrots and a butternut pumpkin
  • a can of peeled tomatoes
  • a bottle of red wine
  • 1/2 Liter of Beef Stock
  • Sage leaves and rosemary
  • Olive oil, butter, flour to dust the meat

Preparations

Pre-heat your oven to 160°C. Peel the onions and cut them to small pieces – don’t cry! Then peel the carrots, half them and chop them into thin slices. Repeat the procedure with the parsnips. Now, take the pumpkin and cut one half into dices – about 1cm to half an inch. Put everything on the side.

If you have been clever (or nice to the butcher) your meat is already diced properly – if not (like mine), cut the meat into pieces of about 2cm so one can easily eat them without cutting. When done, dust the meat with flour and put it to the other prepared bits.

The Cooking

You now need an appropriate pot – one that can go onto the oven first and then into the oven later! And it needs to be big enough for the stew.

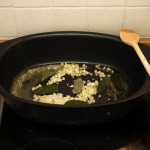
Put it on the oven and add just enough butter and olive oil to cover the base. When the butter is is molten, add the sage leaves and the onions – cook till the onions start to get glassy.

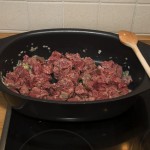
Now add the meat and stir. Wait for the meat to gain some color and develop some flavor. Then add the remaining ingredients – parsnips, carrots, the pumpkin and the tomatoes. When everything is properly mixed, add the wine and the beef stock – you need enough liquid to make sure all of the bits and pieces can actually cook in it. Finally, season with freshly ground pepper and salt as needed and let it cook – I have it sit in the oven for three hours at 160°. You need to try it from time to time – it is done when you think it is done – meaning when you think the meat is soft enough and all the other things as well…

The good thing here is: it would not mind staying in the oven another hours, so your family or guests do not really have to rush to the point for you to serve them.

Serving

Before serving, cut the rosemary and the garlic into fine pieces and mix them – sprinkle over the plates when serving. It just smells great and tastes even better! Enjoy…

Posted in Cooking | Tagged | Leave a comment

Bringing the DDI-1 Floppy Drive back to life

With the CPC 464 cleaned up and still working, I took the external Floppy Drive off the shelf (yes, ebay as well! – 43,60€, it seems to be pretty rare…) and connected it to the CPC. All switches on, all lights green…

…but the typical Disk-Drive Extensions to the instruction set are not present. Hm… my first guess: either the contacts on the mother board are more eroded than they look or the connector in the connector pack is a bit weak. After a couple of disconnects / reconnects, the drive is now recognized but it is still an area to look into later.

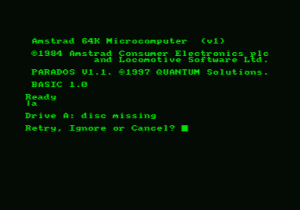
So, time to load a disk (also eBay, two disks for 0.99 Brisith Pounds) and switching to the drive (I remember the syntax: |a) and yes, there it is… but trying to read anything from the disk only results an error: Disc missing… more “hm’s”…

So I peeked and poked the Internet a little bit, and it turns out that the DDI-1 Floppy Drive has a weakness – at least these days, some 25+ years after production: the drive belt that is transferring the power from the motor to the spinwheel turing the disc tends to wear out and often requires replacement.

A friend in the office had old drive belts for cassette players at hand so I opened up the DDI-1 Floppy today and replaced the belt.

Caution: you are working on an electrical device that is connected to 220V Power – unplug the device first and do not touch the transfomer area in the back – not even after you unplugged the device!

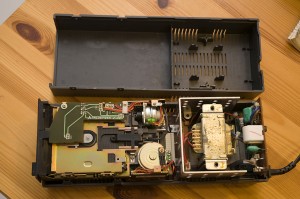
Now, turn the DDI-1 upside-down, then unscrew the two large screws on the bottom as well as the four screws on the left and right side of the drive. Turn it back into an upright position and carefully lift the top cover.

Next, detach the cables connecting the actual drive with the lower board in the case – there are two connectors that can be simply released and one grounding wire that needs to be unscrewed. Lift the drive unit out of the case and turn it on its side.

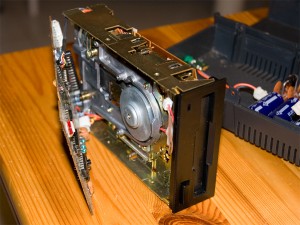
Then remove the four screws holding the lower board in place. Keep the drive on the side to avoid and pieces falling from it! You may want to detach the connector going to the front of that board to gain better access to the area of interest.

You can now see the drive belt. Remove it and replace it with a matching one. If you cannot find an exact match, try one that is slightly smaller.

When done, re-assemble the device and put everything back in place. You may now plug the drive back into the power outlet. Switch on the drive and ensure that the lights are on. Then switch on the CPC464, put in a disk and try again – my drive is now working just fine (so I can continue bidding on eBay on additionan disks – they are rare 3″ Discs not produced anymore so eBay is the only chance to get them (as far as I know))

Posted in Classic Home Computer, CPC | Tagged , , | Leave a comment

That’s a hell lot of dirt…

As mentioned in my previous post, that CPC 464 I bought on eBay has long seen its best days – though still working, the entire PC more resembled a dustbin than a classical home computer, the connection to the monitor is all but shaky and the only positive thing about it is the fact it only cost me 20€.

Why? Because at 20€, it is not a big loss if it will no longer work after the procedure it is going to go through: a total disassembly and cleansing. My hope is though, that the CPC – when built in the mid-80s – was nowhere close to the filigran design of todays computers. I expected it to be of rather strong (some would say “crude”) design, more likely built to last and I kept my fingers crossed it might survive the procedure.
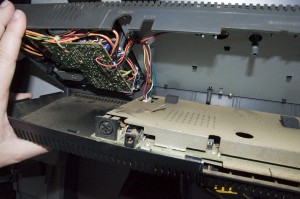
To take the CPC apart, one needs to turn the CPU/Keyboard Unit upside down and remove six screws. You can then open the case but you need to be careful because of the three connectors running from the upper half to the lower half – so don’t overstrech it!

The three connectors can easily be detached – the one close to the tape deck is a solid plastic block, easily removed. But you wanna be careful with the two coming from the keyboard, they are plastic strips with contacts only – not solid connectors.

Once you have the two halfs separated, you need to decide which one to work with first. I picked the lower half because it is holding the mainboard. Unfortunately, the CPU section is covered with a thin metal cap which is poorly sealed with a set of soldering points. Most of the points on my CPC had been broken by time – the two remaining ones I cracked carefully with a screwdriver (if they would have been any more solid, I would have carefully cleaned them and then used the soldering iron.
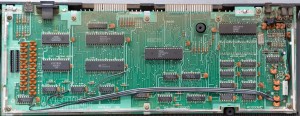
Mine seems to be an older board but I could not find the exact details (yet) – it carries a 1984 Copyright with the Part Number Z70200 (MC0008C). I will have to find out about that one a bit more later.

The whole mainboard has a solid, greasy film of dust on it, resisting to any “soft” cleaning approaches such as pressurized air. The only way of getting rid of it was 100% pure alcohol – I used Isopropyl alcohol and cotton wool.

Eventually, that did the job and the fact that Isopropyl alcohol is evaporating quickly without leaving any traces behind made me hope the board will survive the rather drastic method of simply bathing (well, OK, not bathing but applying large quantities) it to get rid of the dirt.
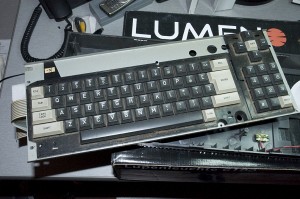
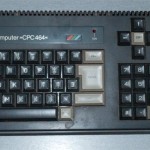
That done, my attention was drawn to the keyboard next. The shape the keyboard was in when getting the computer was nowhere near “I want to touch that” – I had the feeling that the last (and possibly only) cleaning it ever received was also the very first one in the factory.

One good thing about the CPC464’s original design is that it had been built to last: each key can easily be detached from the keyboard, cleand and reassembled later – try this with a modern day keyboard any you may not succeed – the CPC’s keyboard, however, was disassembled, each key cleaned with nail polish remover (take one that does not have acetone!) and put back into place. The result was astonishing – the key are shining like on their first day.
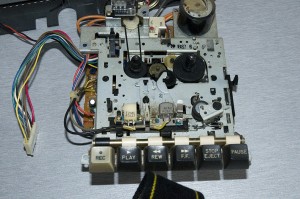
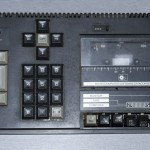
Next candidate to worry about was the data recorder – an oldfashioned, music-cassette device to save and load programs.

Same thing here – if one looks at the original images, you can see the dust and the grease locking up the device – keys could be pressed but not released, the dirty of all the years finally taking over.

With a couple of screws removed, you can take the entire device out and clean it up. You don’t even have to worry too much, like many old tape decks, this one is more than capable of handling a decent cleaning procedure.

Last thing to clean is the actual non-electronic parts such as upper and lower plastic cover and the metal lid that is enclosing the CPU section – warm water, soap and a bit of rubbing does the job. Help with a good amount of Isopropyl Alcohol later – but do not use nailpolish remover! They keys can handle it, the case not… I might have to give mine a new spray of gray color if I am ever in the mood to do it…

After everything has been cleaned to a reasonable level, the procedure of assembling the pieces back is even faster than taking it apart – now you know where the screws go and if you have been clever, you had taken a good set of pictures breaking it up – they can now help putting it back together.

With all pieces back in plance (and the one screw left that I cannot remember where I had taken it from), I connected the monitor back to the CPU and fired it up…

Posted in CPC | Tagged , | Leave a comment

Built in 1984, working in 2010…

It must have been around 1988 or so when I sold my original Schneider CPC464 (also known as Amstrad CPC464) for a small part of the money needed to buy my first PC. And then I have forgotten about it for a long long time…

As mentioned before in an earlier blog post, I had decided to check back on old times and – thanks to eBay – the first success was the acquisition of an original CPC464 with green monitor. The seller was not giving anything more away than the types and the fact that the computer still worked “perfectly” – but given the age, nothing too good was expected.

Then, this morning, the door bell rang and the poor mail man arrived with two packages (not too heavy, I have to admit) which I opened at once. What came out earned me a wry smile of my better half and the confirmation that a lot was to be done to this one…

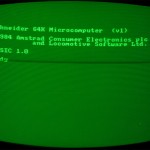
But first things first, I plugged it in and switched it on – and yes, it is still alive, 26 years after it had been assembled.

A quick inspection shows that there are a couple of “restauration activities” required:

  • The whole thing has the dust of two decades in it – and it has solidly attached to every element of the computer.
  • The tape device buttons got stuck – most likely to owed to the dirt within.
  • The monitor works but the cable has been tampered with and the brightness of the display has suffered (unless you tighlty squeeze the cable where it has been put back together).

Besides that, I am worried about the stability of the Monitor (and the display quality) so one other thing to do is to investigate the possibility to hook it up to a modern VGA Monitor.

One of these days (possibly tomorrow) there will be an additional package coming in with a matching Schneider 3″ Floppy Drive…

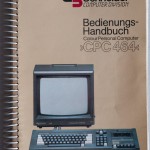
But there was also a surprise in it: the included manual dates back to 1984 so this may be one of the early build (given that the CPC was built and sold from 1984  to 1990). I will find out when I open it up…

Total Investment so far: about 20€ for the system plus shipping…

Posted in Classic Home Computer, CPC | Tagged , | Leave a comment