Adding Geo-Tags to Photos automatically

One of the questions with my old-time pictures is always “Where has this picture been taken?”

While this question is of little to no importance for lets say the pictures of the last birthday party, it becomes quite interesting when the pictures are showing landscapes or buildings.

There are plenty of tools that allow you to add geographical information to photos – but very few that do it so well as Geosetter.

I have used Geosetter in the past to add tags to old slides which I have scanned in – it is a cumbersome, error-prone process because you will always have to first identify where a picture has been taken – then you can set the information.

This time, however, I have chosen a different approach: I have used my iPhone and an application called MotionX-GPS to record the GPS Locations at any point in time (or rather: while I was driving through Scotland). The result is a GPX Log File which is a standardized GPS Exchange format.

So here I am – a set of photos on my hard-disk in Photo Vault\Nikon D70\2011\2011-06-19 and a GPX Log File for June 19th, 2011.

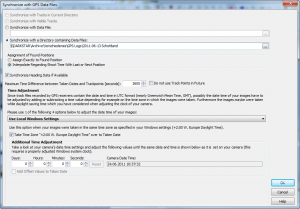
With all images selected, I choose Images -> Synchronize with GPS Data File from the menu.

Because my GPS Tracks are stored into multiple files, I am using the option to use all files in a given directory to determine the locations (as opposed to using a specific file).

Also, many of my pictures have been taken when the GPS Tracking was actually stopped – for example when taking a walk. Therefore, I am telling Geosetter to interpolate the times when trying to match them to the time a picture was taken.

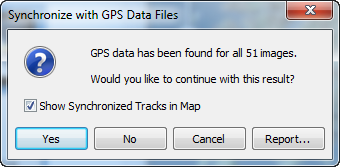
When I now let Geosetter to its job, it will match the timestamps of my photos to the timestamps in the GPS Log Files and if a match can be found, add the geographical information to the EXIF Information of the image. Once done, you will get to know how many of the selected photos could be matched.

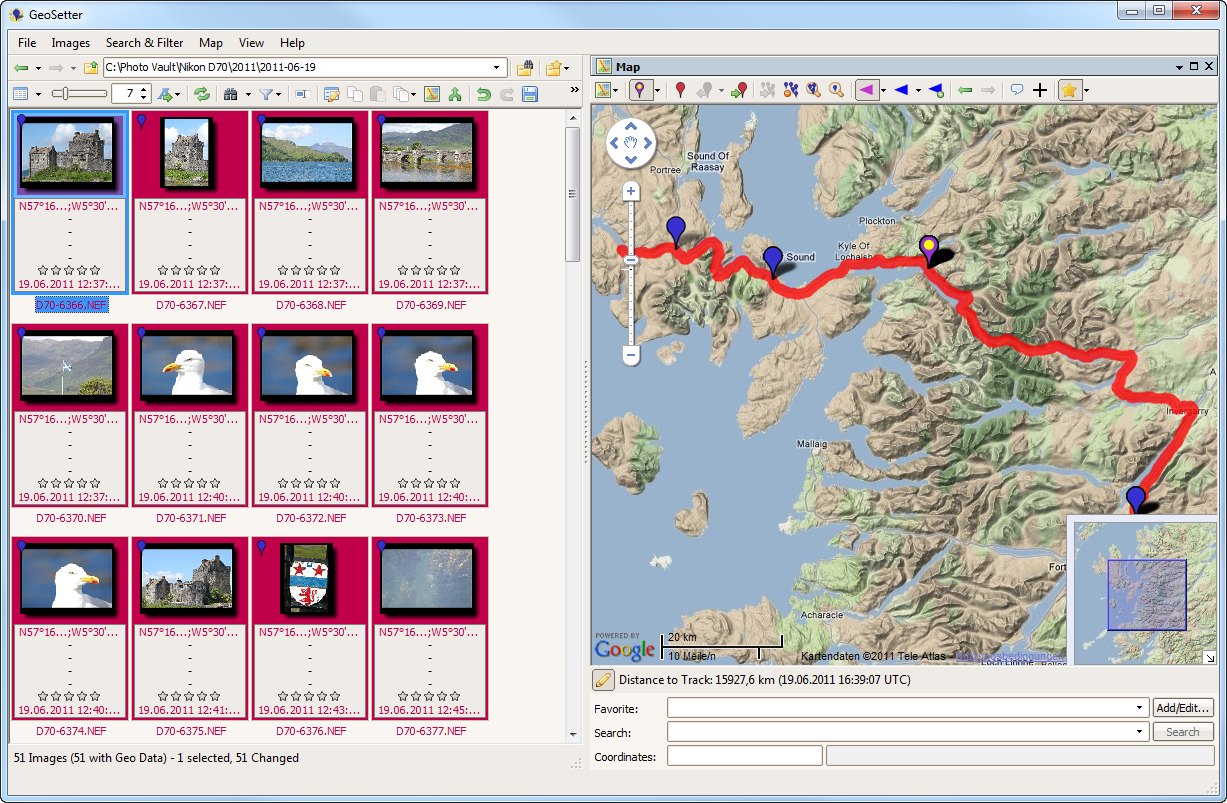
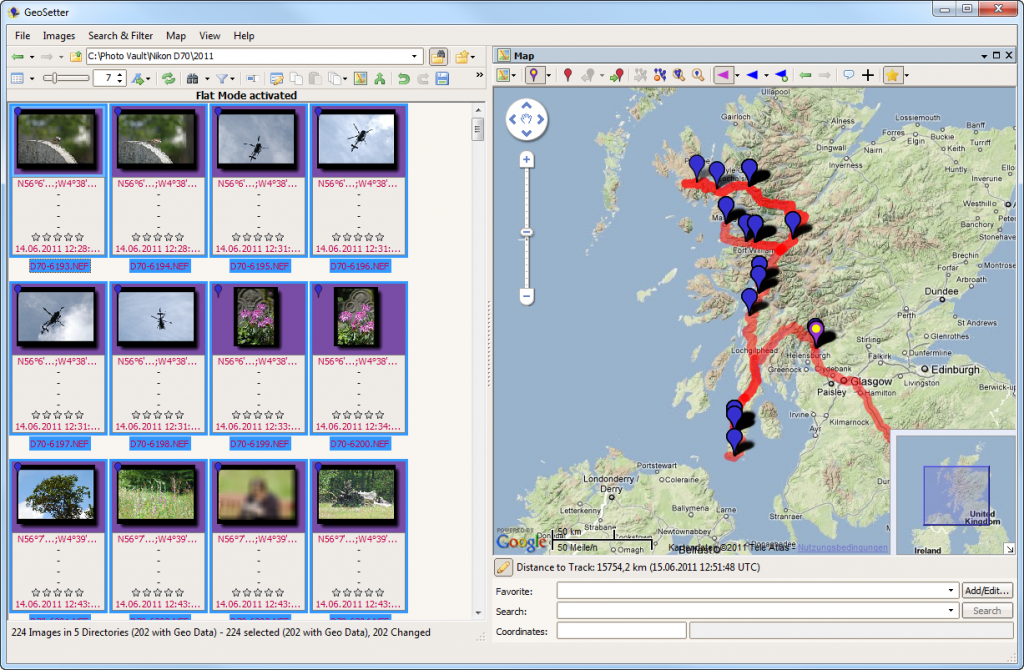
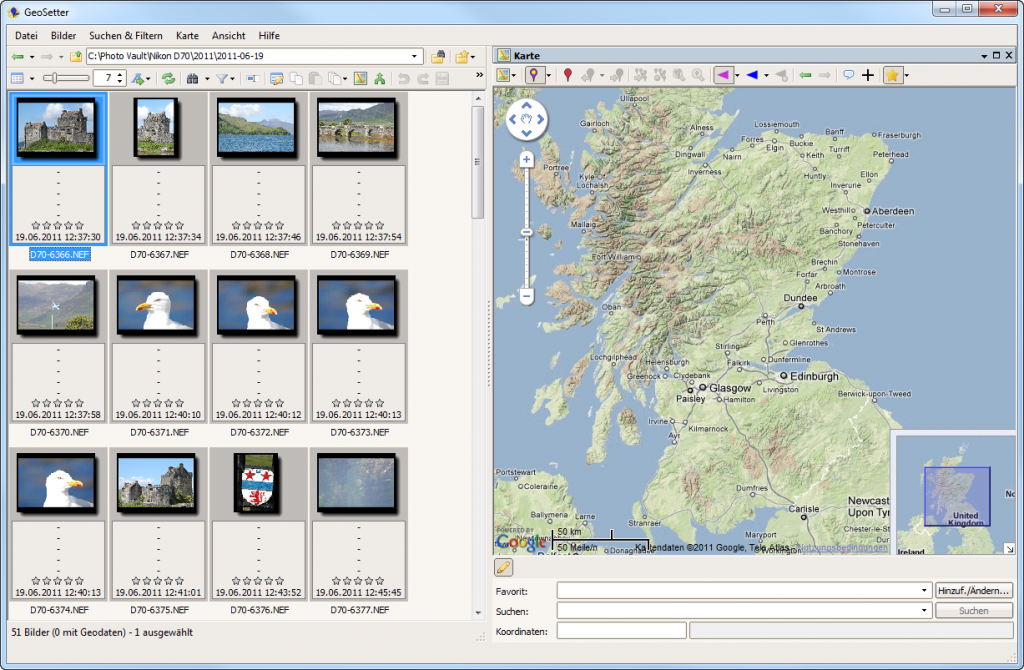
With that done, you can now display the added information on the Geosetter main window.

A couple of things have changed now:

  • Each photos (at least those that could be matched) has a geographical information added to its information. Also, the timestamp of the picture has been updated but should be the same than the original timestamp (worth checking!)
  • The map window has been updated with the GPS Track and the placemarkers for the matched photos.

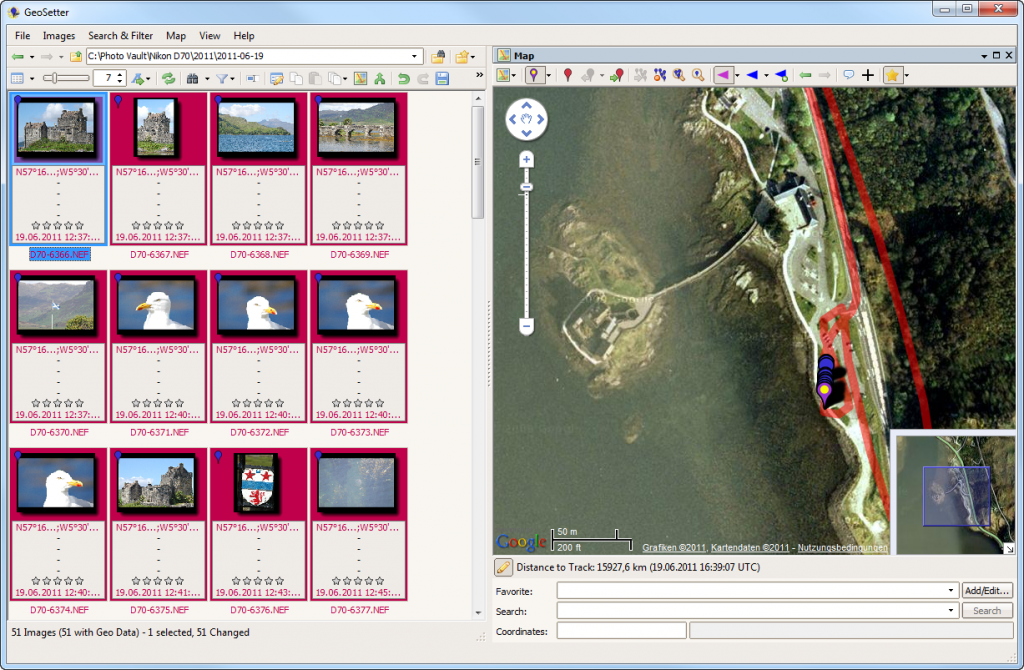
You can now select a photo and zoom in on the map – you can even change which type of map you are displaying. The example below zooms in on a shot of Eilean Donan Castle in the Scotish Highlands.

A very cool feature is the ability of GeoSetter to not only work with files in one directory. Up on the toolbar of GeoSetter, you will find a button named Show images in subfolders.

Once activated, GeoSetter will switch to a flat-mode, displaying all the pictures in the current folder and its subfolders. That way, you can select them all and by pointing them to a directory containing GPS data files, you can add geotags to all your photos in one single operation. Pretty cool!

Finally, don’t forget to save the changes to the images! As long as the information appears in red on the left-hand side, the image has not been saved!

With that, I wish everyone happy geo-tagging and hopefully a lot of time saved upon the next major trip you are planning through countryside!

Posted in Digital Photography | Tagged | Leave a comment

Managing your Digital Photos with Subversion?

Over time, I have accumulated a large number of digital images and the more images I accumulate, the more it becomes obvious that it is not a good idea to loose them. And you can loose an image in multiple ways:

  1. Digital Images are stored on some type of media – either a harddisk or a CD-ROM/DVD/Blueray or a memory stick. Any of these media can become corrupted, either logically or physically – so you are looking at an issue of Media Safety.
  2. Digital Images are processed like other files – there are plenty of tools out there that you can use to view and/or manipulate the image and usually, saving an image overwrites the original image. This is what I call Logical Safety.

The Issue with the Media Safety

Media Safety to me means the reliability of the media I used to store the digital data on. Every one of use who is accumulating digital data should also be aware of the fact that digital data (if it is of any worth to you) needs protection against any kind of loss caused by physical issues of the related storage medium.

That is why in the old days we have backed up our data onto tons of floppy disks. Everyone of us understands that this is a cumbersome process – and everyone of us tried to make it easier for us as much as we could (and our budget allowed).

For my, that means that vital data (and that does include my digital images/photos) is stored in a Windows Home Server where the server’s internal duplication together with regular backups to off-site hard-disks) provides (hopefully) sufficient protection against any sort of physical loss – may it be because the disks in the server cease to work or the server itself gets destroyed (e.g. in a fire).

That sort of protection does, however, not help with what I call Logical Safety.

The Issue with Logical Safety

Logical Safety to me is anything that is related to data destruction due to false handling of data, either by human interaction or software.

Even if data is protected against physical losses, who protects data against me deleting it involuntarily? Or who protects my data against any software corrupting it e.g. when saving an update to the file? Of course, you could argue, I do have a backup to restore the original file from. But what if I do not even recognize that I have destroyed my data?

My backup cycle will re-use the off-site harddisks ever so often and when I am backing up the corrupted data onto that disk (and thus overwriting my good copy) I have nothing to revert to in case I discover the problem with my original file.

The solution to this issue is to store any change to a file as a new version instead of overwriting the original file. In theory, that sounds like a perfect solution but there are two things to keep in mind:

  1. Windows does not (or at least not easily) allow you do deal with multiple versions of a file.
  2. If you store each change in a separate version, your need for storage capacity increases dramatically!

Adding Version Control to Digital Images

I am running a Subversion (SVN) Server on my Windows Home Server anyway – so the logical choice was to create a SVN Repository (think if a Repository as some kind of cabinet dedicated to the management of related data) for my Digital Photos.

I don’t really want to go into the details of installing and configuring Subversion – there are enough posts out there that will tell you how to do that. So let me focus on digital images and Subversion instead:

Migration of existing Images

Before I can benefit from my digital images being under version control, I need to migrate the existing data to Subversion. One of the positive aspects of using SVN is that I can have a copy of my images on my Workstation PC so all my applications dealing with them work locally (and not over the network) which makes them significantly faster than before.

So I am linking a directory on my local harddisk to my Subversion Repository (which is currently empty) and start building my structure on my local harddisk. Once I am happy with the structure, I can add the files (and directories) to the repository and commit then. This is the moment in time when the data is written into the Subversion Repository which means it will take some time if I am working with large numbers of files.

This process duplicates my data (one copy is in the Subversion Repository on my server and one (working) copy is stored locally on my desktop). However, if I am going to delete the original server-side storage location (the one not under version control!) once I have validated(!!!) the functionality of my Subversion Repository, I have not used more disk space on the server than I did before.

I do use much more space on my local PC (with the working copy now being there) but I gain a significant amount of performance (because of elimination of network traffic).

File Size Considerations

Over the years, my digital images have accumulated and they have been created using different technologies and devices. Where is a snapshot of what I am seeing in my repository today:

  • My first digital Camera seems to have produced images of 6 Megapixel in JPG Format with file sizes roughly around 2MB,give or take 500K.
  • My second digital Camera was also a 6 Megapixel device but the images are larger – the JPGs measure around 3MB each (give or take 500K) but the RAW Images are around 5MB to 6MB each.
  • My current digital Camera is a 10 Megapixel device and I am only taking RAW Images these days – each one of them is somewhere between 9MB and 11MB in size.
  • I have scanned a lot of color slides, each one of them is around 2MB (give or take 1MB).
  • I have scanned a lot of photos my grandfather took back in the 1940s and because they are black & white, the images are a few hundred KB only.

My entire digital library (without version control) accumulates to approx. 150GB of data… and that is storing every image only once!

Why using Version Control? Shouldn’t be using the right tools make that useless?

One of the things I was really thinking a bit about was the actual need for version control with digital images – especially digital photos.

Tools like Adobe Lightroom are claiming to use “non-destructive” processing – in other words: everything you do with an image is not done to the image physically (the file) but is stored in their database and simply applied every time you use the image. This, in theory, would mean that the image never changes and therefore you would never have a second version of the image.

The following is my personal conclusions: if the above said is true, I am not going to lose anything if I am putting the images under version control. There will be exactly one copy stored on the server, using up exactly as much space as it would without version control.

Yes, I am spending a bit of my local storage space (because the image is duplicated to my workstation PC) but I do gain a good amount of processing performance.

On the other hand, Adobe Lightroom is not entirely non-destructive – there is, for example, an option to write metadata to the physical files and that will change the file. Also, Adobe Lightroom does not give me all the features I need to modify my images – so there are other tools and they may not be as non-destructive as Lightroom is. And finally: I am sharing my data with other people in the house – meaning I have no control over the activities of other people and they may – on purpose or not – also modify data on the server.

Conclusions

Adding Version Control to the digital images does not sound like a bad idea, especially if you are running a Subversion Server already. However, first tests have shown that you might want to commit yourself to an intelligent workflow to avoid unnecessary duplication of data by creating new versions of large files when there is no need to so. But that is another post…

Posted in Digital Photography | Tagged | Leave a comment

The Thing with the Ribbon

When Microsoft introduced Office 2007, users suddenly faced a new kind of user interface – the toolbars and menus known from the previous versions of Office (in fact: all previous versions of Windows!) had vanished and had been replaced by the Ribbon.

The Ribbon is a huge change – not only for the end user but also for the developers writing Windows applications. Microsoft characterizes the Ribbon as

“the modern way to help users find, understand, and use commands efficiently and directly – with a minimum number of clicks, with less need to resort to trial-and-error, and without having to refer to Help.”

Microsoft User Experience Interaction Guidelines
for Windows 7 and Windows Vista

From what I know today, this is quite a statement… not because it is wrong but it is quite a challenge and many people did not like to take on that challenge and really embrace the Ribbon concept.

Working for a software development company, and providing a product that has switched from classic menus and toolbars to a Ribbon interface, I know what I am talking about.

Resources

It is still difficult and confusing to gather good resources about the Ribbon, the ideas behind it and the design principles that lay the foundation for the development of your own application. But here are some good starting points that I really found helpful:

Developers obviously want to know where they can get a Ribbon Control to use but that is a different topic.

The Ribbon is a Change – and constantly changing

That – to me – is currently the greatest challenge: the Ribbon is not only a change from the previous concept, it is constantly changing itself! While that change is positive because it incorporates lessons learned from previous implementations, it is also challenging because just the minute you thought you had your thoughts and ideas together, you are faced with a new twist in the whole ribbon story!

If you now combine that with the task to develop some software application exposing a  Ribbon interface, you suddenly find yourself back to the drawing board just the moment you thought you had your design!

When Microsoft Office 2007 was released, the Ribbon in Microsoft Word 2007 showed the following Home Tab:

One version later, Microsoft Word 2010 showed the same Ribbon but the design had changed – and not only visually, as we will see later:

Click the images to see the original size – it makes the view a bit clearer.While the visual design is one thing (and as any question of taste it is not really worth arguing about it) the change in the so called Application Menu makes things different for developers.
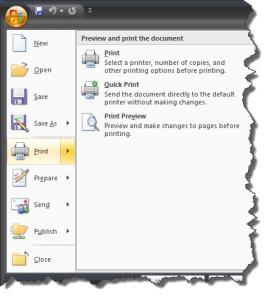
In Microsoft Word 2007, the Application Menu was available via the Application Button (that Bubble in the upper left corner of the Ribbon) and was merely a big drop-down menu named the Application Menu.

If the user clicked one menu item, they either executed an option directly or where directed to another dialog (e.g for the Save and Print commands).

In Microsoft Word 2010, we are seeing the evolution of the original Ribbon featuring an Application Menu into a new version of the Fluent User Interface now featuring an area called Backstage, available via the File Tab. There is an in-depth article about this feature available here.

What does that mean to the end user and the developer? First of all, the end user has to adjust what they just learned about the new user interface. If they loved it before, they may love that change – if they hated it before, they will take it as a sign of instability and hate it even more. For the developer, it opens up space – literally: the Backstage area allows for a much better organization of information and eliminates the need for that additional dialog that we still had on Microsoft Word 2007 when we clicked Print on the Application Menu.

Nonetheless – a change is a change and if you just line out your application design you may find it quite annoying that you now have to adapt it, especially if you want your applications merge into the new Windows User Experience as seamlessly as possible.

The Components of the Ribbon

Besides the Application Menu vs. Backstage question, the components of the Ribbon are pretty much the same in Microsoft Office 2007 and Microsoft Office 2010. They may look slightly different but their intentions and functionalities are the same.

Click the above image for a larger view – it outlines the major components available in a Ribbon (but not the actual controls which we will do later).

The Ribbon Tabs

The typical Ribbon consists of a set of Ribbon Tabs (or Tabs) which are identified by the Tab Header. The Ribbon Interface knows three kinds of Tabs – Core Tabs, Contextual Tabs and Modal Tabs.

Core Tabs & Standard Ribbon Tabs

Core Tabs are always visible. Microsoft has defined a set of Standard Ribbon Tabs that should be available in any application as long as the features they are exposing are relevant to the application. These Standard Tabs – defined in the UX Guide, Page 274 – are Home, Insert, Page Layout, Review, View and Developer.

Thinking about it, it makes a lot of sense to have the same Tab with the same functionality in different applications – why would you call a Tab Insert in one application and Add in another application if they both offer functionality to place elements into whatever your application is dealing with.

And it also makes sense to not always have all Standard Tabs in your application: if there is nothing to insert in your application, why would you have such a Tab in the first place?

Contextual Tabs

Unlike the Core Tabs, the Contextual Tabs are not always present – they expose functionality only applicable if your application is in a specific state – in Word, for example, the tabs dealing with table-related formatting are only visible if you have a table selected.

Contextual Tabs can be shown or hidden by the developer – it is their responsibility to wisely use  them! Again, Microsoft has defined a set of standard Contextual Tabs one should use if they make sense in the own application: Format, Design, and Layout.

Modal Tabs

Modal Tabs are used to replace the Core Tab Set (and also any available Contextual Tabs) by a single Tab when your application comes into a specific temporary state where only specific actions are available. Modal Tabs are pretty rare – in MS Word 2007, I am aware of the Print Preview being presented on a Modal Tab but in MS Word 2010, that is no longer the case. As an example, I can present MS Wordpad (in Windows 7 available with a Ribbon Interface and having a Modal Tab).

My personal feeling is that a Modal Tab should be avoided if possible – it disrupts the flow of the user and forces them into a specific pattern of doing their work. However, there are still cases where a Modal Tab may offer value to both, the developer and the end user.

The Ribbon Groups

Each Ribbon tab organizes its commands into Ribbon Groups. A Ribbon Group clusters commands of a related area into one place – e.g. the Clipboard Group, Font Group and Paragraph Group on the Home Tab.

Again, Microsoft has lined out a set of Standard Ribbon Groups for the previously discusses Standard Ribbon Tabs (see UX Guide, Page 275) and some really meaningful tips on how to organize groups and tabs appropriately.

The Quick Access Toolbar

One of the things that you will hear frequently from your users is “Why did you put X onto tab Y? I need it much more frequently together when on tab Z!”. Well, you cannot really predict every single users way of working with your application – and for those that need frequently used commands at hand without having to switch tabs, the Quick Access Toolbar comes in really handy!
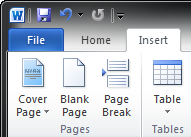
The Quick Access Toolbar – or QAT – lives in the upper left area of the Ribbon – in MS Word, it contains some default commands such as Save, Undo and Repeat.

The idea is that the user does not have to know where exactly those commands are hidden on different Tabs or the Backstage area – if they are frequently used, place them in the Quick Access Toolbar. But a good application design should foresee a possibility for the end user to add their own choice of commands to the QAT.
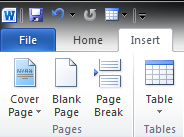
What if someone is frequently working with tables and needs to insert quick a few of them on a regular basis? Well, just add Insert Table to the QAT!

The picture to the right shows a customized Quick Access Toolbar, having the icon for Insert Table added next to the Repeat command.

As a developer, you want to make sure, however, that the user’s Quick Access Toolbar is persisted when the application is closed – there is little use of a QAT you have to redefine every time you are starting the application!

Enhanced Tooltips

Tooltips are great – they have always offered a way to present additional help to the end user without having to use a huge label on a control or refer them to the help file. However, they had been confined to a rather small space. With the Ribbon, Enhanced Tooltips became the standard.
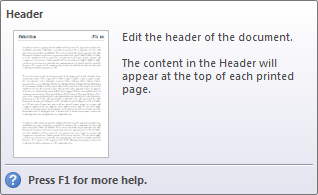
In the old days, the command Insert Header might have had a tooltip similar to this: “Adds a header to each page of your document.”

While this may have been the correct information, the Enhanced Tooltip simply adds to the user experience! It does not contain any more information than the simple tooltip above – but the layout with a thumbnail preview, a title and the additional footer telling you that there is more help available if you press F1 makes the whole thing much more appealing to the regular end user.

Ribbon Galleries

Speaking of eye candy: another neat feature of the Ribbon is the support for Galleries. Remember the old days of Microsoft Word when you had to select a paragraph formatting from a drop-down box giving you the name of the actual paragraph formatting but no information as to its appearance?

The Gallery is the perfect tool to enhance that user experience: it allows you to provide a visual representation of the actual choice, clearly showing the end user what they will be getting when they choose this option.

Galleries obviously only make sense when there is a set of clearly defined, related and visually representable choices. But if this is given, then a Gallery is a great tool to use. The Ribbon acactually supports two types of Galleries – the in-Ribbon Gallery which we see an example of above and the drop-down Gallery which for example is used in Microsoft Word 2010 to select a Word Art for insertion.
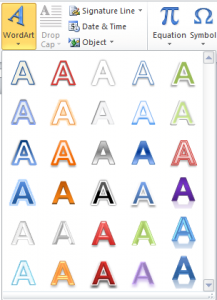
Drop-down Galleries make a lot of sense in several scenarios:

If the space used by the Gallery is too big to be displayed in the Ribbon.

Or if some (or all) choices the Gallery has to offer are used to infrequently to justify their presence in the always visible section of the Ribbon.

Frequently, Galleries are a combination: even the Style Gallery offers a drop-down for the additional, lesser used styles defined in the document!

Embracing the Ribbon

Here is my personal point of view and I am sure that many of you will object for reasons as good or as bad as my own ones: I think the Ribbon is one of the great enhancements to end user experience we have seen in recent years – I like it, I find it friendly to work with and I think it makes my life easier than an armada of toolbars I need to switch on or off and get lost with.

But the ribbon is also a challenge. The end user, who may be used to menus and toolbars, may be reluctant to accept that change – so if you are thinking of moving an existing application from a menu/toolbar oriented design to a ribbon oriented design, be prepared for some heavy flak.

A Word of Warning

Not only the end user is challenged: the developers and user interface designers are as well: a Ribbon is a complex sciences of its own – and simply converting menus and toolbars into ribbon commands is not a winning step!

Unfortunately, there are enough examples where applications introduced a ribbon interface without having understood the concept behind – and that almost guarantees a bad user experience which in return results in end user rejection of an otherwise great concept.

I am not gonna excuse myself – I have written what I have written here because I have been there, trying to understand the Ribbon concept and bringing it into an application with little to no experience. You can call that learning the hard way. But it should not be an excuse to not learn at all!

And for all of those who are going down the same road: please keep in mind that you will only be able to implement a good design if you are willing to let go of the existing: if you move your application to a ribbon, you need to think out-of-the-box because nothing will simply translate. And don’t forget all that additional work that you may not even have the expertise to perform yourself: user interface design, icon design, process flow analysis, usage statistics, etc. – all those things that may add relevant information to your ribbon design process but cost time & resources that you may not have accounted for.

But do not let that discourage yourself – the experience is well worth making but maybe you do not want to chose your flagship product to give it a first shot 😉
Posted in User Experience | Tagged | Leave a comment

The “Grand Tour” – Western United States in 1996 – Part II

The night in Estes Park was not much to remember – some motel along a stretch of road with many more motels, one looking like the other. After some quick phone calls “home” to let people know we are safe and sound we headed for the Rocky Mountain National Park Entrance.

“First thing we had to learn is that you might need some time to get into a park – and you should think about buying a Golden Eagle Passport for unlimited admission in all US National Parks if you plan to see more than three or four. Today, the Golden Eagle is about 50 US$, admission for one National Park is about 10 US$ – so figure it out…”

As I just found out, the Golden Eagle Passport program has been discontinued and replaced – I am sure, there are similar offers these days (although I am not so sure about the 10 US Dollar…).

September 10th, 1996 – Rocky Mountain NP and Colorado

The Rocky Mountain National Park is actually divided into two parts – the lower part around Bear Lake and the Trail Ridge Road which crosses the continental divide and takes you from the warm sunny temperatures up above the treeline into a much colder climate.

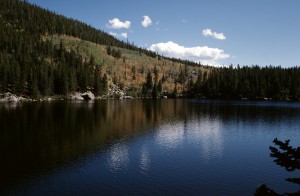
Down at Bear Lake, however, we have been greeted by a warm and sunny day, temperatures around 30°C and clear skies. The first little walk was taking us around the lake, offering a great view of the lake and surrounding mountain ranges which stand up to 4.000m, guarding the lake.

Once in the park, you will figure out that it is separated in two major parts – the “low-lands” around Bear Lake and the “high-lands” with Trail Ridge Road as highlight. Both are really neat but two totally different climates – so make sure you are properly dressed…

“Some say, Bear Lake is the most beautiful place in the park – I would not say so but for sure it is a wonderful place to be. Bear Lake is not that big but its location in a small valley with lots of green trees on the hillsides that are mirroring in the water give the place a special touch. It is a bit touristy and crowded but if you like, you can break off and walk some of the less frequented trails. In any case – you will like it.”

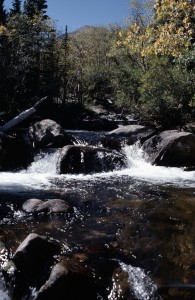
From Bear Lake, it is just a short walk to Alberta Falls so we decided to take that one as well. Although the walk is not a long one, it is quite nice and we had been lucky: not too many people on the trail with us. We passed Alberta Falls and walked on for a little while until we found ourselves a nice spot where you could just sit by the creek and enjoy nature developing around us.

Again, planning a trip like this one would be much easier these days: in 1996, our source of information was travel guides available for the Western United States and some large-scale maps given by the German Automobile Association (ADAC). Today, you can visit the park’s web site and download the map of the park together with a ton of additional information on trails, things to see, weather conditions, etc. – but still, we did get around in 1996 and we worked it out with the available information just fine. And maybe the fact of not knowing it all ahead is much closer to exploring it than planning it ahead and them simply ticking it off on a list.

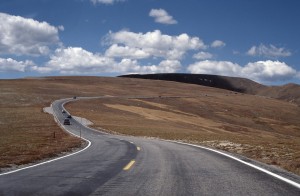
“Once you are finished with the warm and friendly “low-lands” – get into the car and start on Trail Ridge Road. While Bear Lake is below 9.000ft, Trail Ridge Road goes up to more than 12.000ft – even in late summer a chilly place to be. The street raises through several spectacular curves each one giving a new and overwhelming view of the great Rocky Mountains. At the end – above the tree line – there is nothing but pure tundra vegetation.”

Done with the “low-lands”, we took to the car to new heights (literally) with Trail Ridge Road climbing from the valley up to a bit above 3.700m where even in late summer temperatures drop to around 0°C and patches of snow are present all year long.

Getting up there and then getting down on the other side is just one of the most spectacular scenic routes I have been on. As you can imagine, that road is not open year round – snow and ice usually mean a closure with the first snow coming in and into late spring or early summer.

“Slowly, Trail Ridge road descends to a normal level (at least what is normal in Colorado) and if you get a chance, don’t miss the Colorado River that starts not far from here – you won’t get that close so easy again.”

With the descent of the road down into Granby the rest of the day was devoted to driving. Our day had started in Estes Park – but it was supposed to end in Craig, CO, which was still a bit of a drive away. And although names like Kremmling and Steamboat Springs sound vaguely familiar, I do not have a lot of memories about that part of the tour. Maybe the fact that we had a small area of rain clouding the afternoon, maybe the fact that Rocky Mountain National Park had just left too many impressions… I do remember arriving in Craig later the day and was happy for our Best Western Motel to be where we had expected it to be…

“Once we left the Park, there is a good way to go until we are in Craig where we planned to spend the night. Well, it’s mostly driving – all traffic bound for the skiing resorts around Steamboat Springs is on this road and it’s probably not that much fun to drive – on the other side, it is the only good road to Craig.

Why Craig? Well, it is the best way to get to Dinosaur National Monument and with all this Jurassic Park stories in mind you might not want to miss that one. Besides, it is a route not many tourist take and I think it is a good chance to see a bit more of America than you would when just driving the highways.”

Speaking of the Best Western in Craig: today, there is a Best Western in Craig listed on the www.bestwestern.com web site. But I am relatively sure it is not the one we stayed in in 1996. Anyhow, pictures I still have from that evening and Google StreetView suggest, that we had been staying in the Bear Valley Inn.

September 11th, 1996 – Dinosaur National Monument

“Don’t go Utah!” is what we have been told as a good bye from the hotel staff that morning. And “Be aware of Elk on the road!” – which turned out to be a wise advice. The tour for the day was one of the longest we had in one day during the tour. From Craig in Colorado we planned to go west, see the Dinosaur National Monument and then turn north to cross the border into Wyoming and come up to West Yellowstone in Montana – so roughly 600 miles to go.

“Well, the Dinosaur National Monument is really in the middle of nowhere. Located around 100 Miles west of Craig with nothing but a road and silence in between: if you like, get out of the car, walk a couple of meters and listen to the sounds of nature – it might well be that you will not hear anything but the wind.”

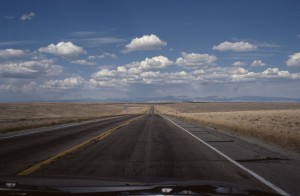
But first things first, we needed to fill up some gas – Highway 40, which is taking you from Craig to the Dinosaur NM, is one of the loneliest stretches of road I have seen in the US. So it is wise to have the tank full, water supplies ready and enough energy to make the long drive. The landscape though is fascinating – a long stretch of barren land, desert-like and bare of any trees or large rivers as far as I can tell. Places like Elk Springs and Massadona don’t ring a bell.

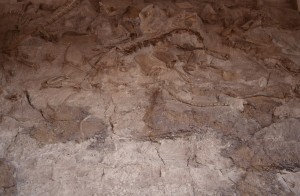
“The National Monument itself consists of a huge area of protected landscape and a visitor center built around the exciting wall of dinosaur bones. There are thousands of them – and even in this mess of bones you can still identify single individuals.

In the early times of the world, it happened to be the bed of a river – Dinosaurs died and sank to the bottom where their corpses where covered with sand. It took mother nature millions of years but while preserving the bones inside, the former bed of the river was raised by forced deep in our planet – today it stands at a 70° angle.”

We quickly found our way into the Quarry Visitor Center, looking with amazement at the huge collections of bones in the sandstone wall.

Having seen the visitor center we paid the Green River a short tribute, then continued our way westward to Vernal where we intercepted Highway 191 northbound towards Wyoming.

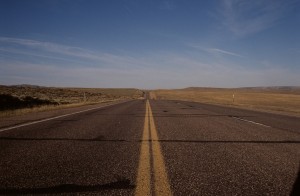
“Heading north takes us into Wyoming. And here – far away from any touristy place – we go through one of the most boring bust fascinating landscapes: just after we crossed the border to Wyoming, the 191 raises and a wide valley opens to our right hand. We are about 1.000ft above the valley, it looks like there is nothing down there but a dirt road – and the whole valley might be 30-40 Kilometers wide. I found a couple of places in the US that where more deserted than this one but at least from out point of view it looked like a nice place to stay – no desert.”

Following Highway 191 northbound for about 200 Miles, crossing into Wyoming and driving towards Jackson took the better part of the day. There is not much to remember besides the wide open country and the Rocky Mountains lining up on the horizon.

One thing I know: Wyoming was nowhere close to what I expected it to be – although I did not know what I have expected. But seeing the wide open prairie stretching from horizon to horizon under blue skies again brought it back: that feeling of the vastness of the West.

“Going farther north, we crossed I80 which took us a couple of miles back east to Rock Springs – looks like a small town that is just there to host a McDonald’s that serves the truckers that come along.

From Rock Springs, it is a good 170 Miles up to Jackson – the southern starting point into Grand Teaton NP and Yellowstone NP. 170 miles of land so wide open you can see the Rockies to the east from more than 100 Kilometers. It looks like not many tourists drive up here and I have no clue what Ernst thought about this part of the trip – I enjoyed it.”

At the end of the day, we had to learn our lesson about carelessly not booking hotels ahead: Jackson was booked, so was West Yellowstone and the way to Cody (east of the Yellowstone Park) was blocked. The result: we had to sleep in the car after having wasted a lot of time driving around trying to find a motel… so when we finally put to sleep, it was quite late and quite uncomfortable.

“Of course there was no bed to catch for the night – Jackson was booked, so was everything else in the area…what do you do? Hm, find a nice spot to eat (which we failed to) and a nice place to sleep (which worked out) – get some beer to make sure you don’t care too much about the inconvenience of the car, the Bears and try to sleep. Well, at least you get a nice sunrise because you won’t sleep for too long :)”

Nonetheless, we had seen a lot for one day and covered a good amount of road on our way to the North-West.


Posted in 1996 US Tour | Tagged | Leave a comment

The “Grand Tour” – Western United States in 1996

Why would one write about a trip that has happened about 15 years ago? Well – maybe because of that, maybe because there had been an “initial” trip report on my previous web site and maybe because I am thinking of doing another one some time soon.

Also, because this is a story about the opportunities today’s hardware, media and Internet services offer when it comes to re-tracing steps from long ago.

Back in 1996, I took nothing but an old-fashioned camera with me and several rolls of color slide films. All in all, there must have been about one thousand pictures from the four week trip, about 750 which I kept. They had been buried under dozens and dozens of other slide magazines down in my basement for the better part of the last 15 years.

Then – about two years ago – I decided it is time to take my color slides into the digital age – and bought an Reflecta DigitDia 5000 Slide Scanner. It took me another two years to view the results, make the required corrections to the scanned images and get to write this post.

And I am not done yet – the remaining task is to add the missing Geo-Tags to the images which made me re-trace my steps from way-back-when and finally sparked the idea to write down the story here…

To give myself a little more fun (and credit to my original report), I will re-cite the original words and will amend and comment as I see fit now, 10 years after the initial report was written.

September 8th, 1996 – Leaving for the United States

“We started the tour in Frankfurt/Germany – the airport is just a couple of miles away from the place I live – pretty easy to get there.

Unfortunately, there is no direct flight from Frankfurt to Denver so we had to take a connected Delta flight via Atlanta. Flight time was about 10 hours to Atlanta, a couple of hours waiting for the next flight and three more hours to Denver so you can imagine we were pretty tired when we finally arrived at our destination at about 8pm local time.”

One of the first things that came to mind after scanning the slides if of course the questions “Which time-stamp should the images receive?” – from the scanner, they came with the date they had been scanned but any modern photo management software is happily dealing with the embedded information, sorting the images and putting them on a timeline. It was quite obvious that the best solution would be to try find the exact date the picture was taken and use some software to fuse this information into the image itself. For geo-tagging and date correction, I am using an excellent tool named GeoSetter – surprisingly available for free and well worth the download time! GeoSetter is Donation-ware – anyone is free to decide if and how much the application is worth to them…

Back to 1996 – we left Frankfurt some time around late morning or early noon I would guess from this picture taken while still in the Terminal 2.

We have been flying Delta Airlines – not knowing if the plane in the foreground is actually “our” plane (but thinking so) it looks like we got ourselves a ride in a McDonnell Douglas MD-11 but in the background, parked at one of the V-Gates in Frankfurt, is also a Lockheed Tristar L1011, also recognizable as a Delta Airlines bird.

Since at that time there was no direct flight to Denver – our starting point in the United States – we had to connect via Atlanta Hartsfield. I remember Atlanta as a long time of waiting, already overtired and not very worth spending more time than required at the airport. The connecting flight to Denver was again operated by Delta Airlines with a Boeing 767-200. How do I know? Well – that again is one of the many enhancements from the time 15 years ago: information is much more accessible through the Internet than it was then: a website called airliners.net is specialized on photos of aircrafts and since my picture shows the registration number N102DA quite clearly, it is not difficult to find other pictures of this plane and confirm the identity.

Eventually, we arrived in Denver late local time after a flight that I only remember as “very cold and very empty” – but we arrived safely, got our car and found ourselves a Motel which we had reserved (or at least looked up) before starting the trip.

September 9th, 1996 – Denver, Boulder & the Rockies

“Getting up the next morning was not as bad as we thought it would be – probably the weather and our expectations helped a bit.”

One indicator that this trip took place well before a digital camera was around (at least in my hands) is the fact that specific photos are missing – slide films had been expensive and I’d taken a lot of pictures but not nearly as many as I do today. So there is no picture of the Best Western Motel we stayed in.

“Heading downtown in Denver on a Sunday morning is not that bad – there is nearly none around to bother you and even finding a parking spot was no deal at all.”

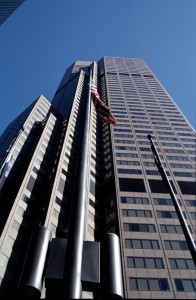
Maybe that was a bit “taking it too easy” from our side – there had been comments that downtown Denver is not a spot where you would like to hang around being touristy when not many other people are around. Nonetheless, we did enjoy the city center and the building there.

For me, it was the first encounter with a US City and therefore, I was not quite sure what to expect. All in all, Denver does not have that “absolutely great skyline you really gotta see” but I did in fact enjoy myself.

Interesting about the city and the photos if the city is that you can easily use Google Earth to locate the spots the pictures had been taken in (switch on the Panoramio layer to make things easier!) and then add the missing geo tags to the photos.

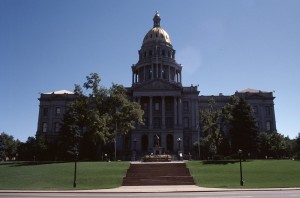
“Probably the best place to be was right in front of the state capitol with its golden dome. Weather permitting (and 30° Celsius and clear skies for sure permit) you have a wonderful view across the city park and the city hall towards the snow-covered Rockies in the distance.”

That is actually true: the Colorado State Capitol and the surrounding area are good for quite a view – especially on days like that one when you had a perfect view of the Rocky Mountains stretching across the horizon.

So after having spent the morning in the city, it was time for us to leave – next stop on the road was Boulder, our gateway to the Rockies.

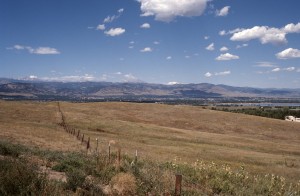
“Actually – leaving Denver was not that hard – we did not come for the cities but for the landscape and to be honest – even the tiny Boulder could not really stop us from going into the Mountains. If you have a map and like to check the way – we took Hwy. 36 from Denver to Boulder and then the 119 into the Rockies.”

The original comment above still talks about “maps” – obviously written long before services like Google Earth have been around to make things easier and better accessible for anyone. So here is the actual route for anyone who might be interested.

Another thing that has been quite a bit different than it might be today is the actual navigation: 1996 was long before general-purpose navigation systems had been available or even built into cellular phones and mobile devise. In other words: navigation was the good old manual – some would say old-fashioned – way using maps and landmarks.

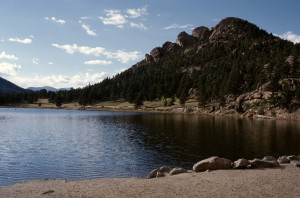
“There are faster ways to get to Estes Park than 119 and 72 but this is supposed the most scenic one – with Lily Lake as highlight before you finally get into the touristy Estes Park. Lily Lake is the first Visitor Center in Rocky Mountain NP if you arrive from the south as we did – a tiny lake you can walk around and you will find it really enjoyable – again, weather permitting. And we figured out that there is a good chance to run into some rain in the late afternoons.”

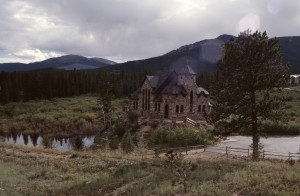
The actual route from Denver to Estes Park is just over 80 Miles – not much but it took us all day, mainly because we could not stop stopping. And again, it is Google which helped quite a bit to retrace our steps and find the spots certain pictures had been taken. A good example for that is the Chapel on the Rocks – St. Malo. I only remember the small church sitting by the side of the road but I failed to remember where or what that picture was showing.

The favorite stop on the way to Estes Park was Lily Lake. This was the first of many stops that actually allowed us to enjoy nature and the vastness of the American West. There had been a couple more opportunities during this trip but as Lily Lake was the very first one, it has a special place in this story.

Since it was late afternoon, we did not even take the time for a long walk (not that two men would have taken a long walk anyway!) but still just sitting there and enjoying the scenery is special – if you ever get into that part of the world, don’t forget to take a break.

“If you want to spend the night in Estes Park, make sure you have a place to stay – even if season is over! It took us a good time to find a Motel that had rooms available for a fair price…anyway – we spend the evening getting something to eat and a couple of drinks later on so it really does not matter what the room is like – it was OK.”

Well, true – we had planned the trip with the foolishness of the unexperienced traveler – otherwise, we would have known that there are some spots that will always have decent vacancies and others where it might be worth booking ahead. Estes Park, as the gateway to the Rocky Mountain National Park, is certainly falling into the latter category. Still, we got lucky and found ourselves a place to stay for the night.

That ends the second day of our trip – since there is quite a bit more than fits into a single post, I finish this one now and will follow up another day…

Posted in 1996 US Tour | Tagged , | Leave a comment